Chatbot Training Guide
Real-time Product Updates
Importing products directly from your Shopify or WooCommerce store provides not only clean and integral information that enhances your chatbot's context, but also enables real-time product syncing with your online store. Let's explore how to implement this.
WooCommerce Webhook Synchronization Integration
Step 1: Access WooCommerce Settings
- Log into your WordPress dashboard.
- Navigate to WooCommerce > Settings.
- Once in the WooCommerce settings, find and click on the Advanced tab.
- Under the Advanced tab, you will see Webhooks. Click on it.
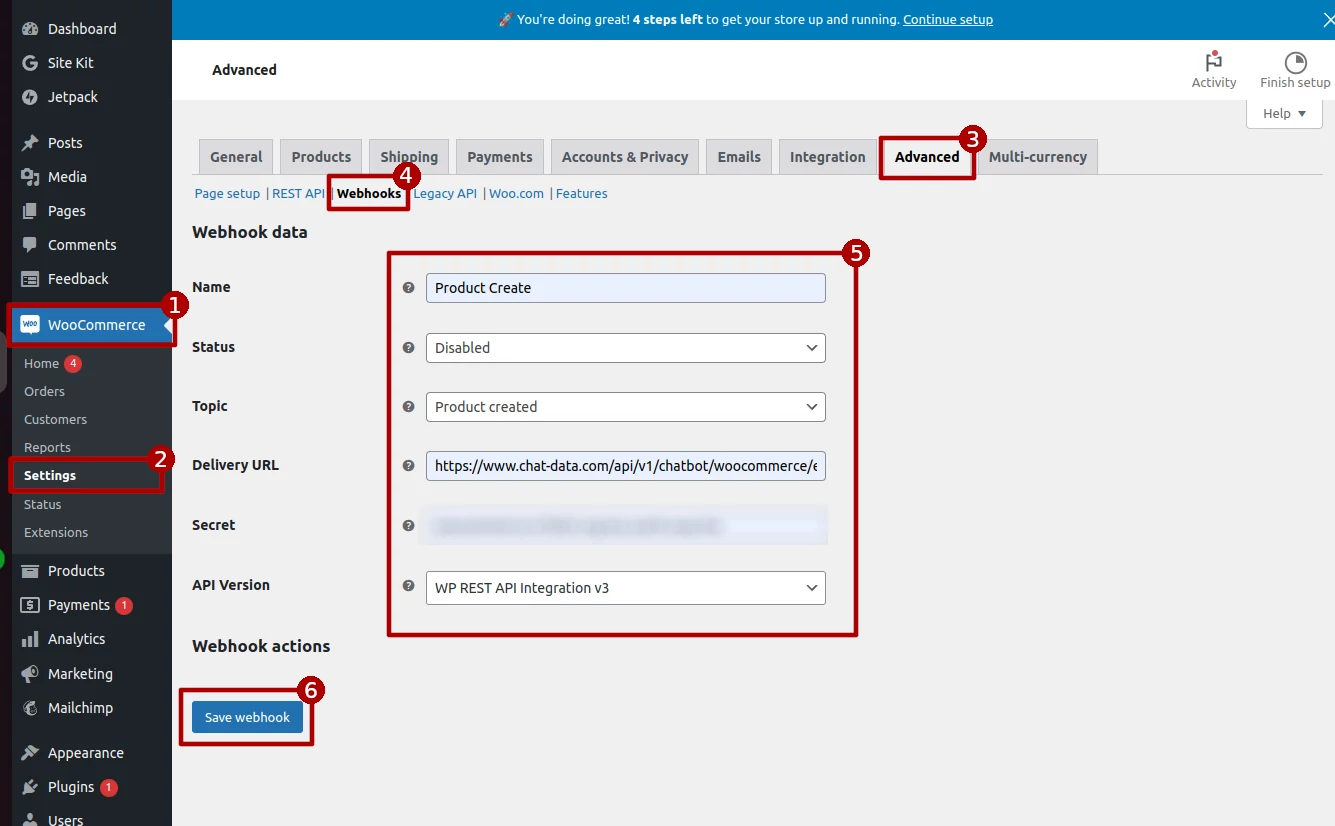
- Click on the Add webhook button. This will open a new page where you can configure your webhook.
- You will be presented with several fields to fill out:
- Name: Give your webhook a descriptive name for easy identification. Use specific names like Product Create
,Product Update,Product Delete,Product Restore` for different webhooks based on the action they are designed to capture. - Status: Set the webhook to "Active" to enable it right after creation. Alternatively, you can select "Disabled" if you wish to activate it later.
- Topic: Select the event that will trigger the webhook. Create four separate webhooks for product-related events with the topics
product.created,product.updated,product.deletedandproduct.restoredrespectively. - Delivery URL: Use
https://www.chat-data.com/api/v1/chatbot/woocommerce/events/${chatbotId}as the Delivery URL. This URL is where the webhook will send POST requests with event data. - Secret: This optional field allows you to enter a secret key, which helps secure the webhook communication. The secret key is used to generate a signature for the payload, helping the receiver verify the request's authenticity. Any random string can be used here.
- Name: Give your webhook a descriptive name for easy identification. Use specific names like Product Create
- After filling out the necessary fields, click on Save webhook to activate it.
This is what the final webhook setup looks like 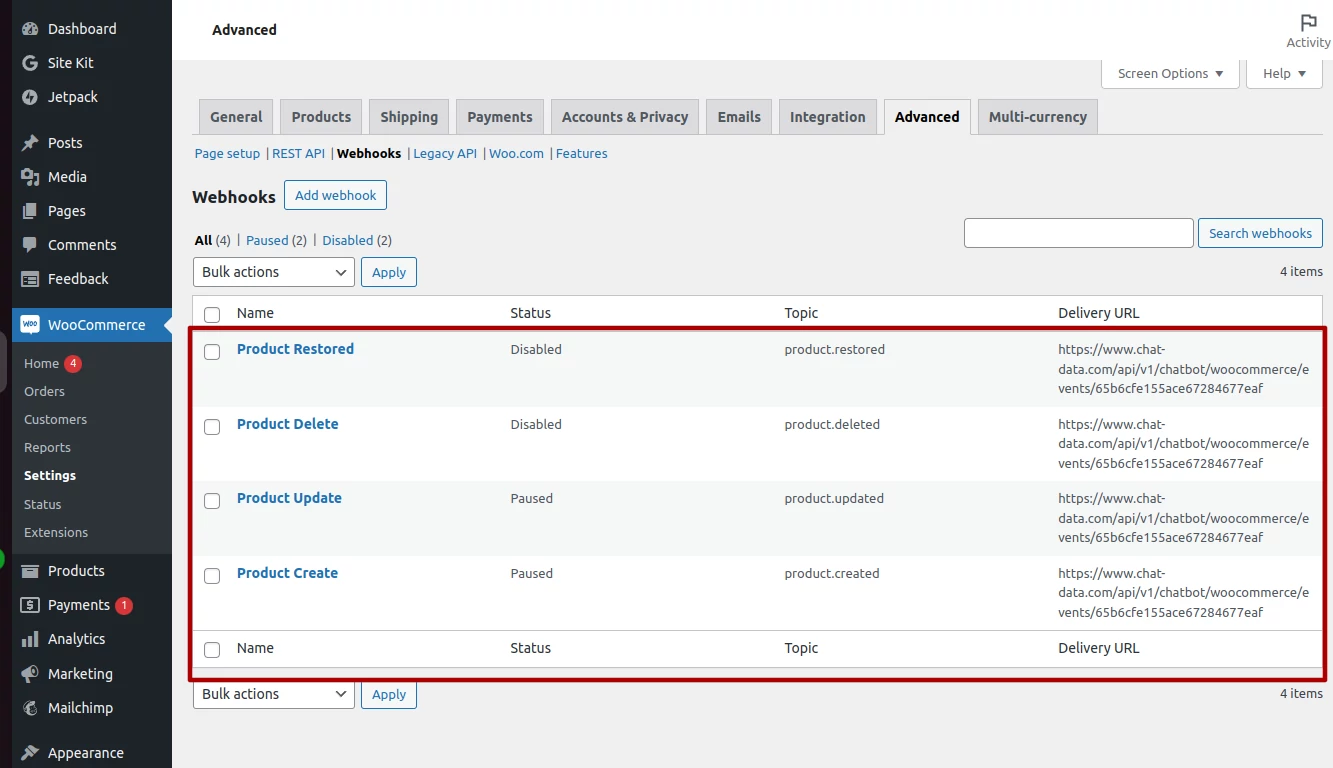
Step 2: Setup Webhooks integration with Chat Data
Navigate to the Integrations tab within your chatbot's menu. Here, click on the Integrate with WooCommerce button to bring up the integration modal. Should you have established a secret in the prior step, you have the option to input it here, though it remains optional. Conclude the setup by clicking the Connect button. 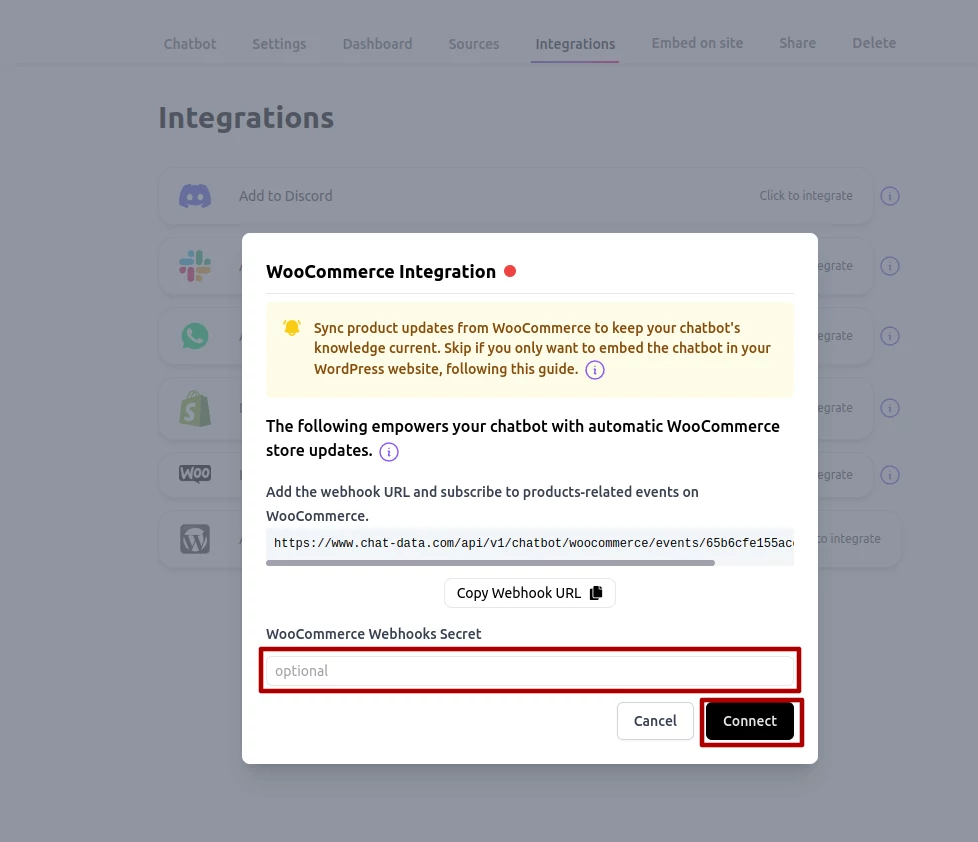
Following this integration, any creation or modification of products in your store will prompt an automatic update to your chatbot with the latest product details. It's important to note that this webhook integration will only capture and relay future product activities. For existing products not yet captured by the webhook, you’ll need to manually train the chatbot. This can be done under the Sources tab by selecting Product as the source type and opting for import via WooCommerce, ensuring your chatbot is fully informed with your current store inventory.
Shopify Webhook Synchronization Integration
Step 1: Open the Webhooks Setting
Click the Setting tab to open the Admin panel. In the Admin panel, click the Notification tab, then click the Webhooks tab, as shown below: 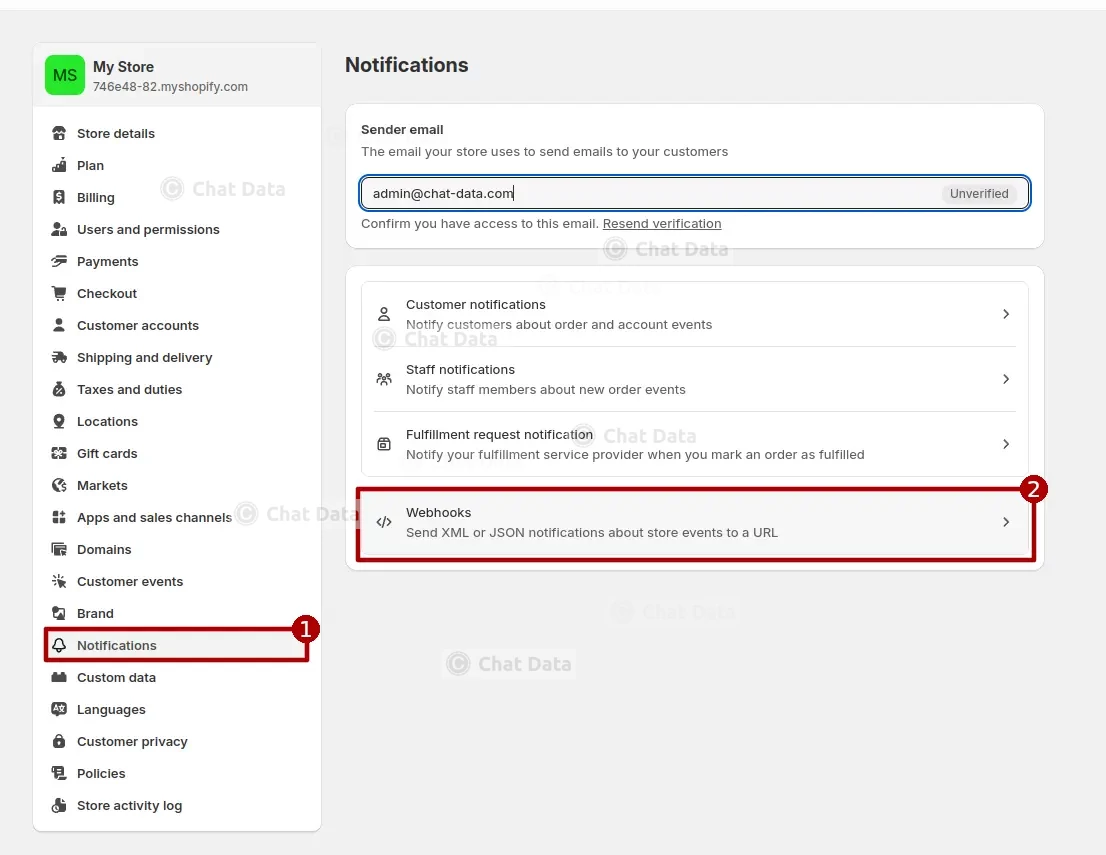
Step 2: Setup Webhooks Signing Secret
Navigate to the Integrations tab in your chatbot menu. Click the Integrate with Shopify button to open the integration modal. Simply enter the signing secret as shown in point 1 below. Click the Submit button to confirm the setting. 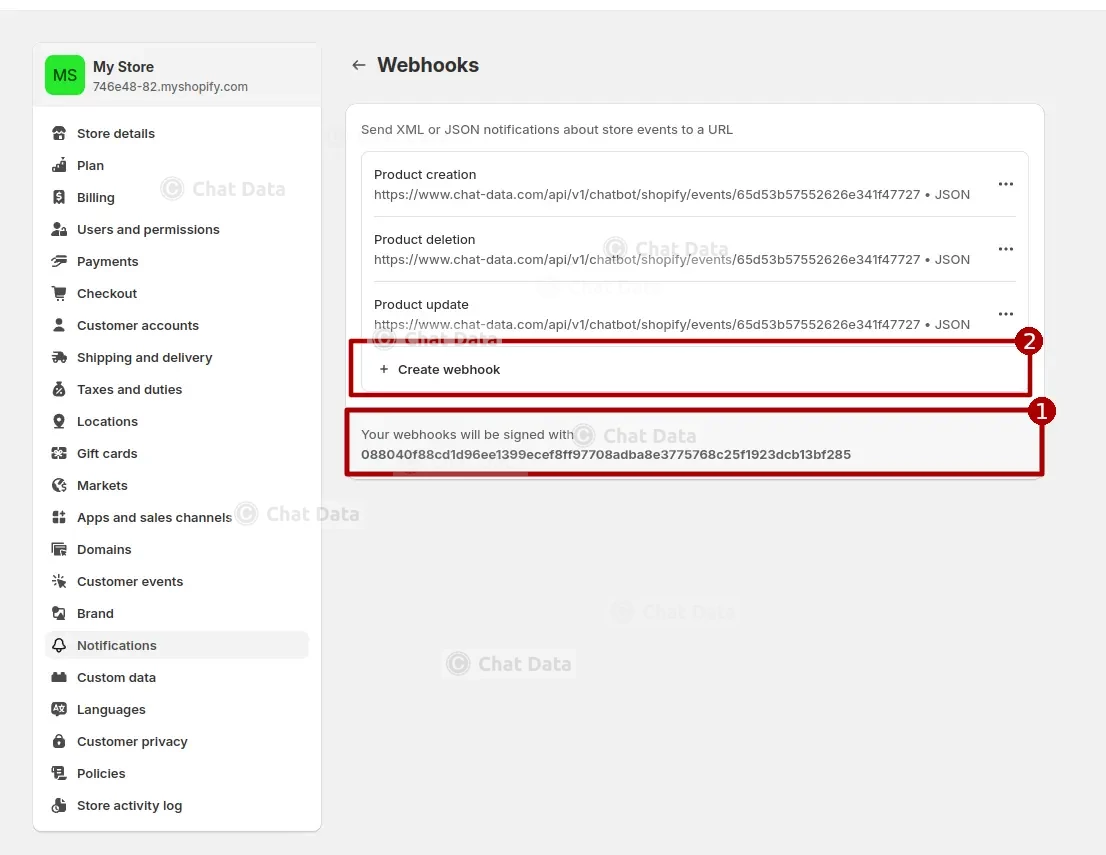
Step 3: Create Webhook Events
Create the Product Creation, Product Update, and Product Delete events with https://www.chat-data.com/api/v1/chatbot/shopify/events/${chatbotId} as the webhook URL. You can use the parameters as shown in the screen below with your own webhook URL. 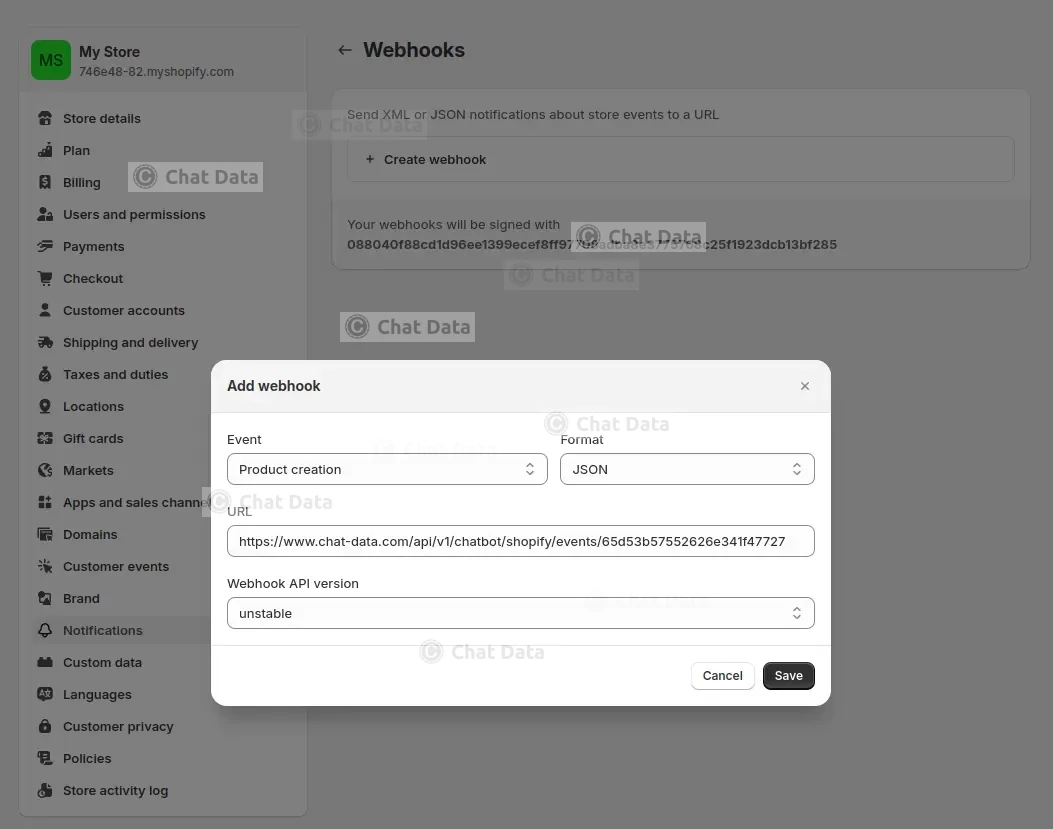
After setting up the three events, whenever you create or update your products in your store, your chatbot will automatically be updated with the latest information. Please note that this webhook can only listen to all future product creations or changes. You will have to train the chatbot with your existing store in the Sources tab by selecting Product as the source, as previous products won't be automatically sent to the webhook URL.