Multi-platform Integrations
WhatsApp Integration
Connecting WhatsApp with Chat Data enables your custom chatbot to interact directly with customers on WhatsApp, offering a smooth and efficient method for managing inquiries and automating responses. This guide will take you through the steps needed to link your chatbot to a WhatsApp phone number, ensuring seamless and effective customer engagements.
Preliminary Information about Phone Numbers
The WhatsApp phone number connected to the chatbot can only be used by the chatbot and cannot be used on WhatsApp or WhatsApp Business.(see Preliminary Information about Phone Numbers for details) If you are already using the phone number with WhatsApp, you must delete your account in the app first.
To delete WhatsApp:
- Open the WhatsApp or WhatsApp Business app.
- Go to Settings > Account.
- Select Delete my account. This process may take a few minutes, but once completed, the number will be available for use.
If you previously used WhatsApp through Meta Developer for business, you must disable two-step verification:
- Log in to your WhatsApp Business Account.
- Choose the phone number you want to connect.
- Go to Settings > Two-step verification and turn off two-step verification.
Connect WhatsApp with Chat Data
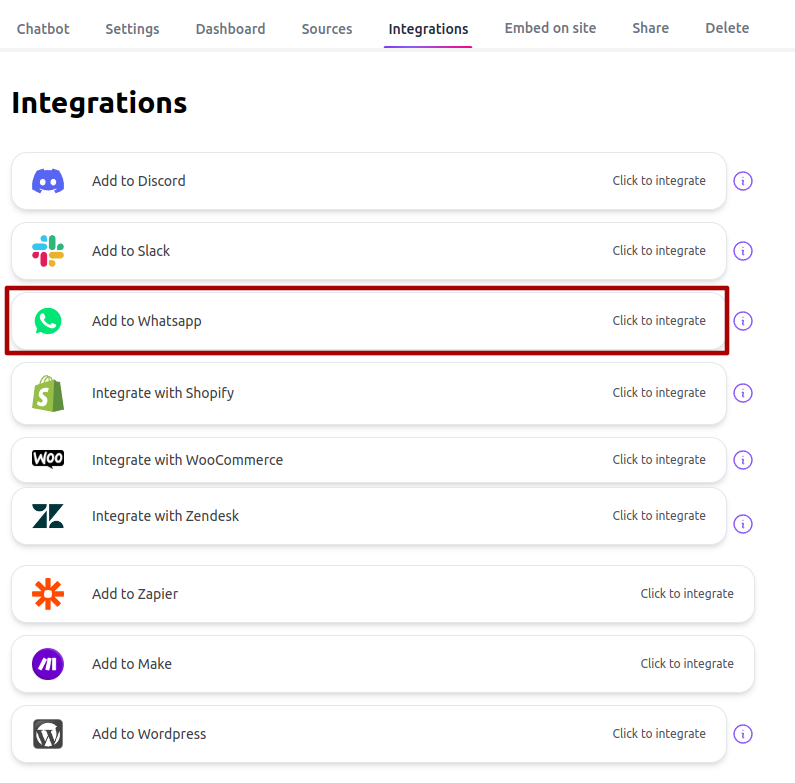
- Go to Dashboard > [Chatbot] > Integrations.
- Select the WhatsApp integration card.
Embed Signup Process
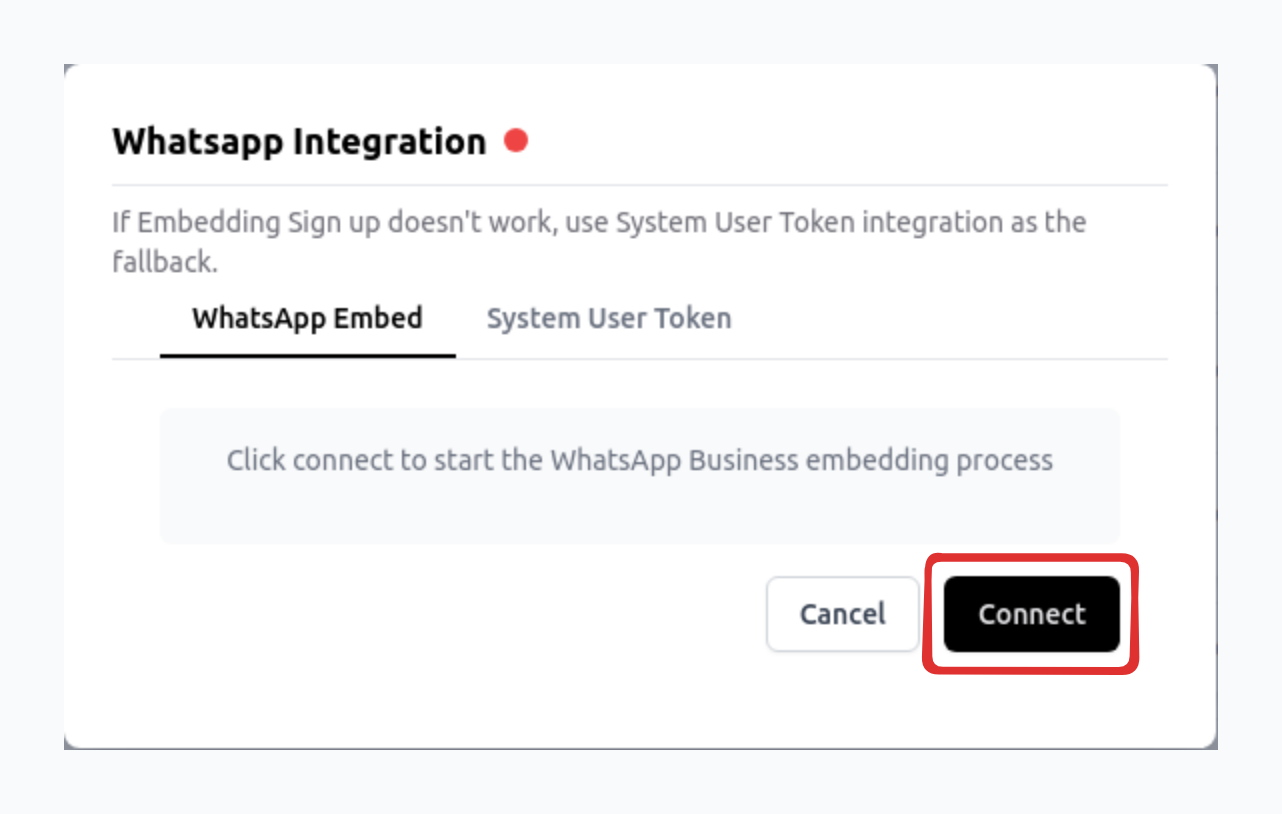
- Click the Connect button in the pop-up window.
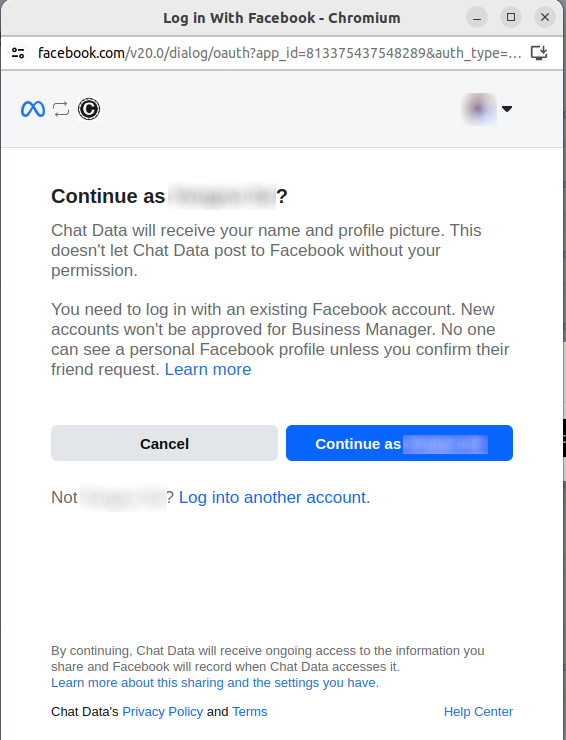
- Sign in with your personal Facebook account.
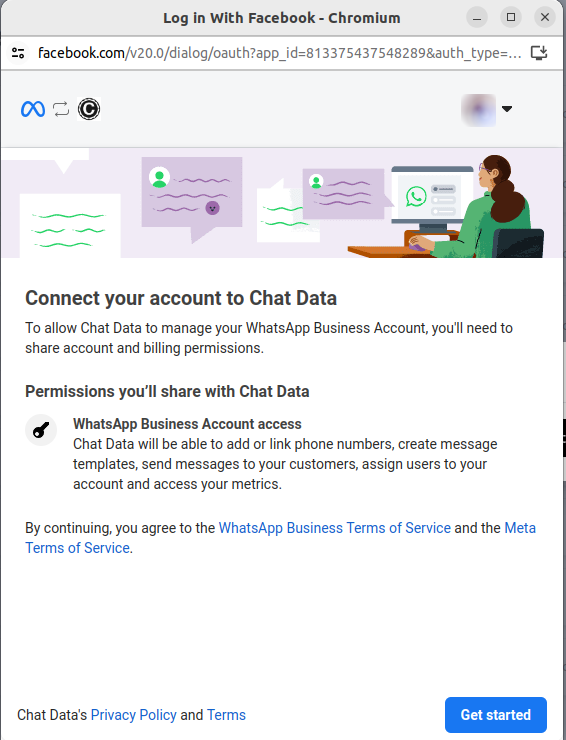
- Press Get started.
- Choose or create a business profile.
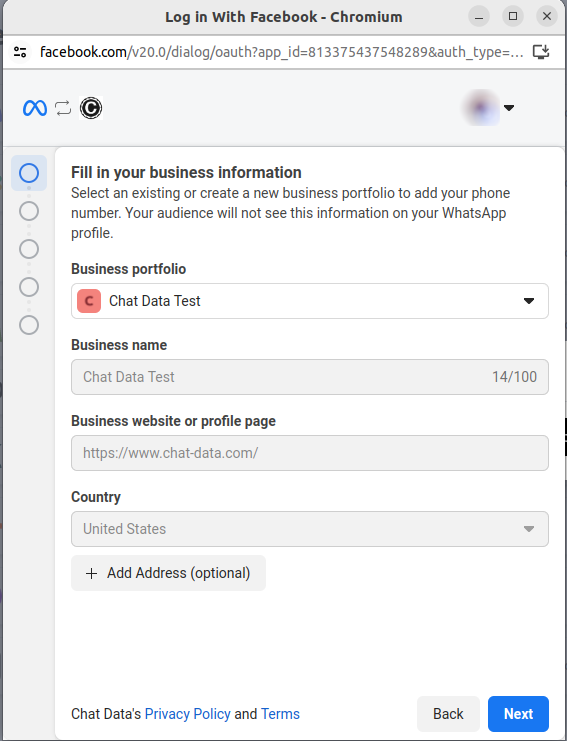
- Set up a WhatsApp business profile or choose an existing one.
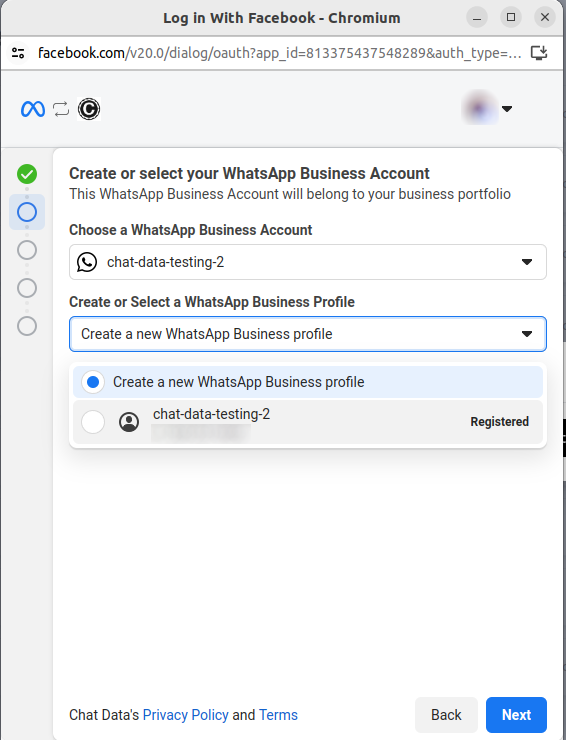
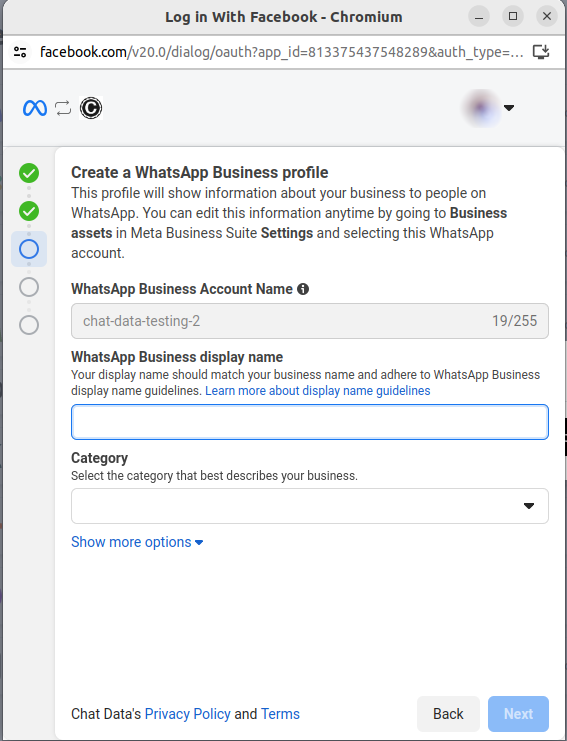
- Enter the details for the business profile.
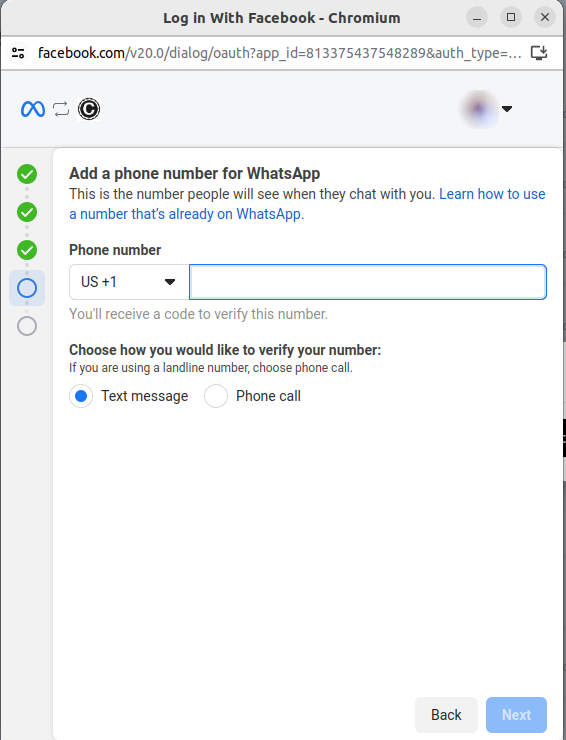
- Add a phone number. It’s advisable to have just one associated number in this profile.
- Click Continue.
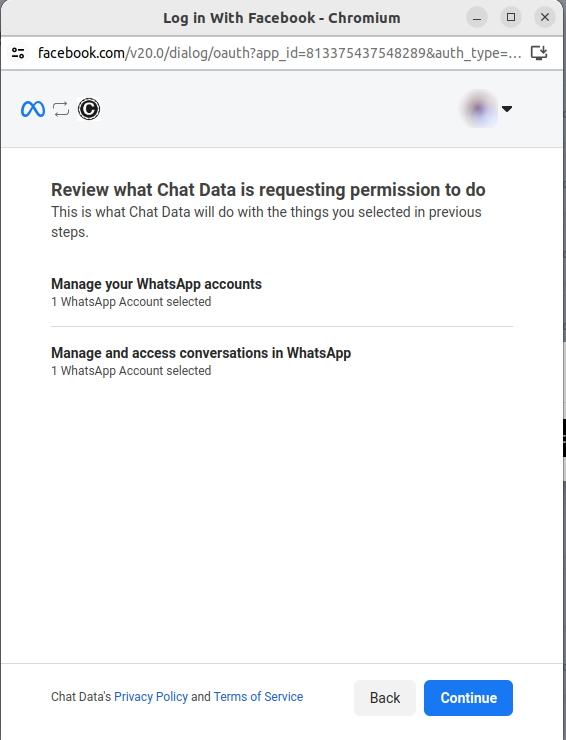
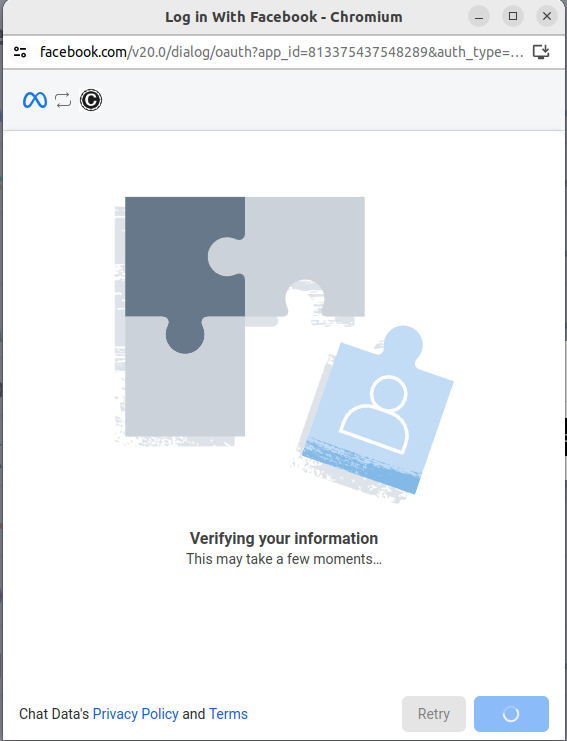
- Allow a few moments for information verification.
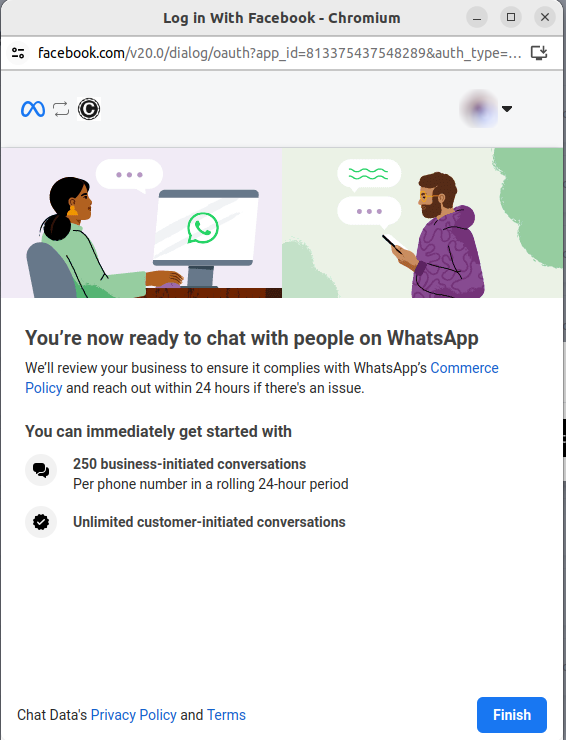
- Click Finish.
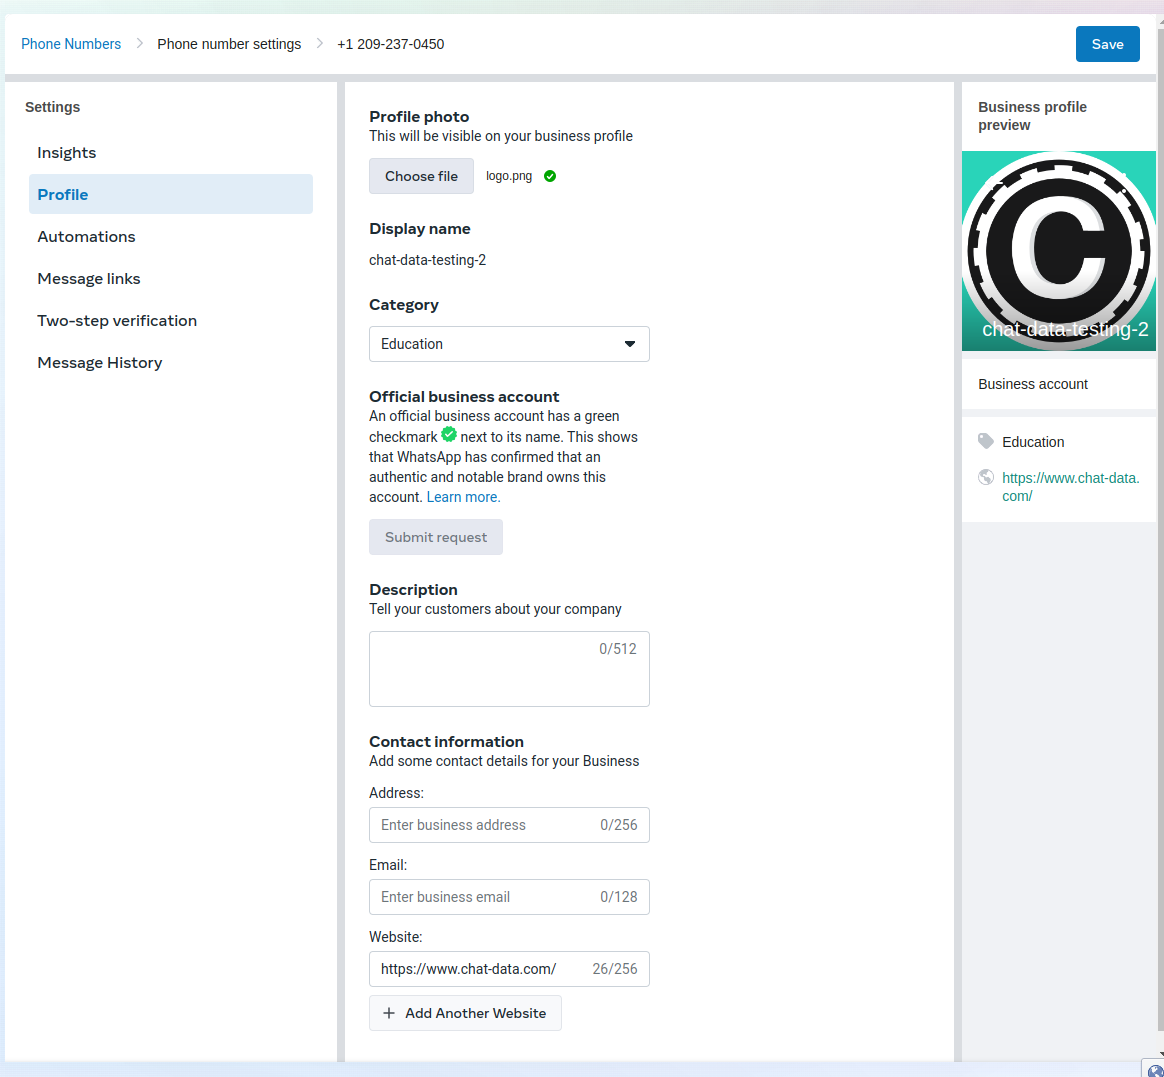
- (Optional) You can adjust your WhatsApp bot’s appearance or remove your phone number by selecting the PHONE PROFILE link.
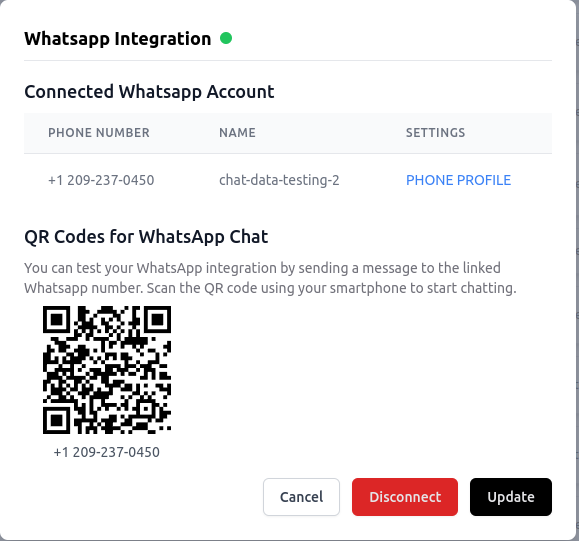
- (Optional) Go to PHONE PROFILE, update your WhatsApp settings, and then click Save.
- (Optional) Scan the QR code with your smartphone to start interacting with the linked WhatsApp number. The WhatsApp account should automatically respond to your message. Since the customer's phone number is included, their information will be collected automatically as a lead.
With the integration now active, you can send up to 1000 free messages each month. To send more than 1000 messages per month, make sure to add a payment method in your Meta billing settings.
Congratulations! You've successfully connected your Chat Data chatbot to WhatsApp, and it’s now set up to respond to all messages received through WhatsApp!
System User Access Token Signup Process
The embedded signup process by facebook might have some bugs in authorization your account occasionally due to bugs by Meta in verifying your phone number during the signup process.  If you happen to have issues at the step 10 above, you can use this integration method as a fallback.
Develop your Whatsapp application following Meta's guidance.
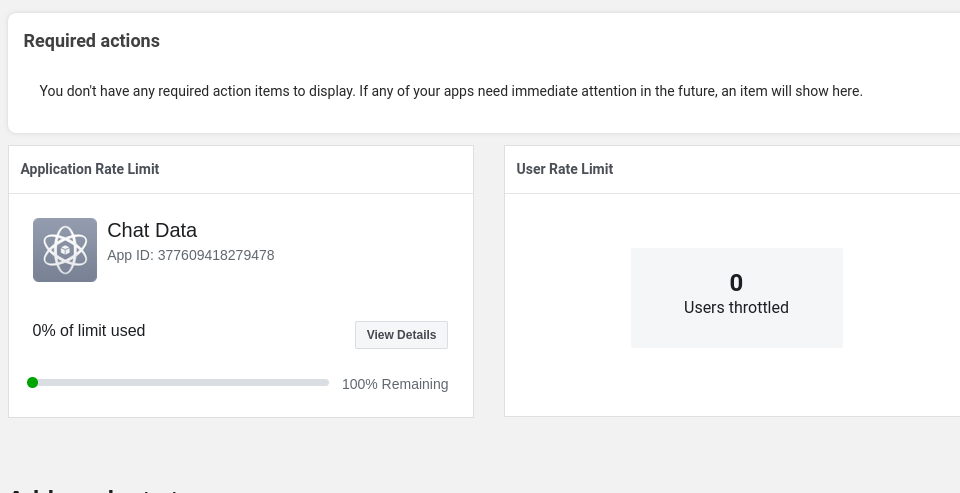
Generate Access Token Generate a permanent system user access with the
whatsapp_business_messagingandwhatsapp_business_managementpermissions for your created app.
5: Setup Access Token Go to the Integrations tab in your chatbot menu. Click the Add to Whatsapp button to initiate the integration process. Simply enter the access token created in Step 3 above. Don't worry if the status dot still shows with red color. 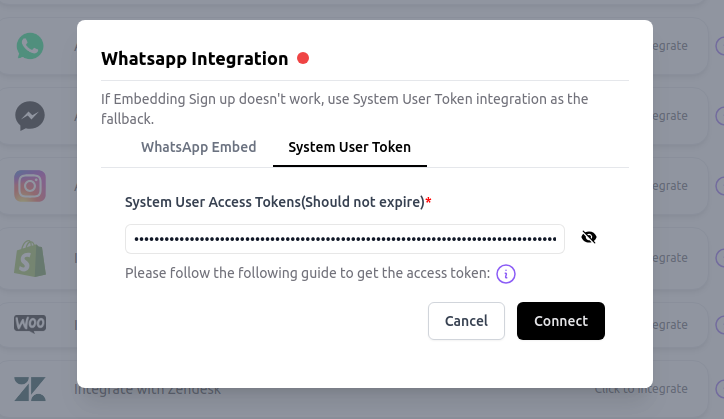
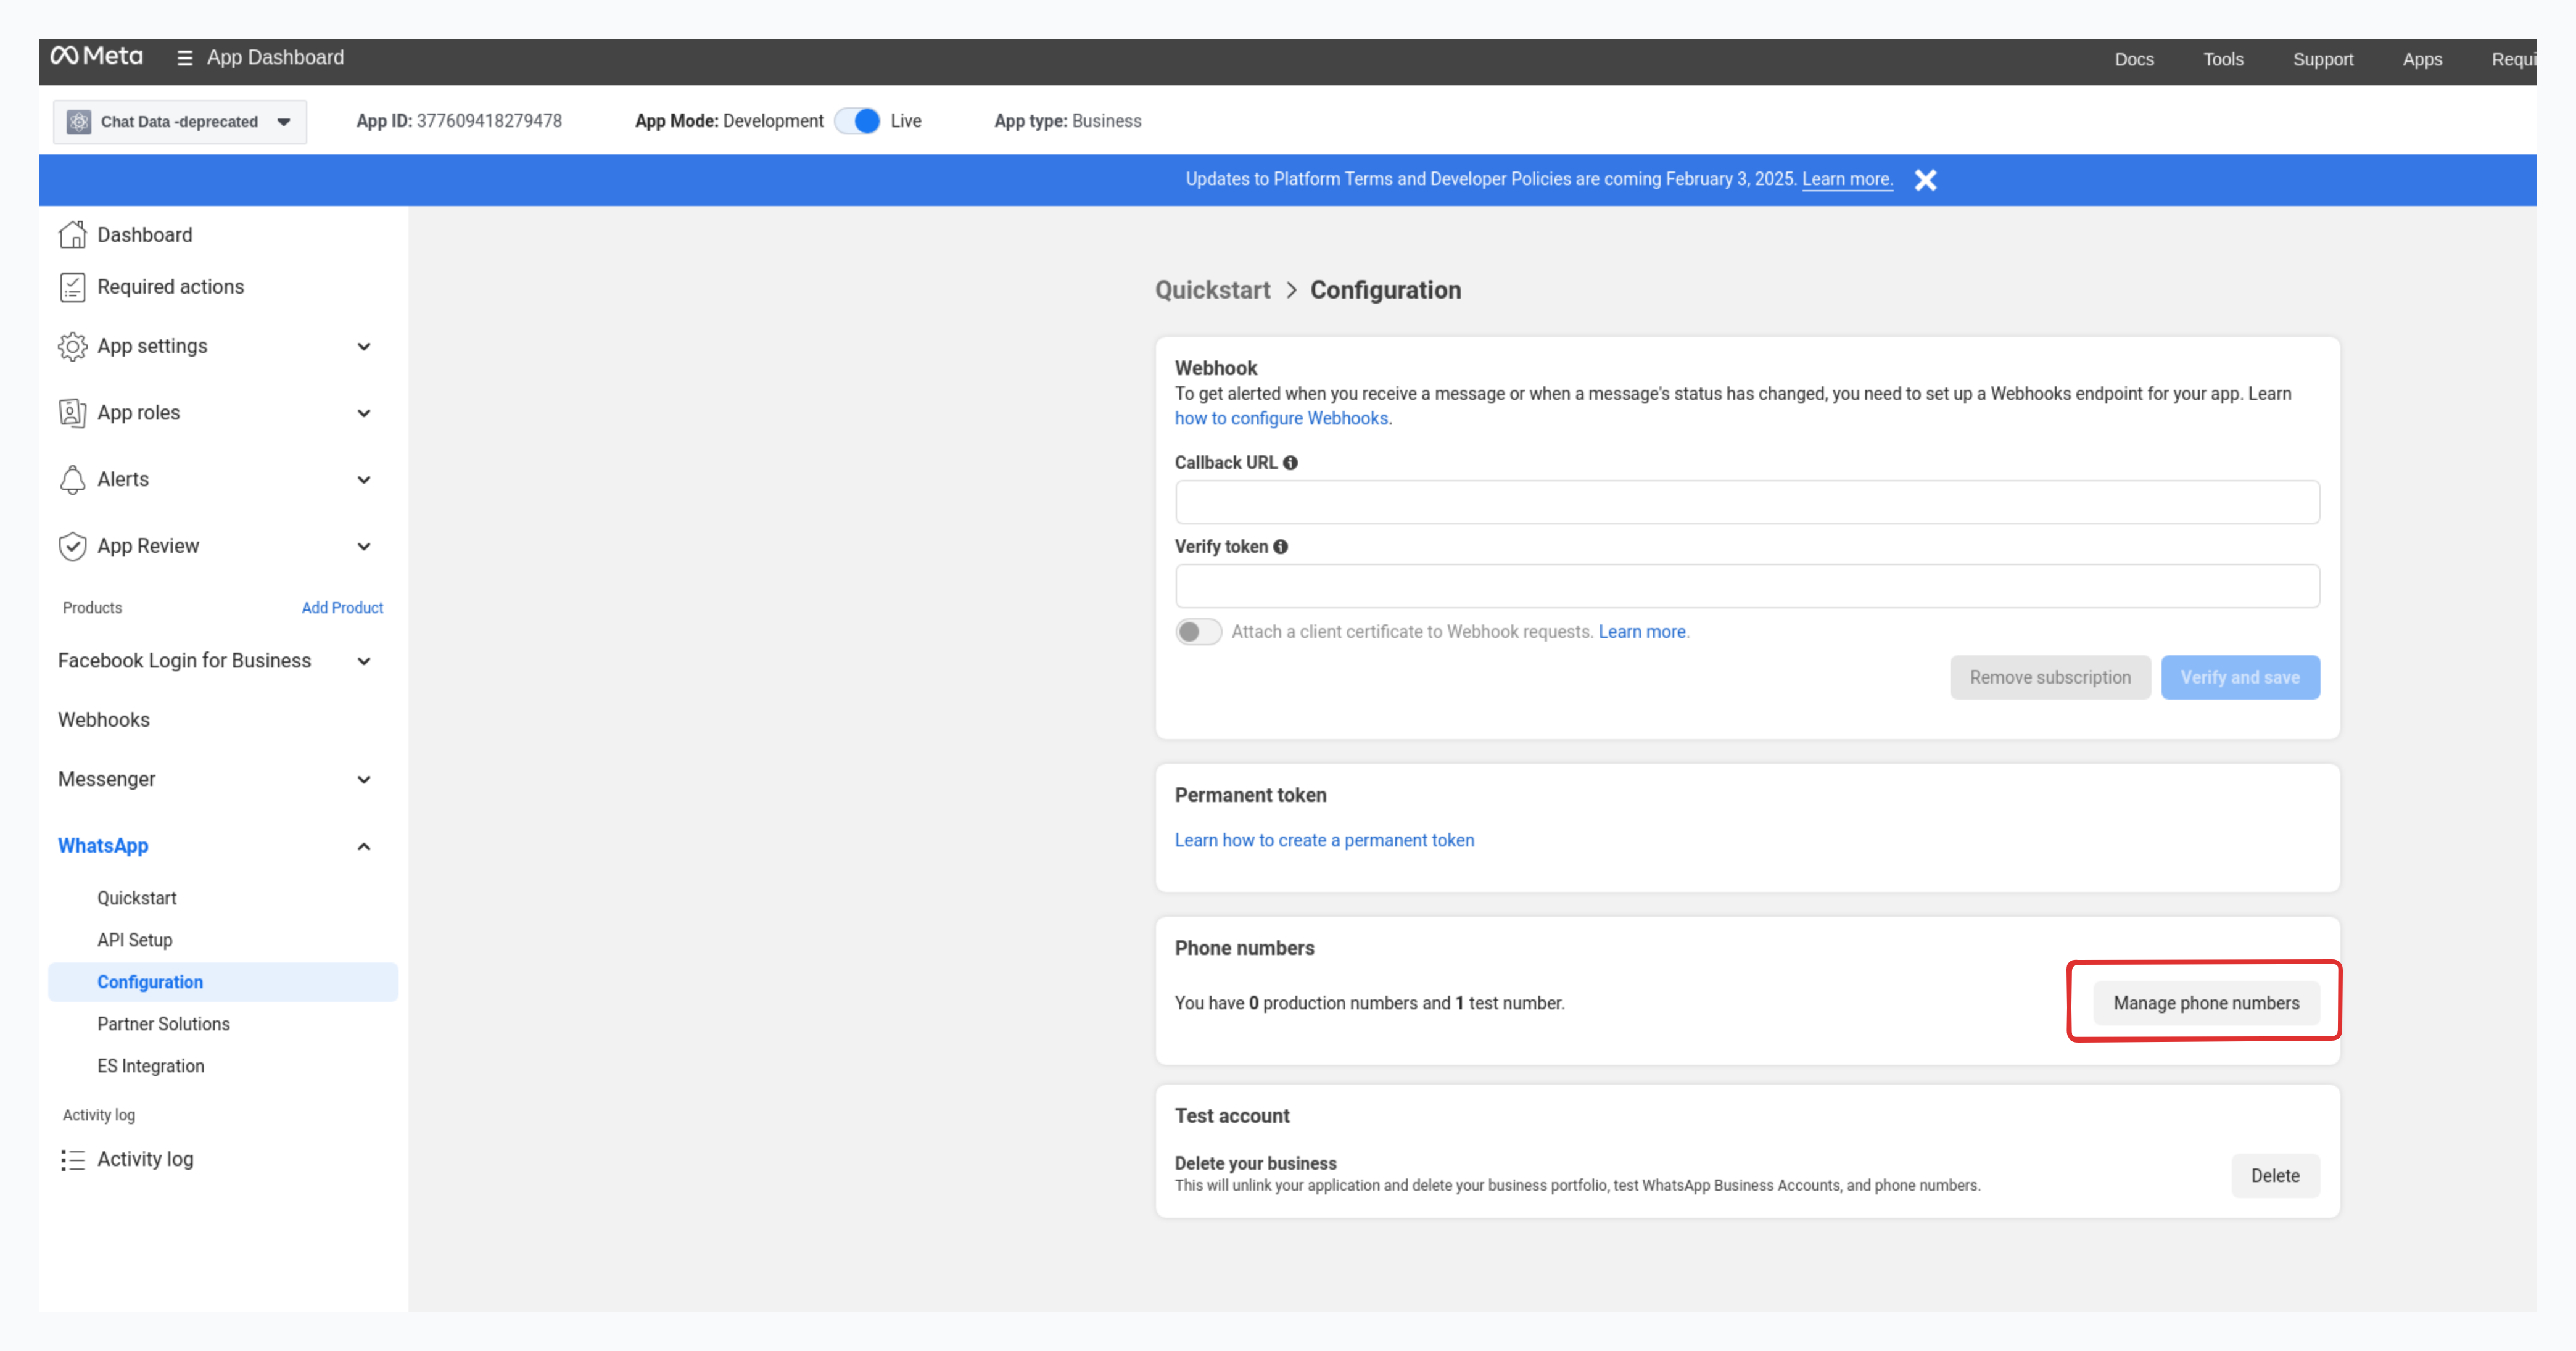
Add a phone number If you haven't added a phone number to your Whatsapp App, you can do so by clicking the Add a phone number button shown in the picture below. And follow the steps to add your own phone number and verify it.
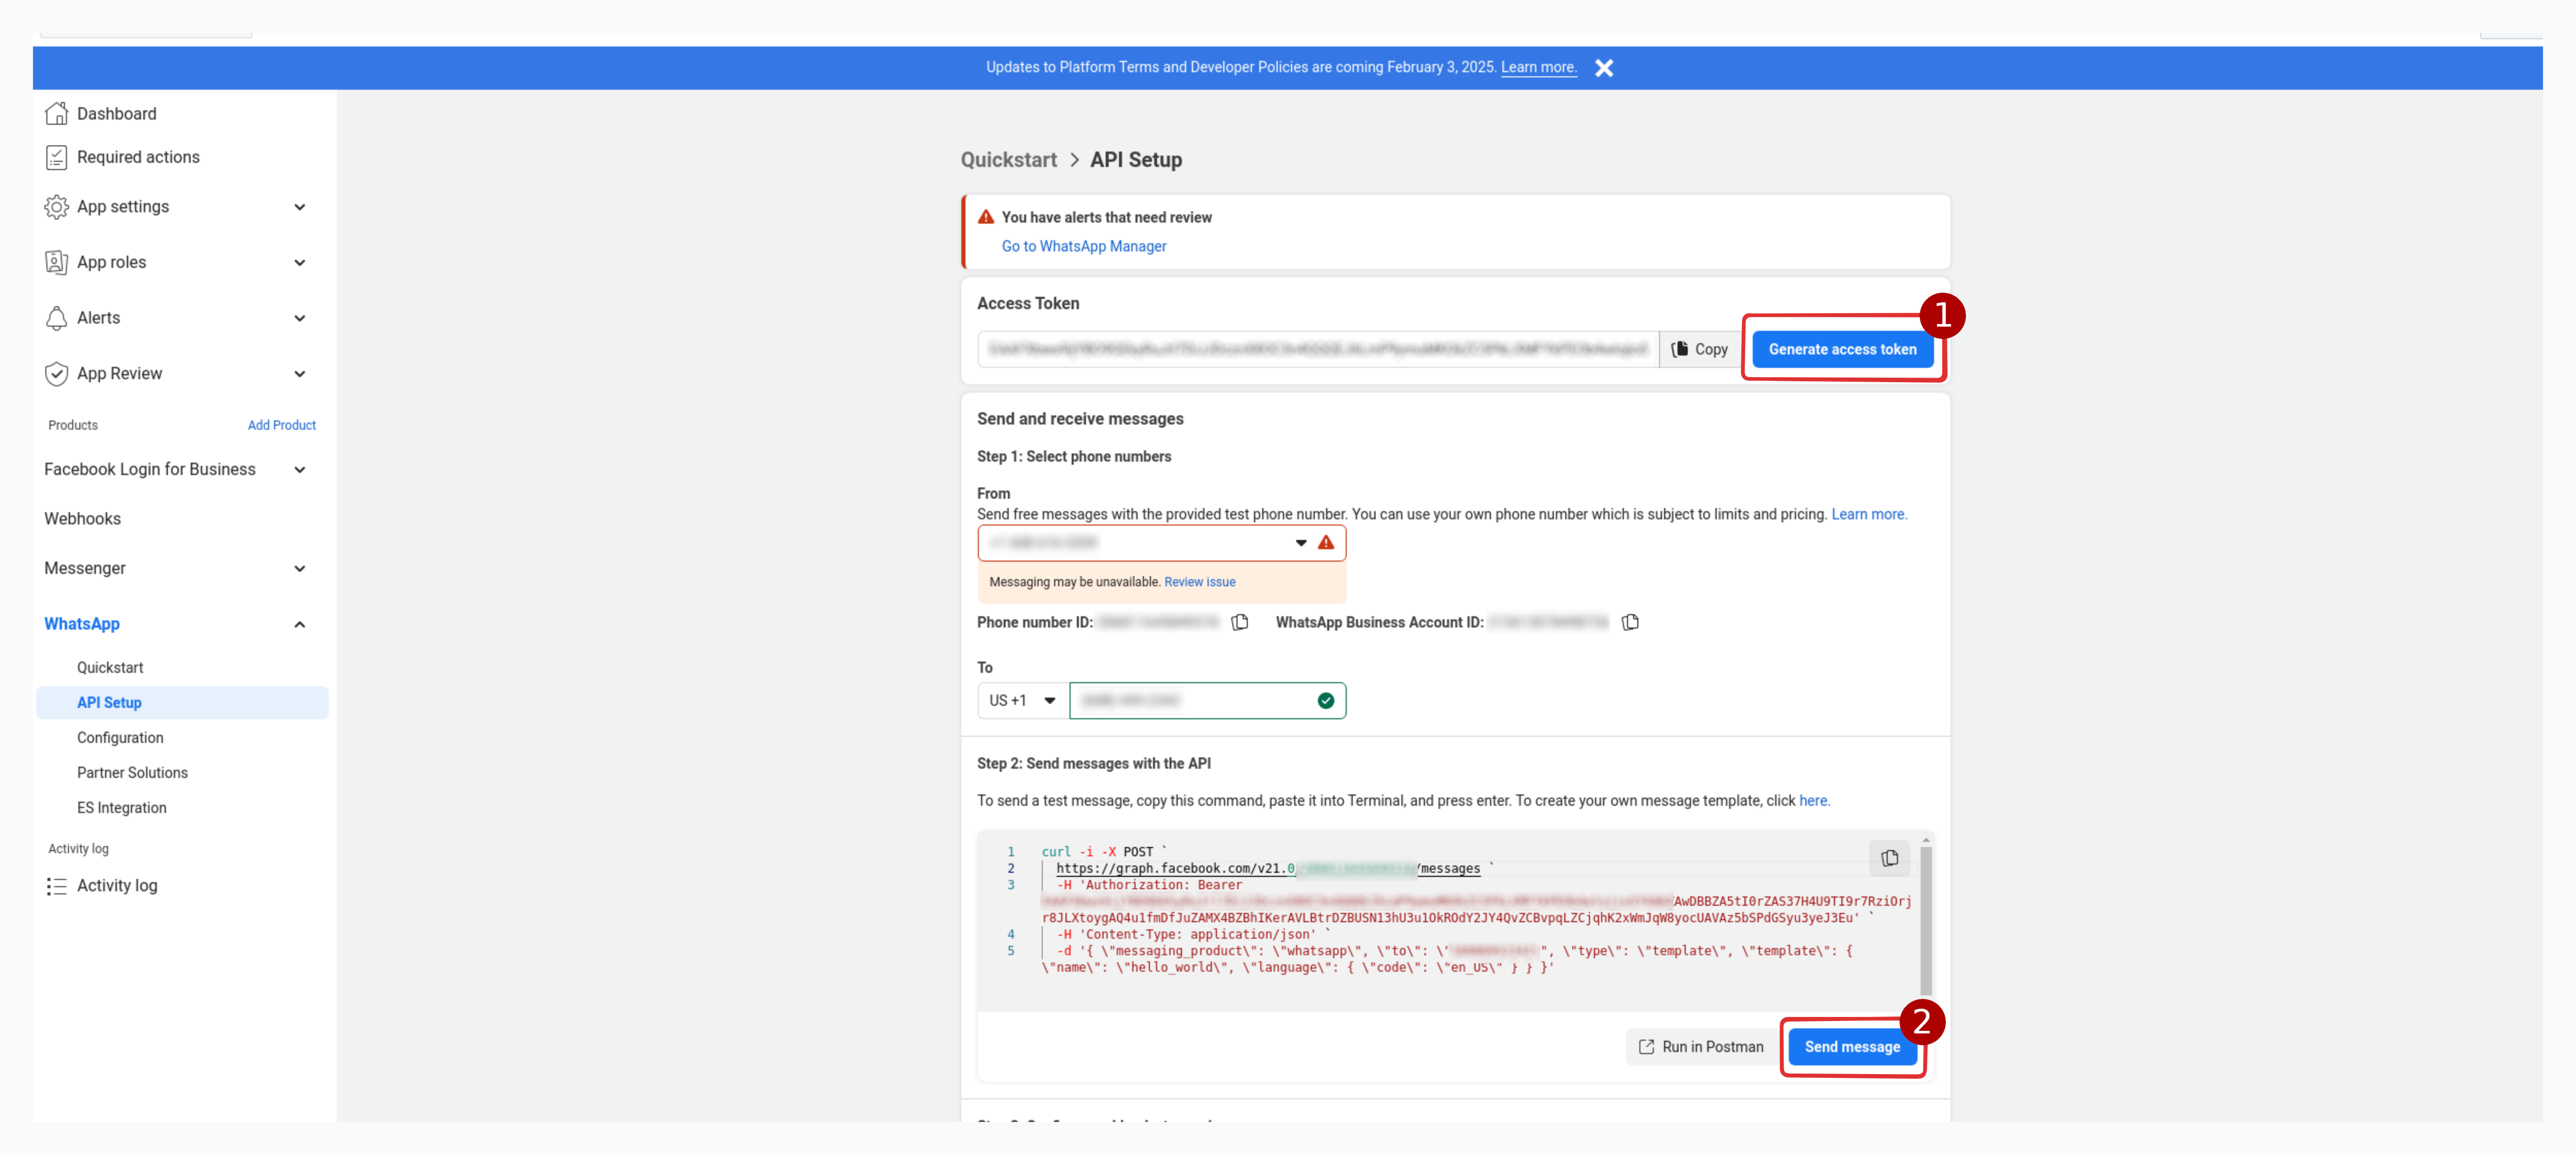
Test the phone number. If added successfully, you should be able to see the phone number in the Phone numbers section. You can test the phone number by sending a message to it.
Setup Callback URL Return to the API setup tab of your Whatsapp App and insert
https://www.chat-data.com/api/v1/chatbot/whatsapp/events/{chatbotId}as the webhook URL. Subscribe to the messages event. The status dot in Step 2 should turngreenafter completing this step.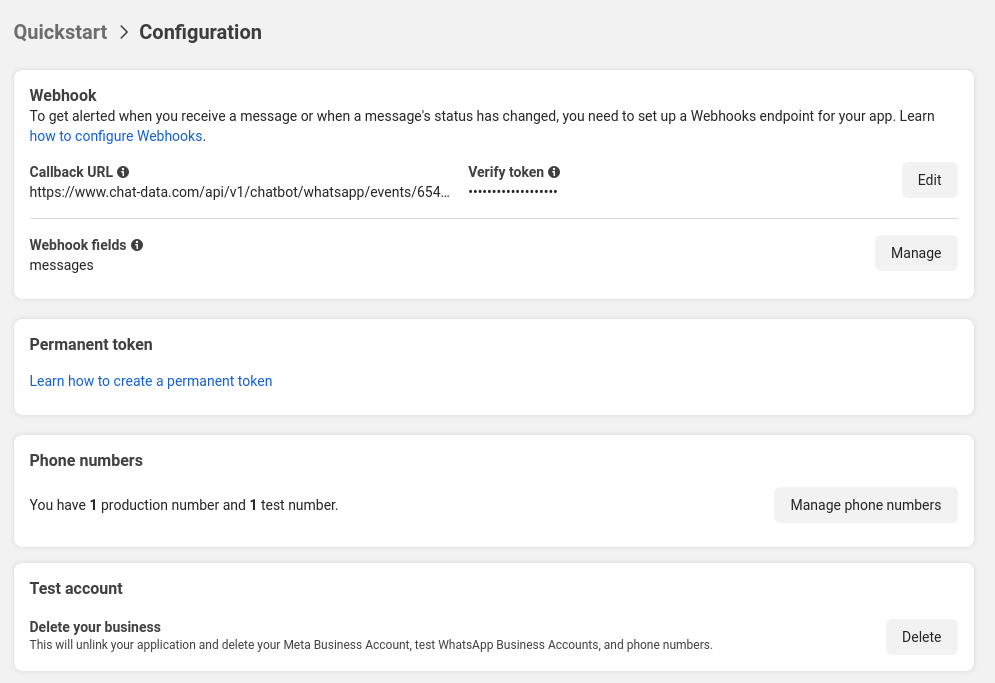
Delayed Message Sending
If you want the AI chatbot to delay sending messages to users, you can set a random delay time for the AI chatbot to postpone its responses to customers. You can configure this in the WhatsApp integration modal as shown below: 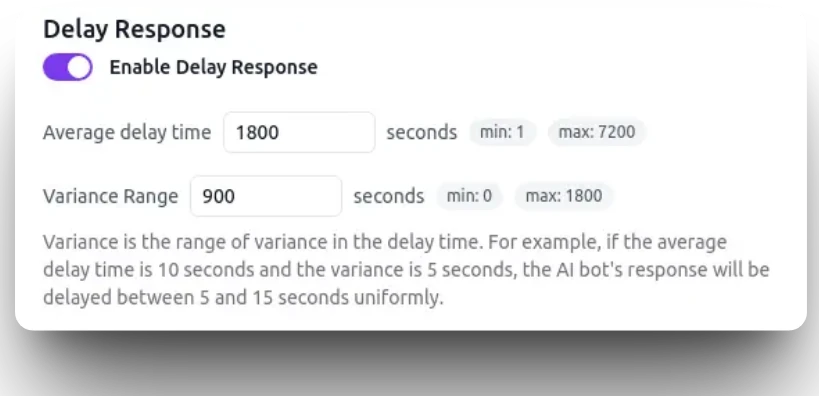
The AI chatbot will randomly delay its response within the range you set, making it harder to detect as an AI bot.
AI Re-engagement
Timely follow-ups are crucial for ensuring customer satisfaction. If you want the AI chatbot to follow up with customers after their last interaction, you can customize three key aspects of the AI follow-up:
- The time window for follow-up after the last message
- The specific conditions that trigger a follow-up
- The style and content of the re-engagement message
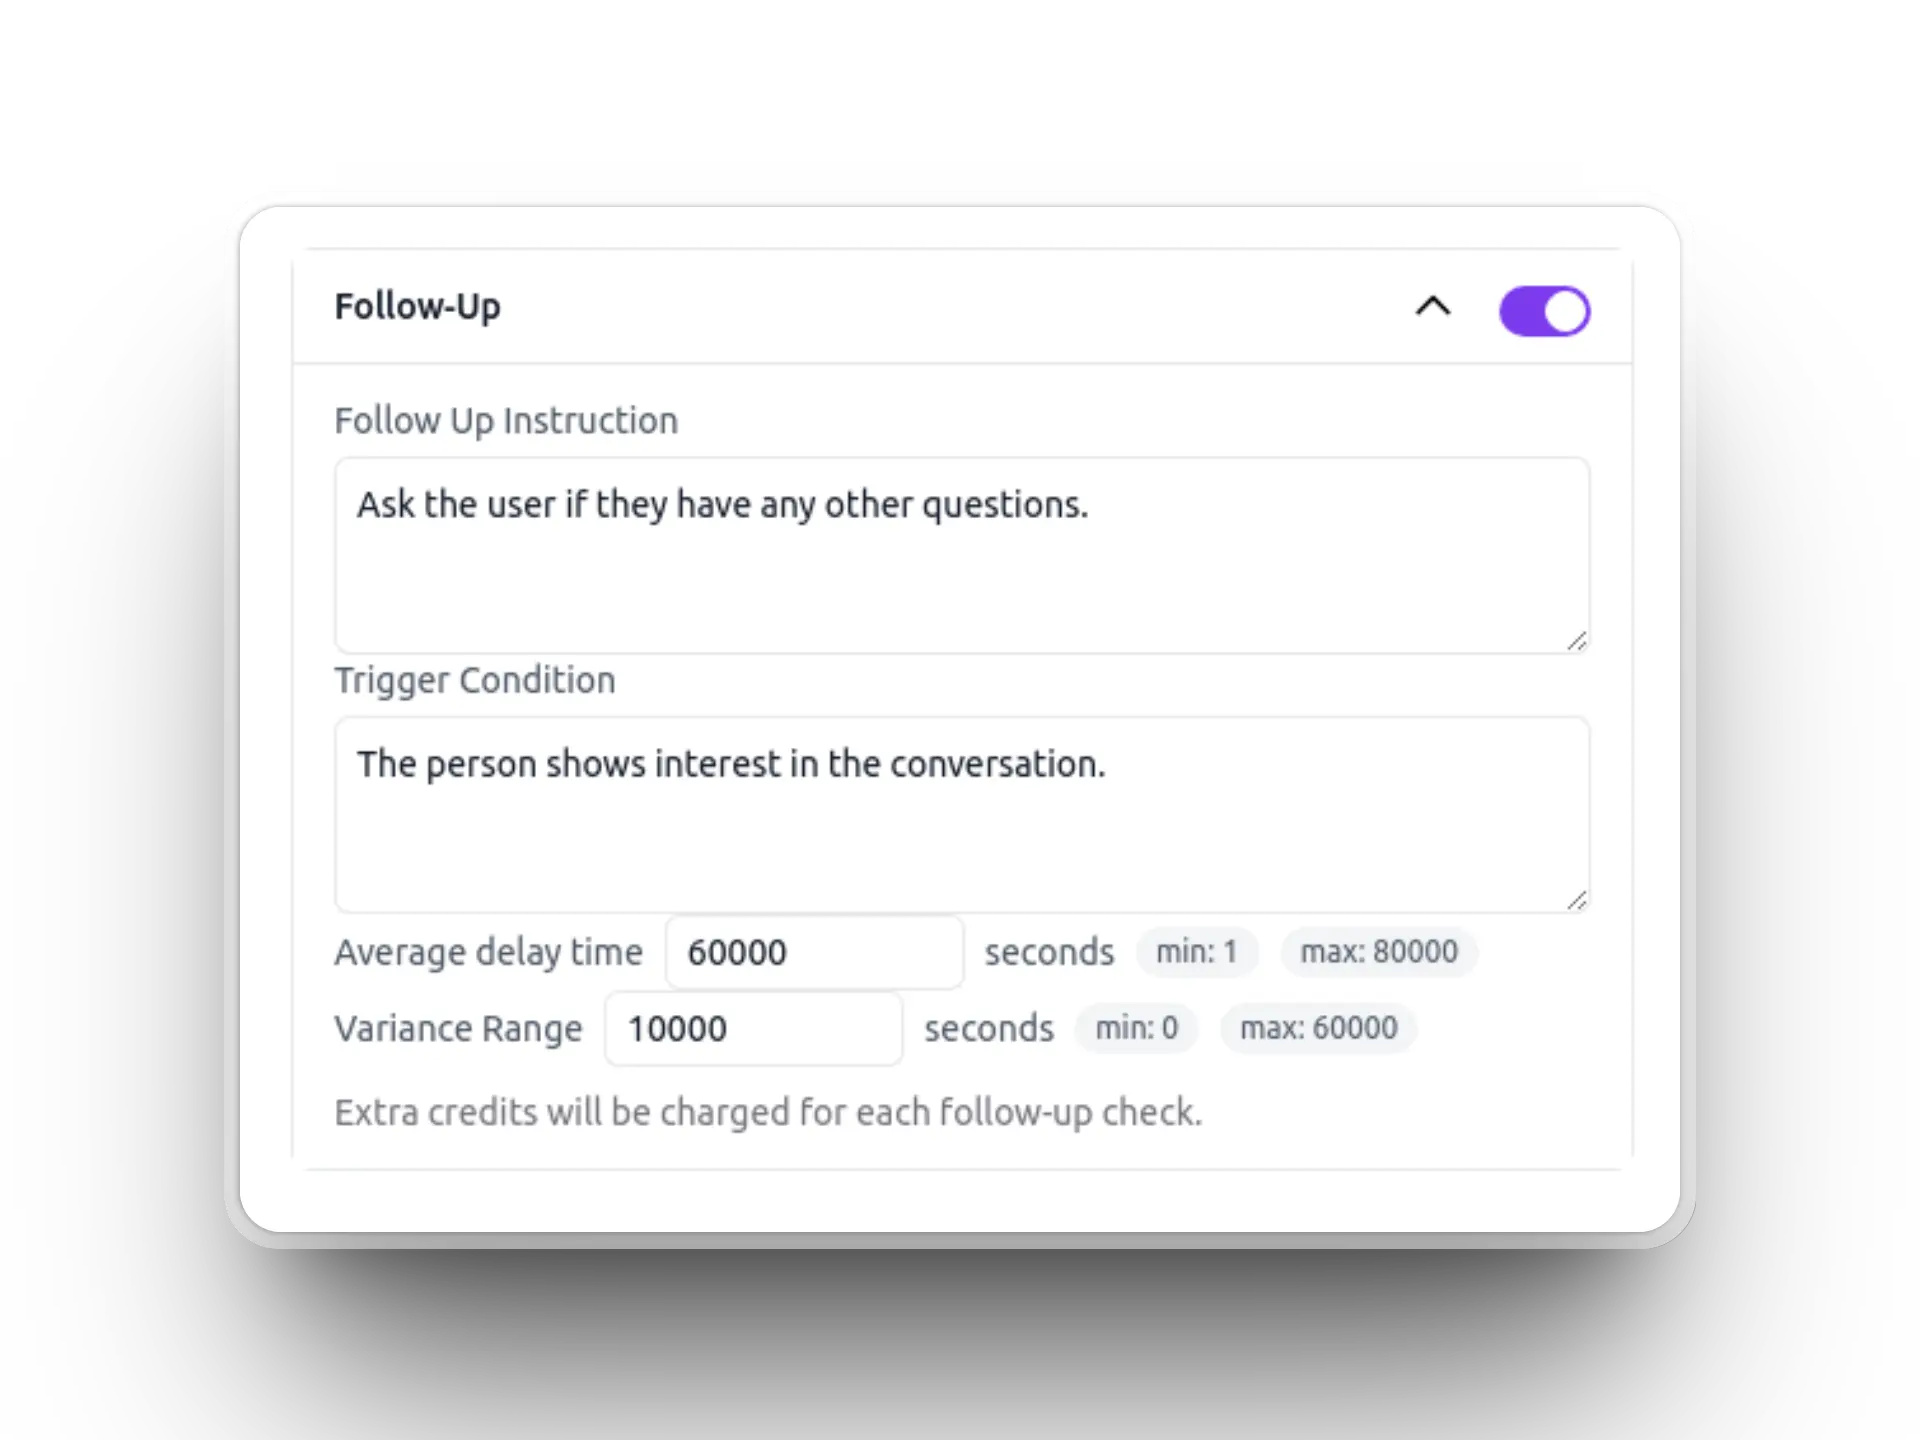
When the specified time arrives, the AI evaluates whether the conversation meets your defined re-engagement criteria. If the conditions are met, it sends a contextually appropriate follow-up message based on the previous conversation.
Live Chat Handover
After the phone number is integrated into the WhatsApp business account through Facebook OAuth 2.0, you cannot use the WhatsApp app to chat with the customer anymore. To chat with the customer in case the AI chatbot cannot provide a satisfactory answer, you can leverage our live chat panel to chat with the customer directly.
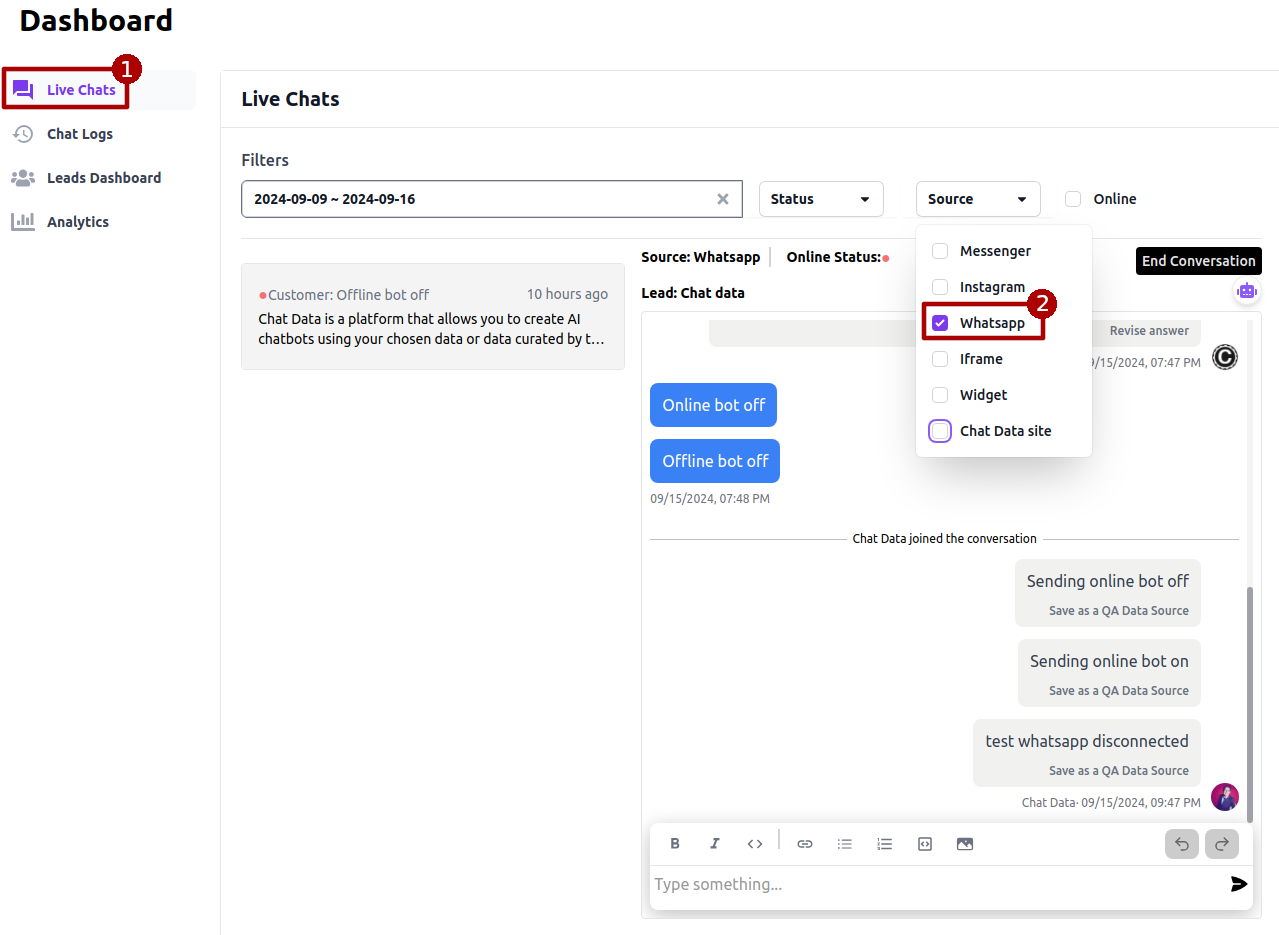
As a human agent, you can click the Live Chat dashboard tab and select the corresponding WhatsApp conversation thread to chat with the customer. Alternatively, you can use the checklist filter to filter the WhatsApp conversations only and select the corresponding conversation as shown in step 2 above.
Then you can turn off the AI chatbot for the corresponding conversation so that the chatbot won't respond to the message when you are chatting with the customer. Otherwise, the AI chatbot will respond to the same query again even if you have typed your response in the admin live chat panel.
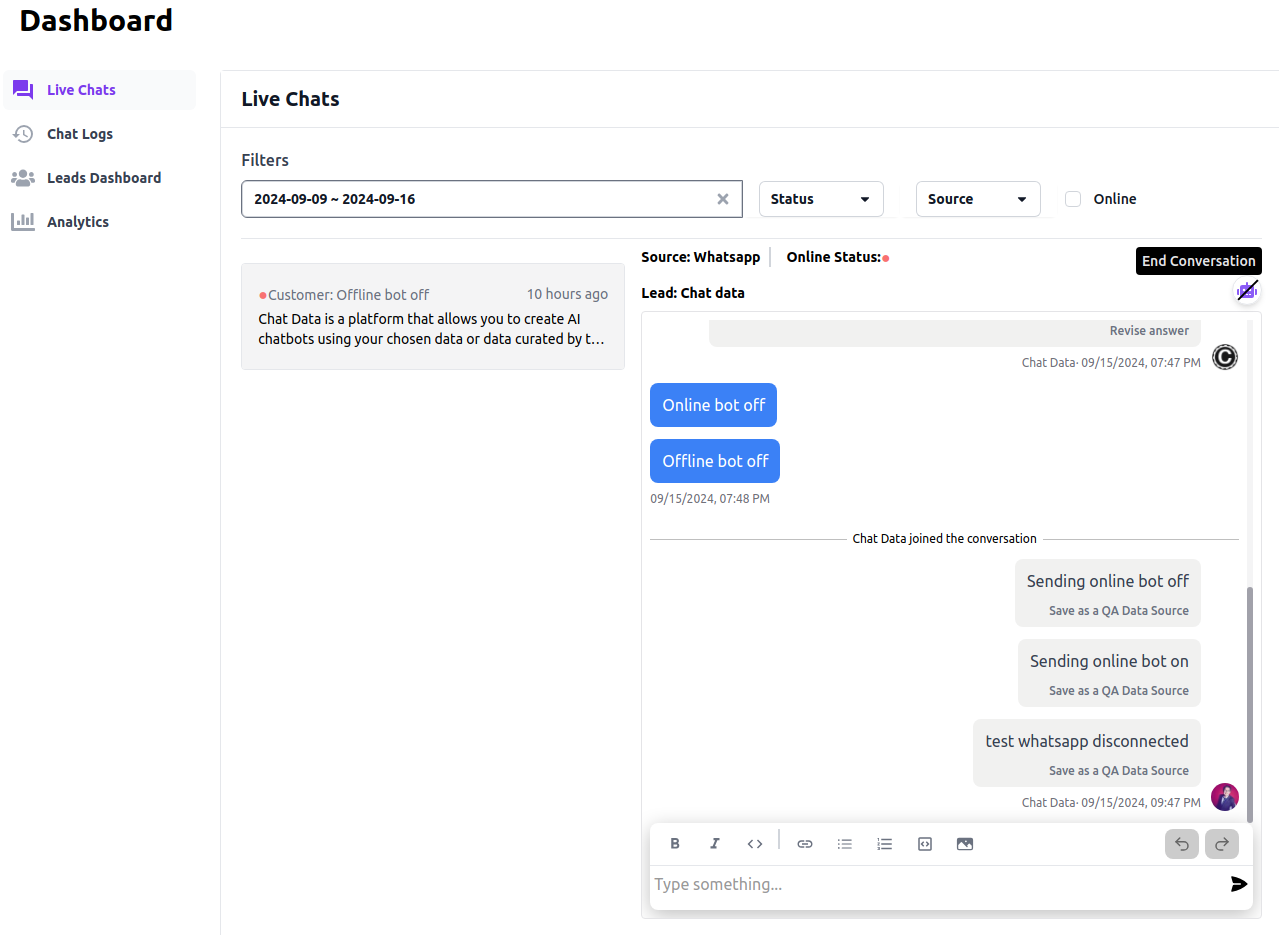
After you send the human response, we will send the WhatsApp message to the customer's WhatsApp account directly. When the customer responds back and if the AI bot is turned off and you are offline, we will send an email along with the chat portal link to your email address registered in the live chat setting, which is similar to how the offline live message works in New Message To the Agent.
You can switch the AI bot on at any time after you have finished the live chat with the customer.
Automatic AI chatbot pause
To improve user experience, you can configure an automatic pause duration for the AI chatbot during WhatsApp integration setup. During this pause (up to 1 week), customer messages bypass the AI and go directly to you with email notifications. The chatbot automatically resumes after the configured time period.
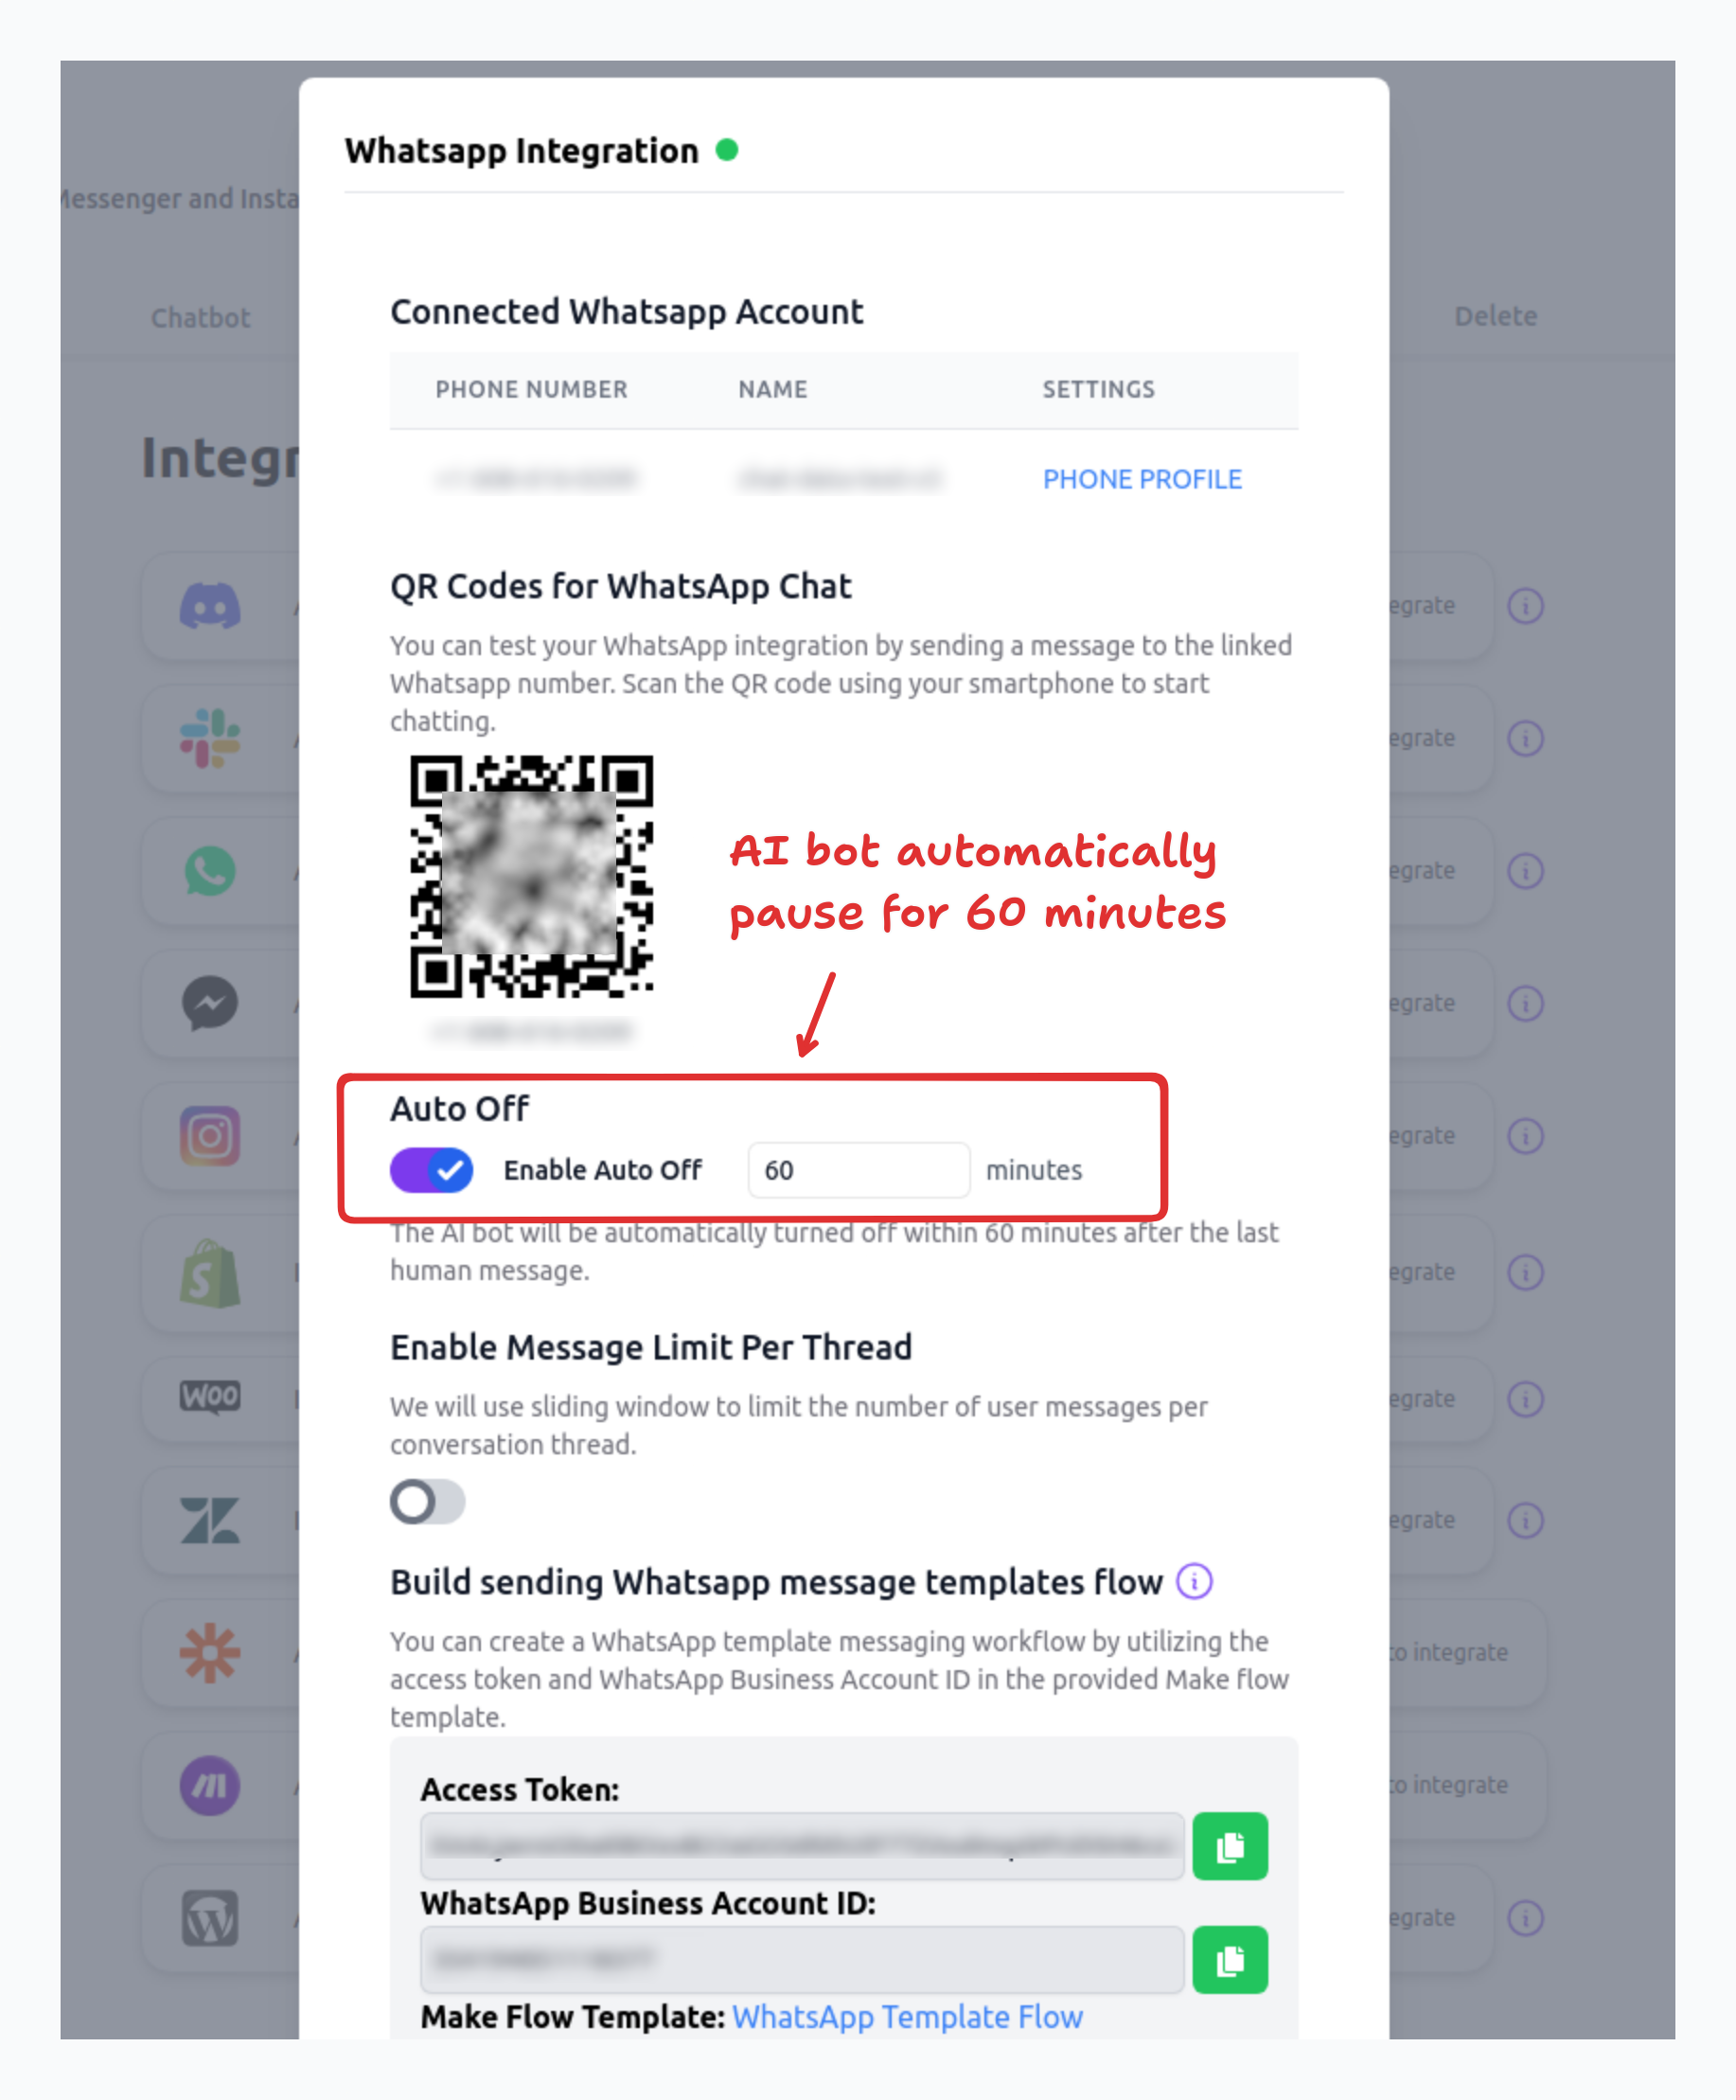
Sending WhatsApp template messages
You can use our Make workflow template to send WhatsApp template messages by the access token and whatsapp account id shown in your integrated WhatsApp account. 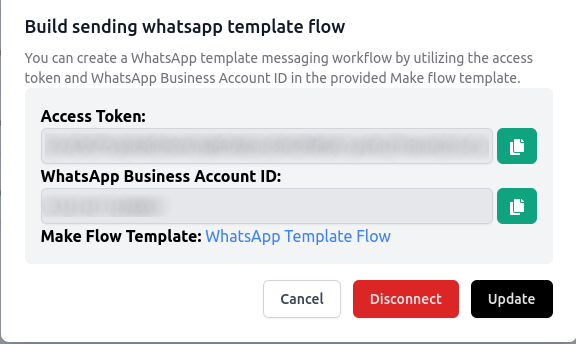 Here we will talk you through a concrete example of how to send a WhatsApp template message using the Make workflow template.
- Create a scenario based on the Make workflow template
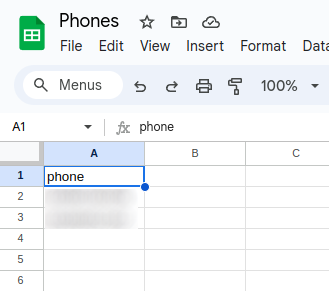
- Create the google sheet with the phone numbers you want to send the message to. Here we used two phone numbers for the example.
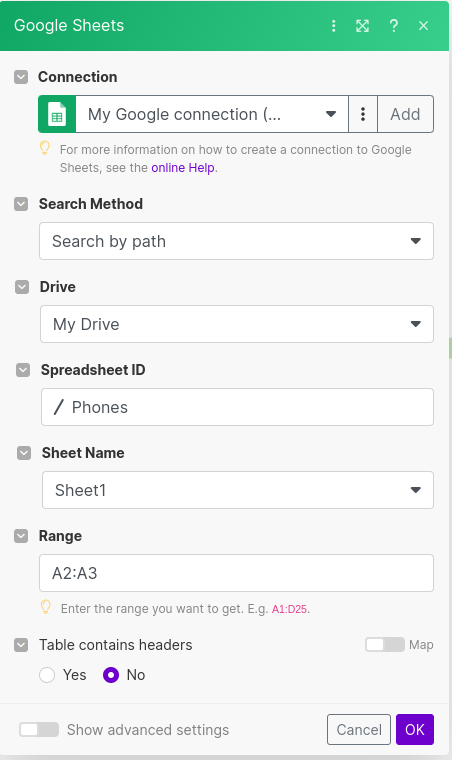
- Establish your Google connection and link the first module to the Google Sheet, then configure the required fields. For instance, we selected the "A2:A3" range without a header, as that is where the phone numbers are located.
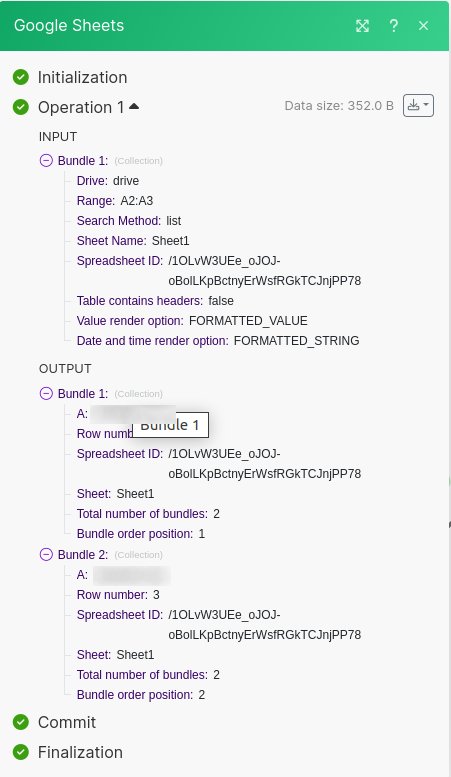
- Run the first modle once to popluate the fields and check if the data is correct. The operations should show the phone numbers with the key "A", like below.
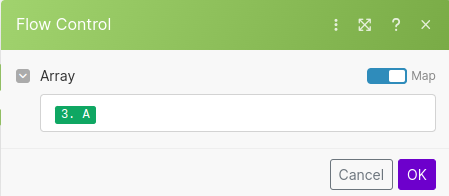
- Use the Iterator module(the second module) to iterate over the phone numbers with the Array "A".
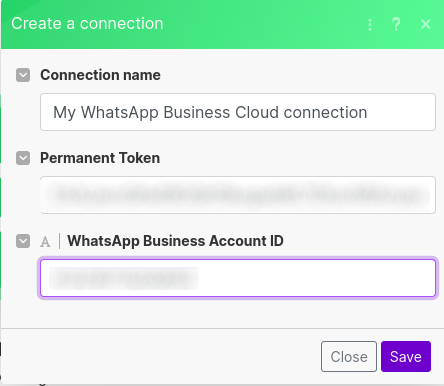
- Create your WhatsApp connection and link the third module to the WhatsApp connection. Input the permanent token(access token) and the WhatsApp Business Account ID provided by us.
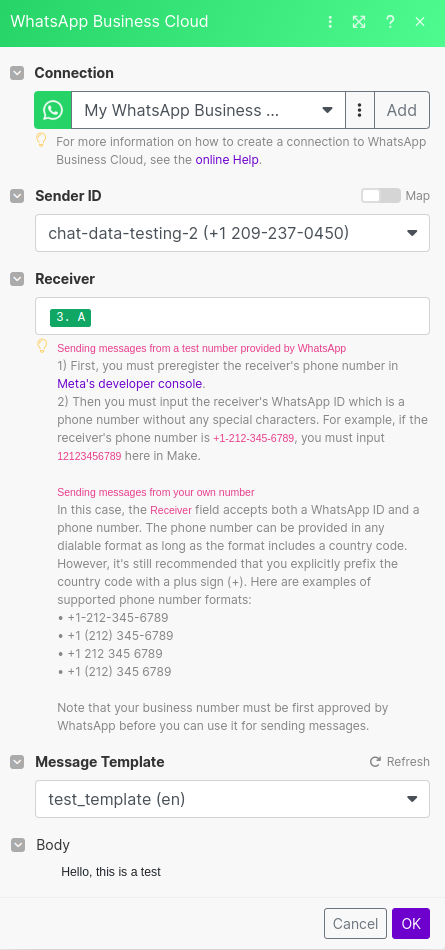
- Set up the parameters in the third module with the receive phone number as the key "A" and the corresponding message template.
- Click the Run Once button to trigger the whole workflow. You should see the whatsapp message sent to the phone numbers.
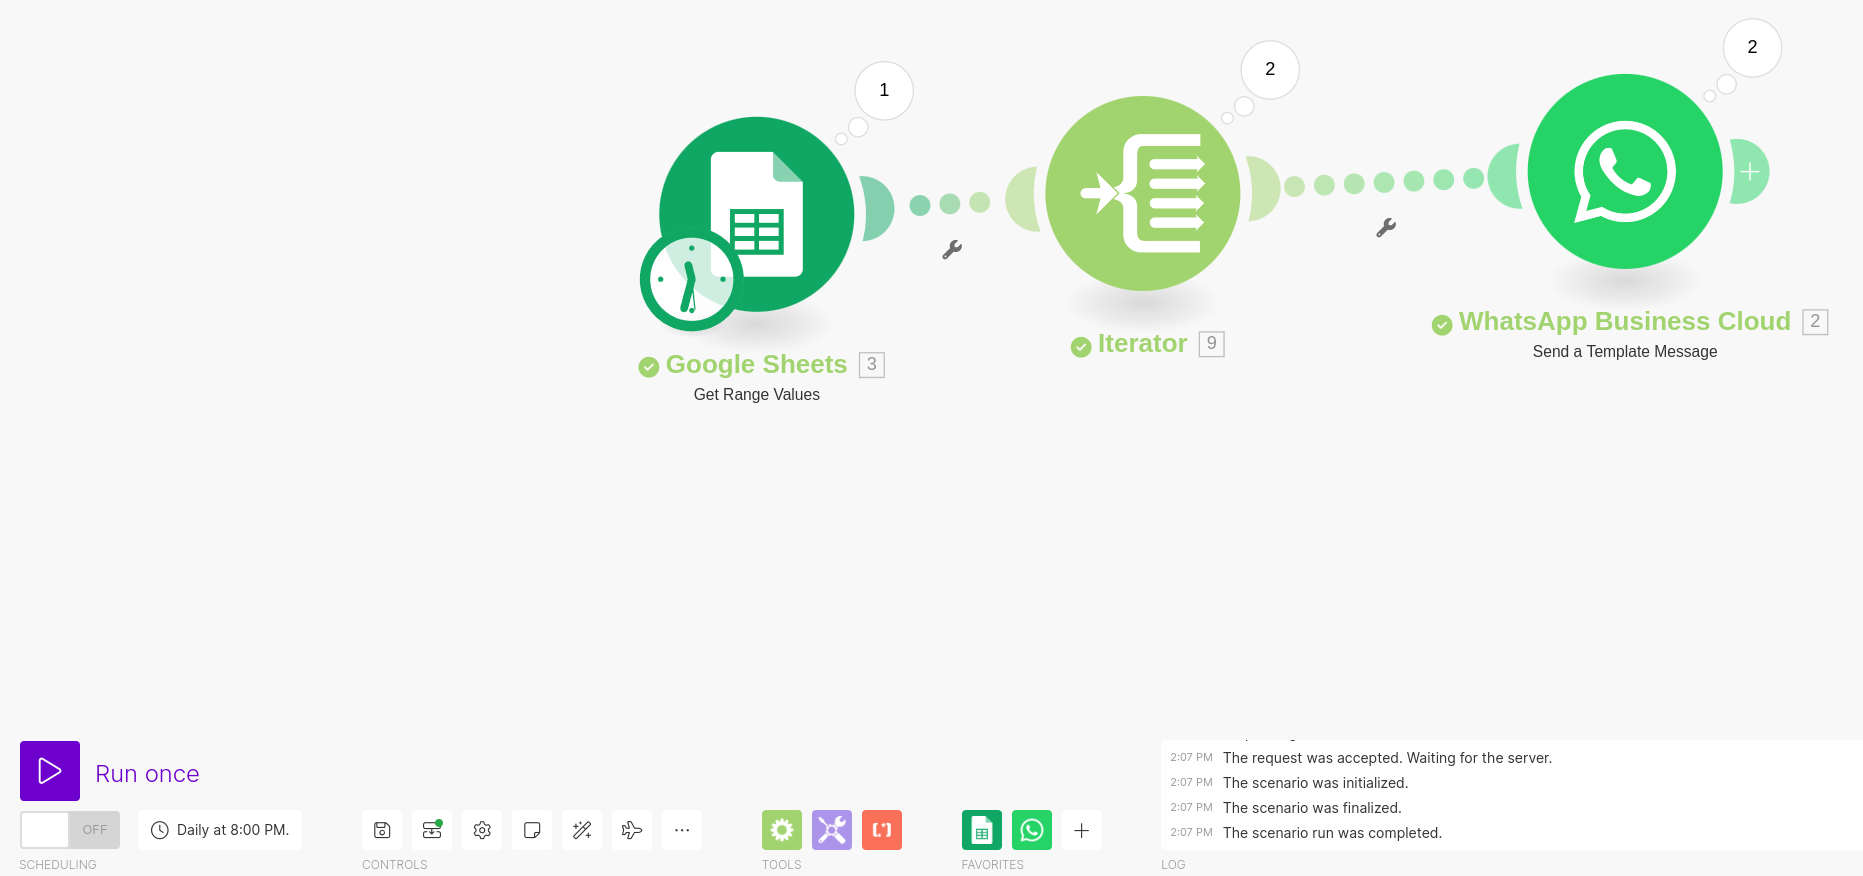
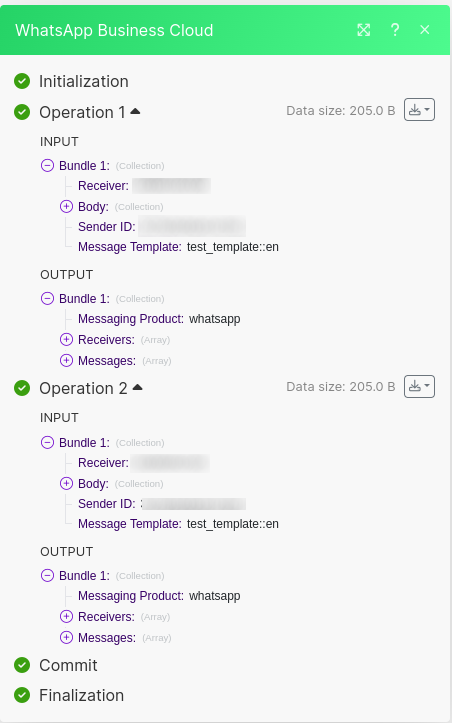
- You can also check the operations of the third module to see if the message is sent successfully.
- You can config the schedule in the first module to trigger the workflow at your desired choice. For example, we set it to run every every day at 20:00 PDT.
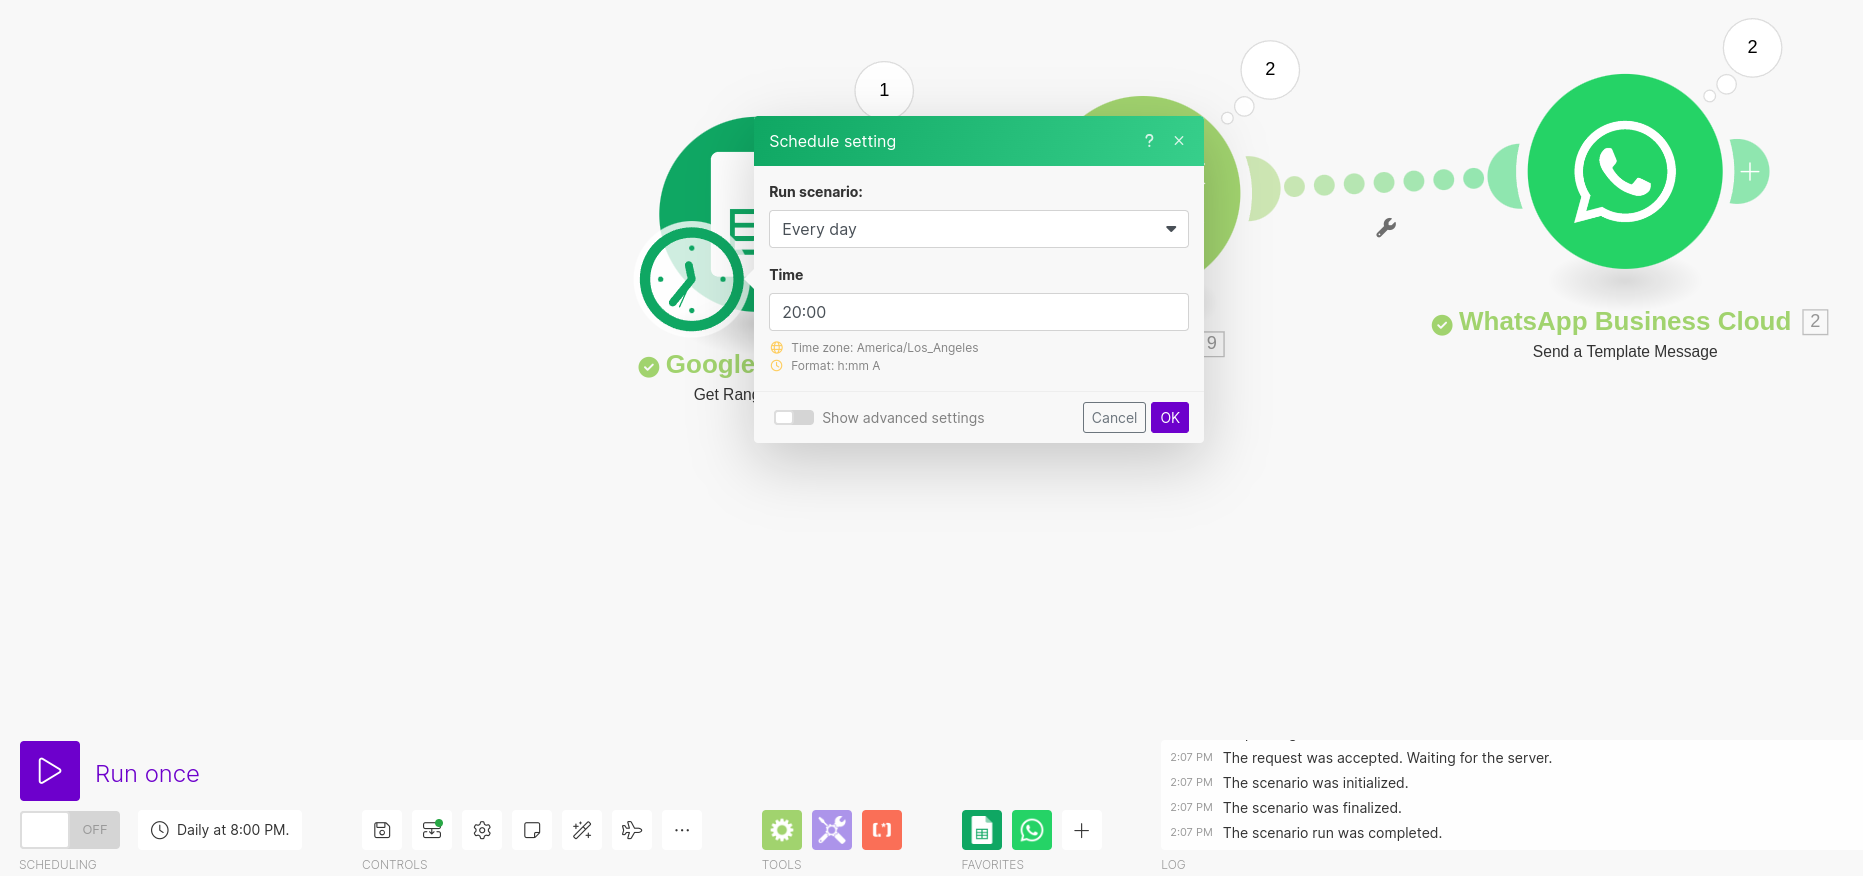
- Save and turn on the workflow.