Multi-platform Integrations
Add Chatbots to Webflow Websites
Discover how to effortlessly integrate a chatbot widget into your Webflow Website.
Step 1: Configure Your Chat Data Chatbot
Start by logging into your Chat Data account. If you're a new user, you can register for a free account here. Once logged in, build your chatbot by adding your knowledge sources. You can use various formats like documents, text snippets, web pages, or Q&A pairs to create your chatbot's knowledge base.
Need assistance with setting up your Chat Data chatbot? Check out our comprehensive setup guide.
Step 2: Retrieve Your Chatbot's Embed Code
Visit our Website Integration Guide to obtain your unique Chat Data chatbot embed code. 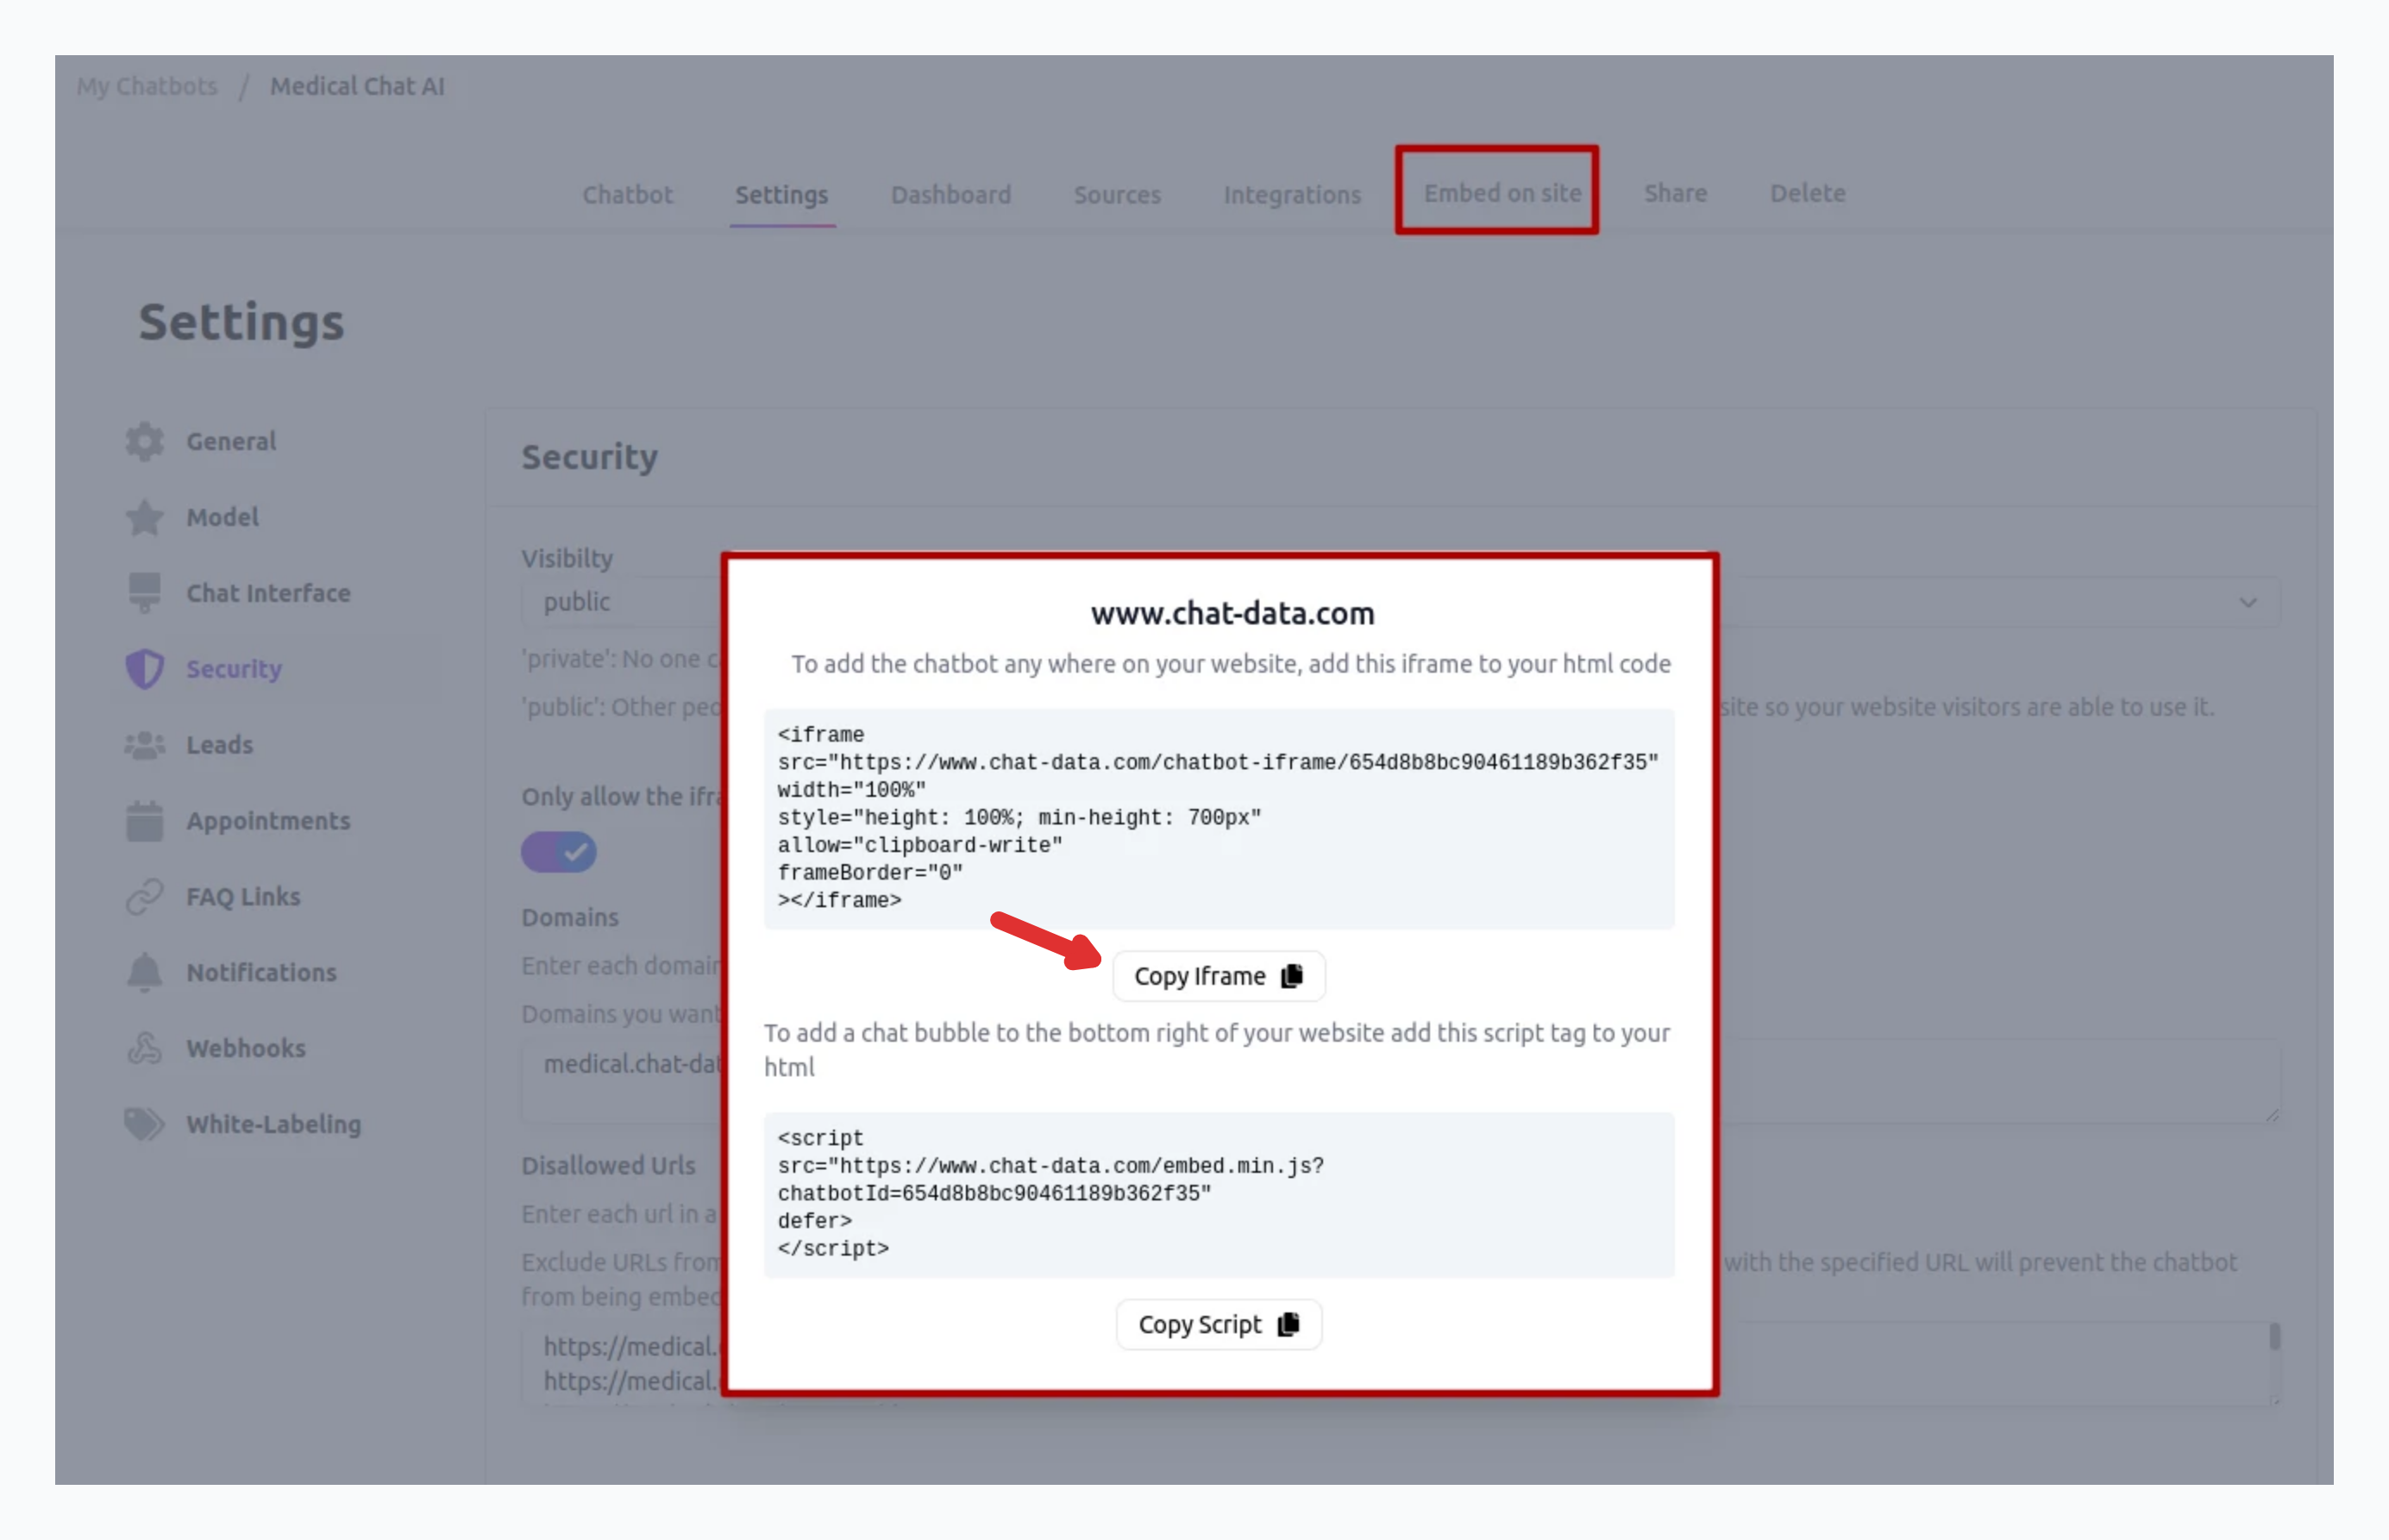
Once you've copied your iframe embed code, you can proceed to integrate it into your Webflow site.
Step 3: Create a Container for Your Chatbot Widget
Before embedding the code into your Webflow site, you need to create a container to display the widget. This ensures the widget appears in the correct location on your website and doesn't stretch across the entire page width.
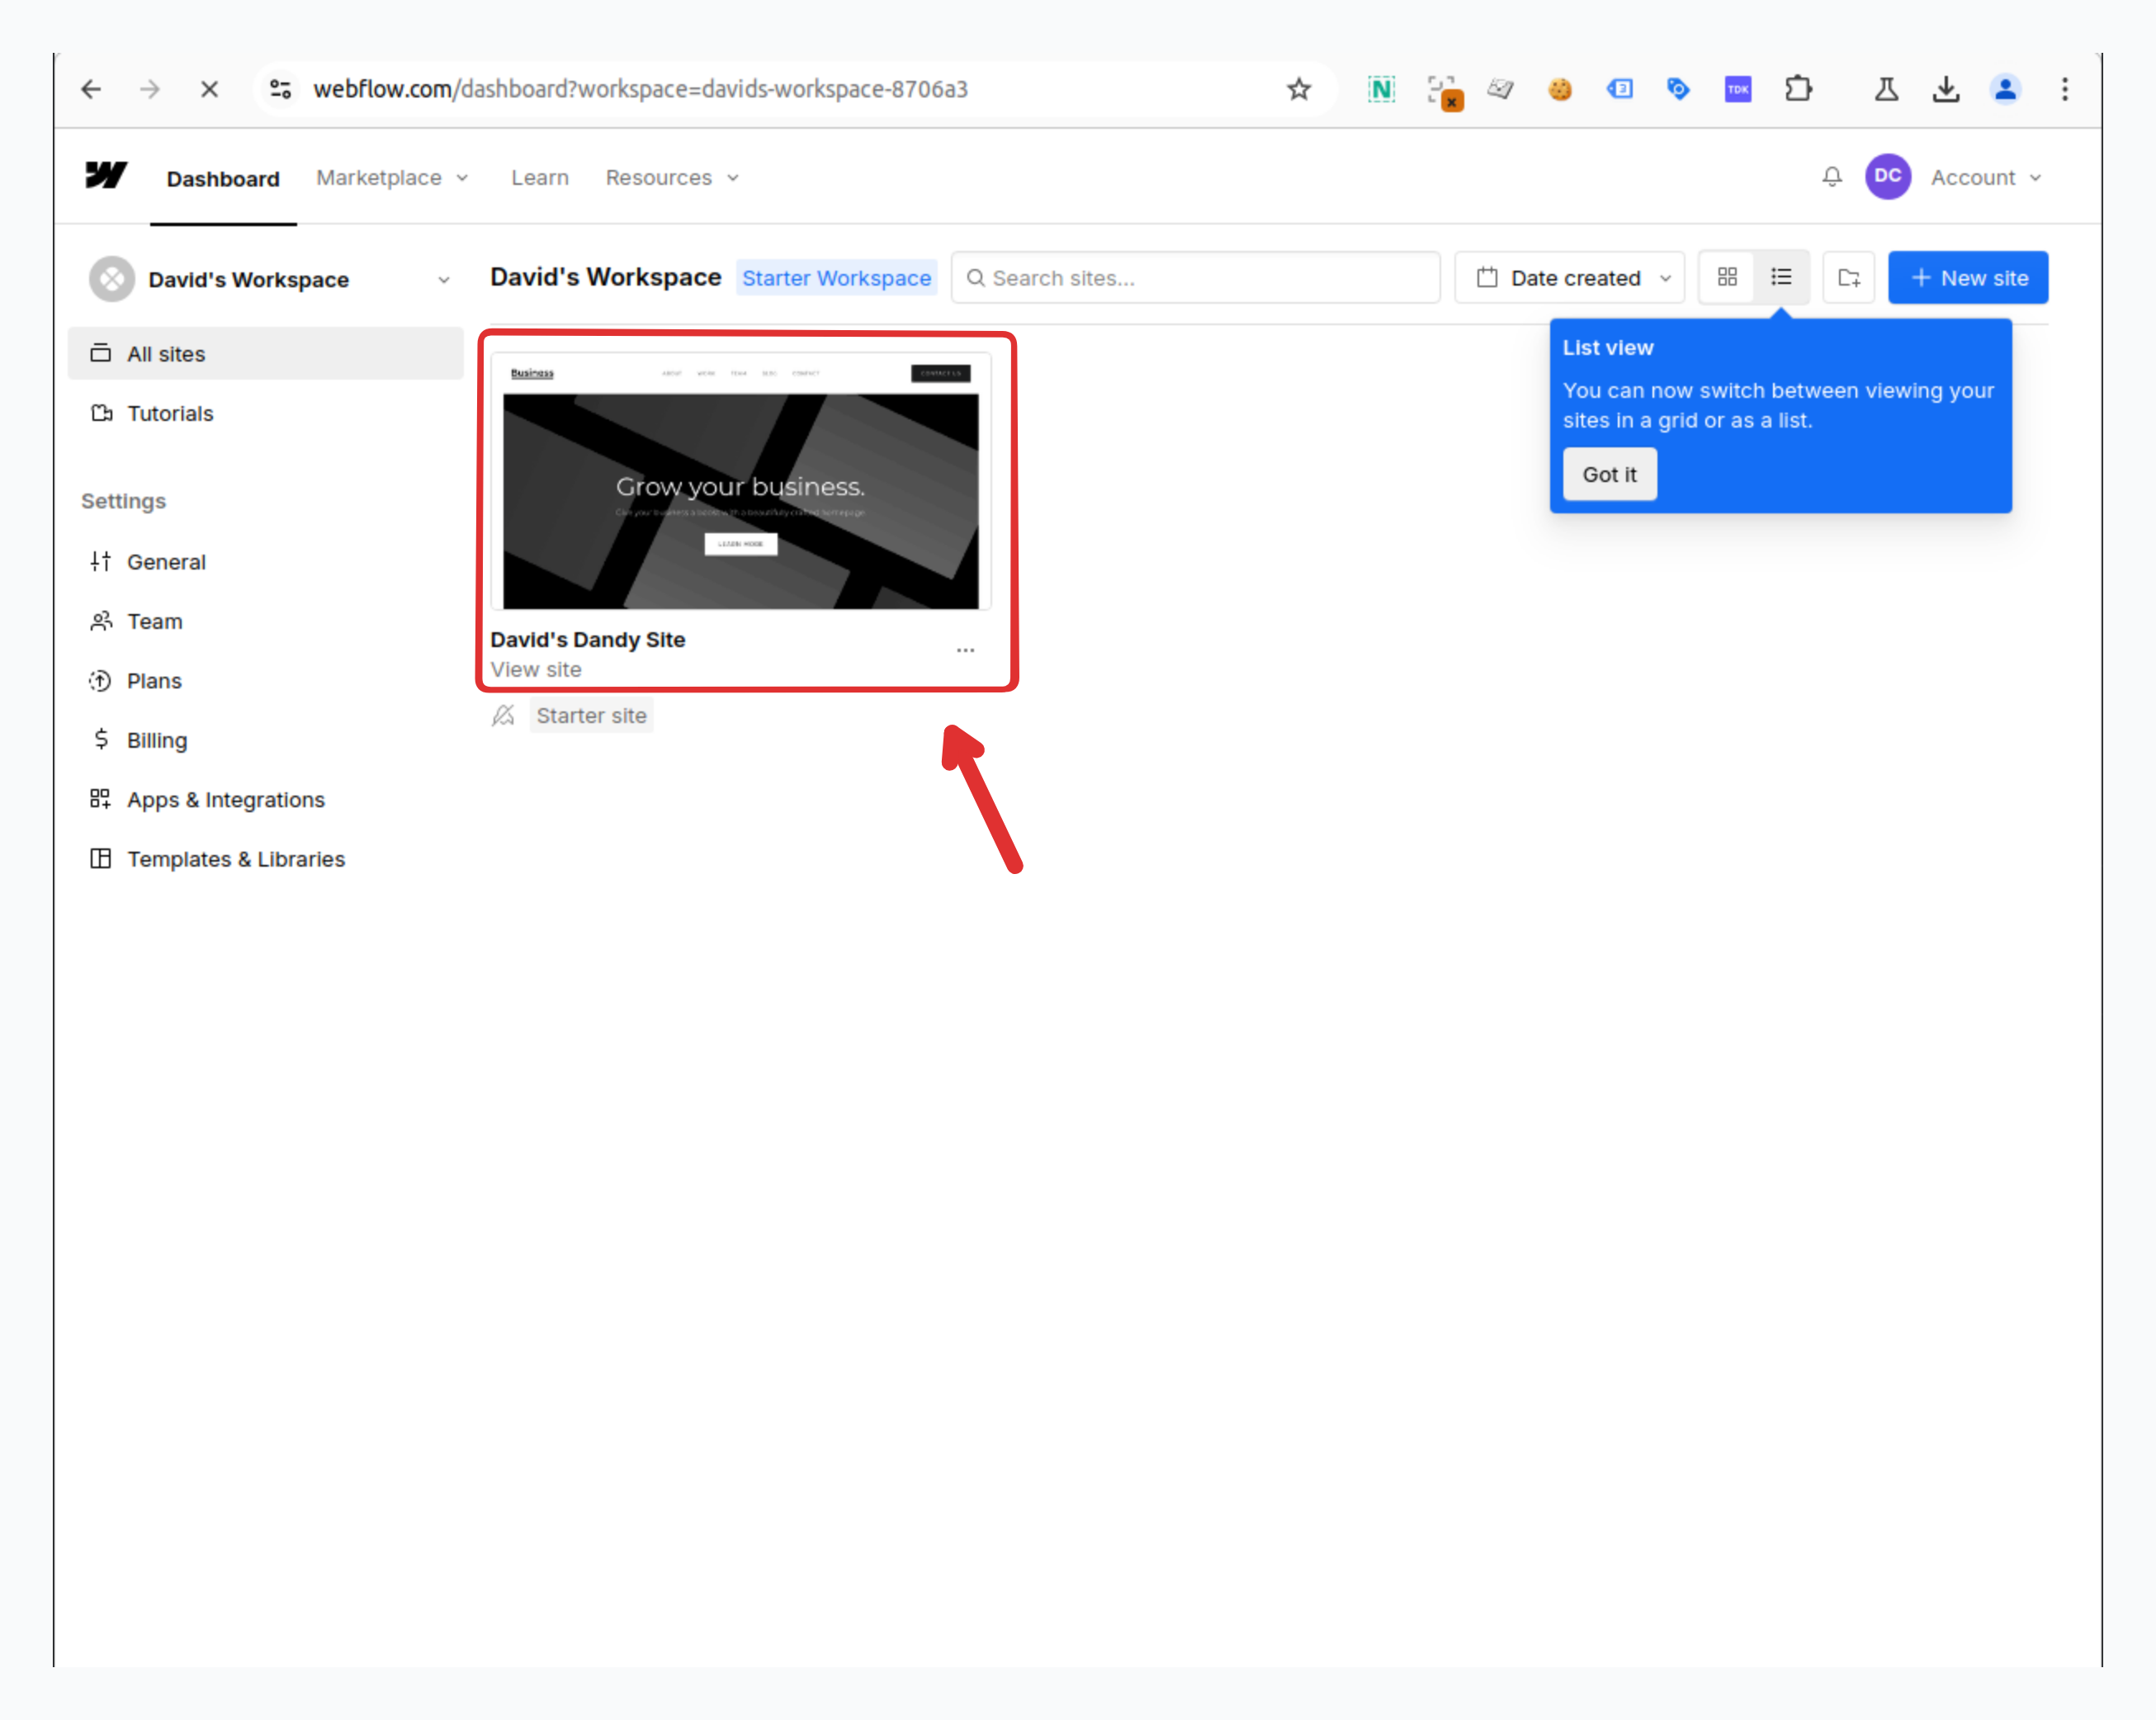
To create a container, log into your Webflow account and access your dashboard.
On your Webflow dashboard, locate your website projects, hover over the one you want to add the chatbot to, and click Open Designer.
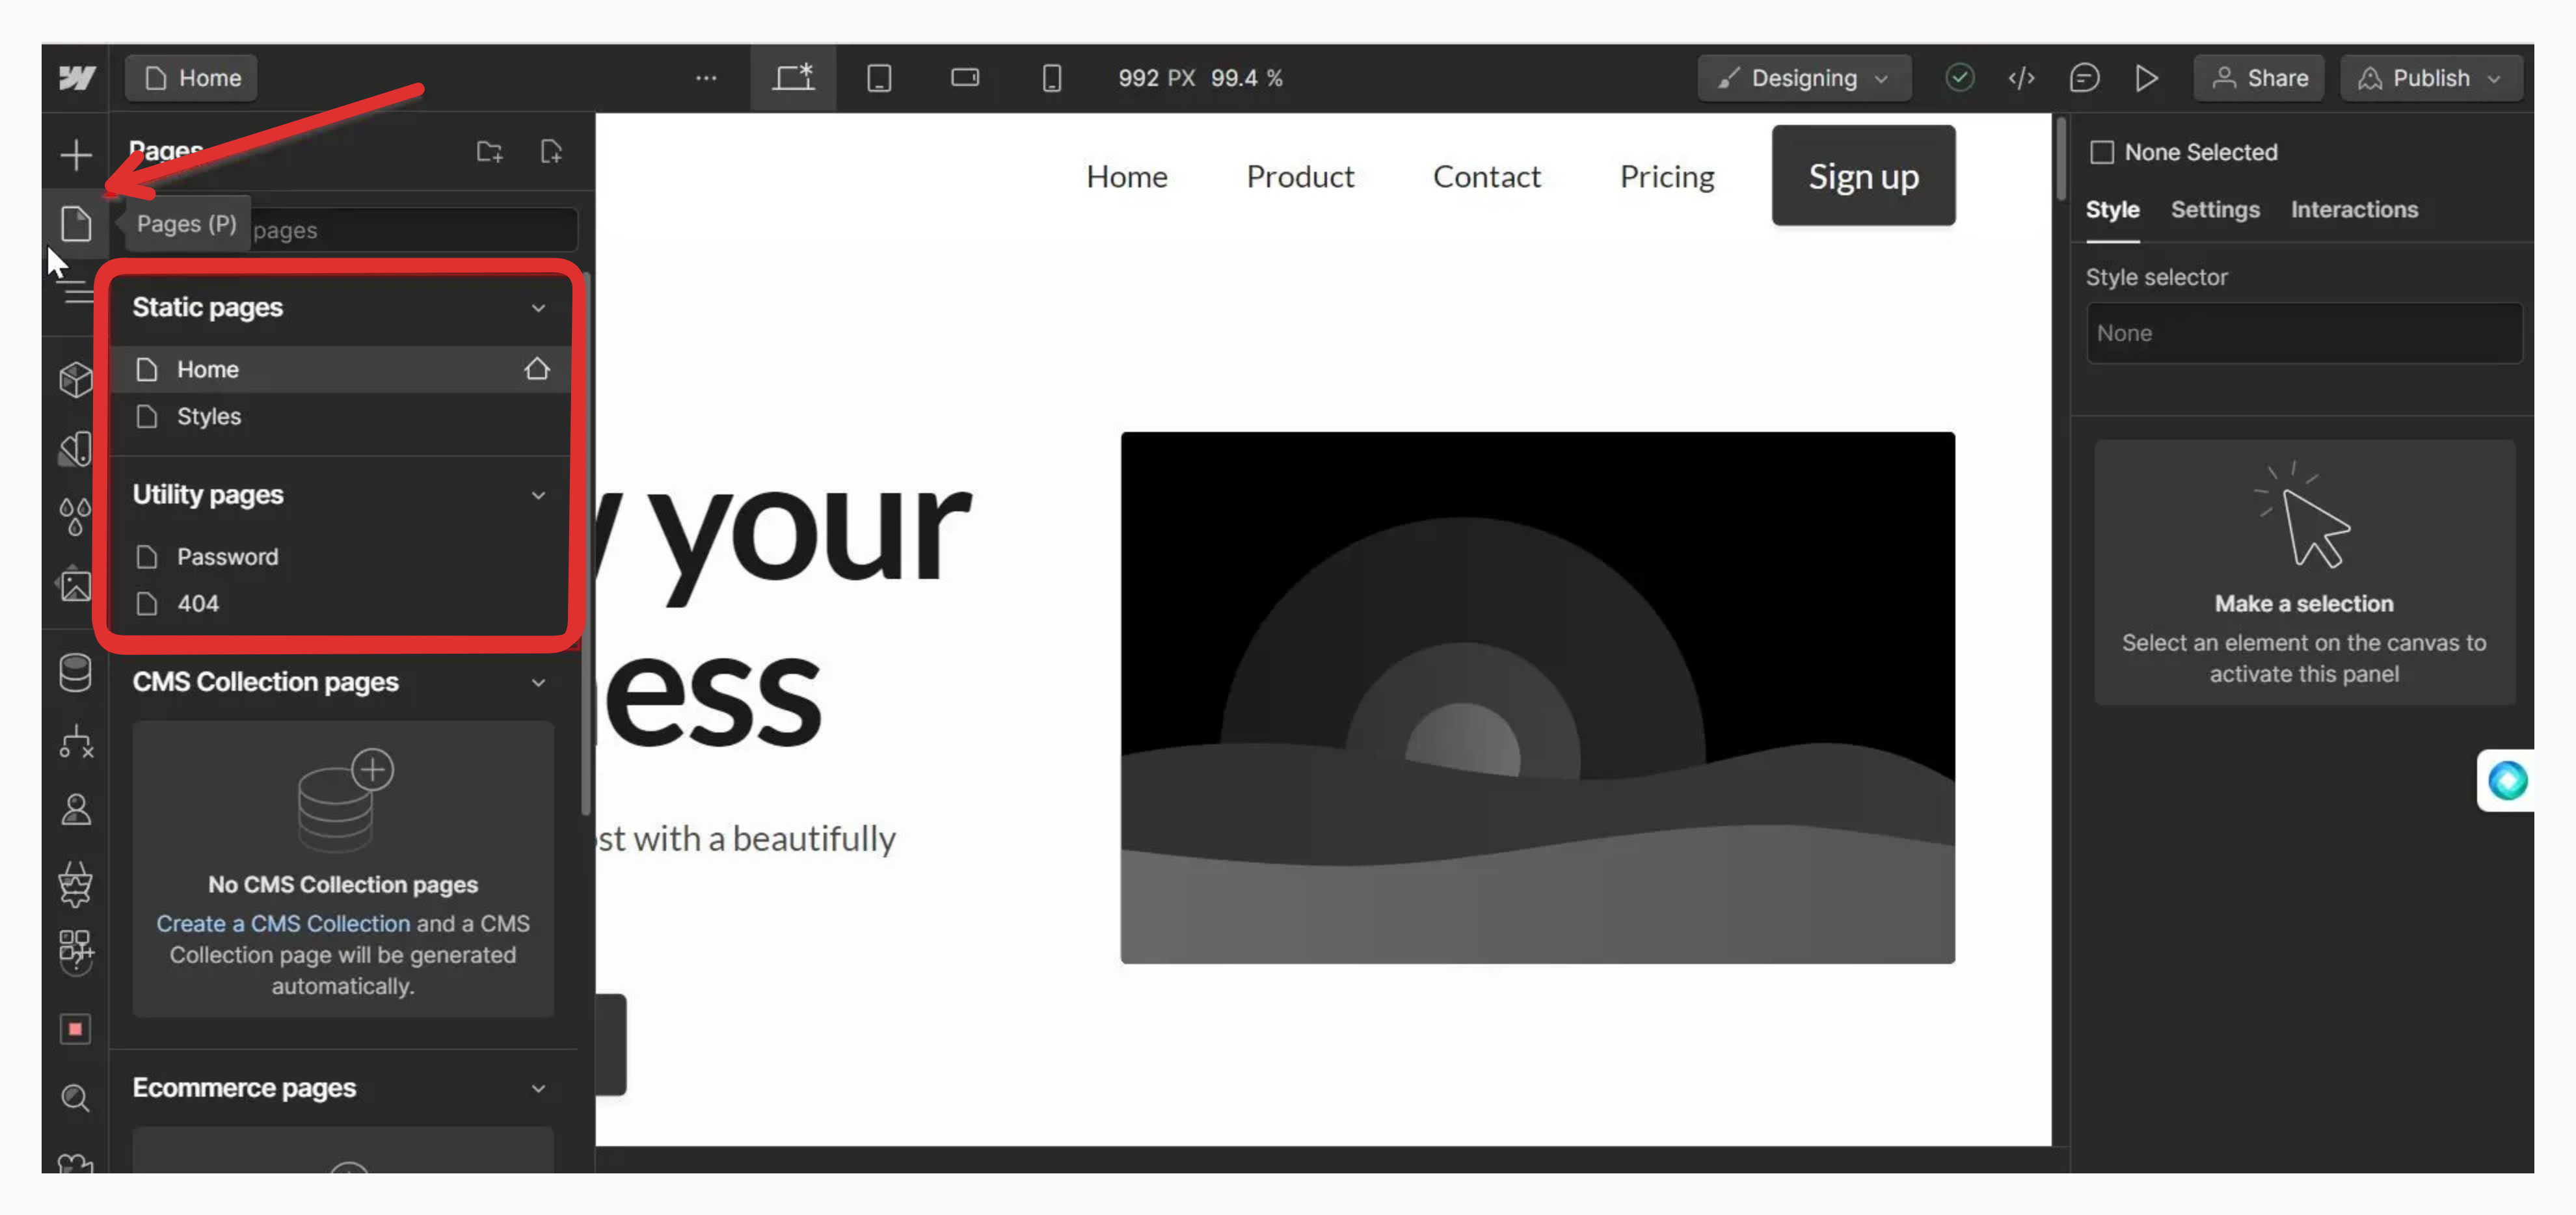
On the designer page, click the file icon (Pages) at the top left corner of the Webflow site designer and choose the page where you want to embed the chatbot.
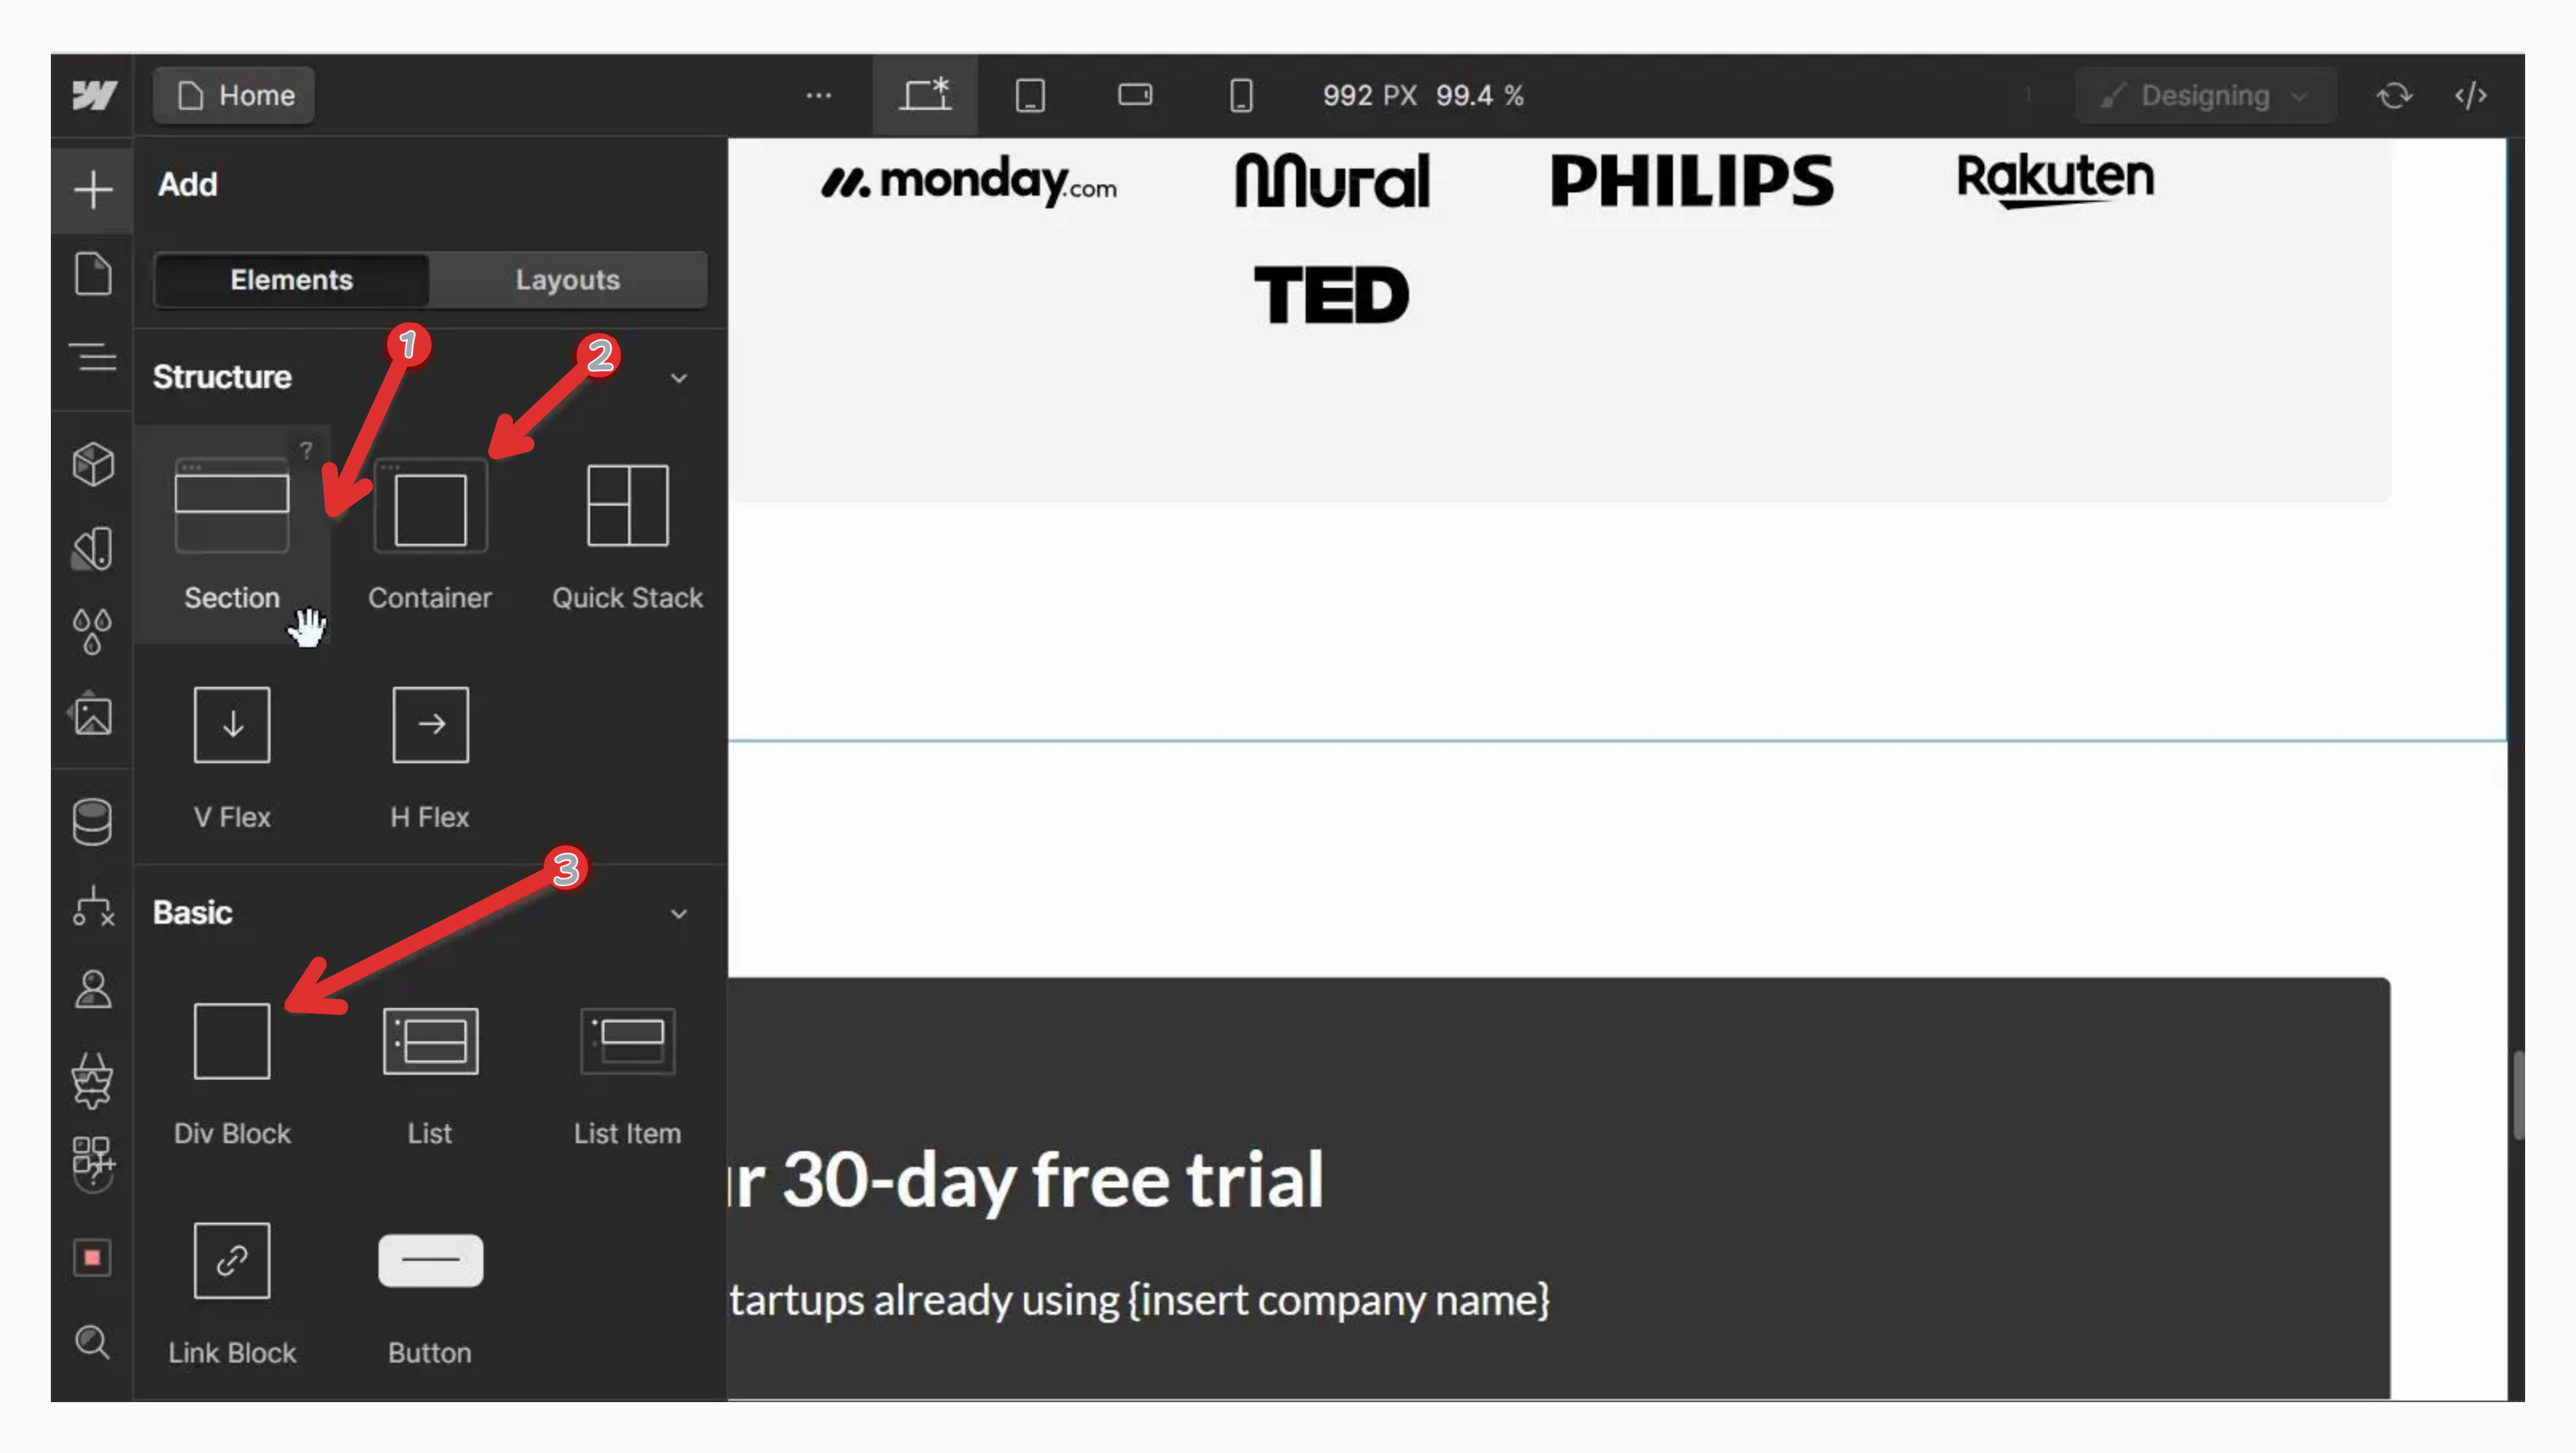
After selecting the page, click the Plus button (Add elements) at the top left corner of the designer screen to view a list of available elements.
Drag the Section element to the area of the page where you want to place your chatbot.
Drag a Container element into the Section.
Drag a Div element into the Container and adjust the Div's size to ensure the bot is contained within it and doesn't span the entire page width.
Scroll down the list of elements and drag the Embed element into the Div on the Webflow canvas.
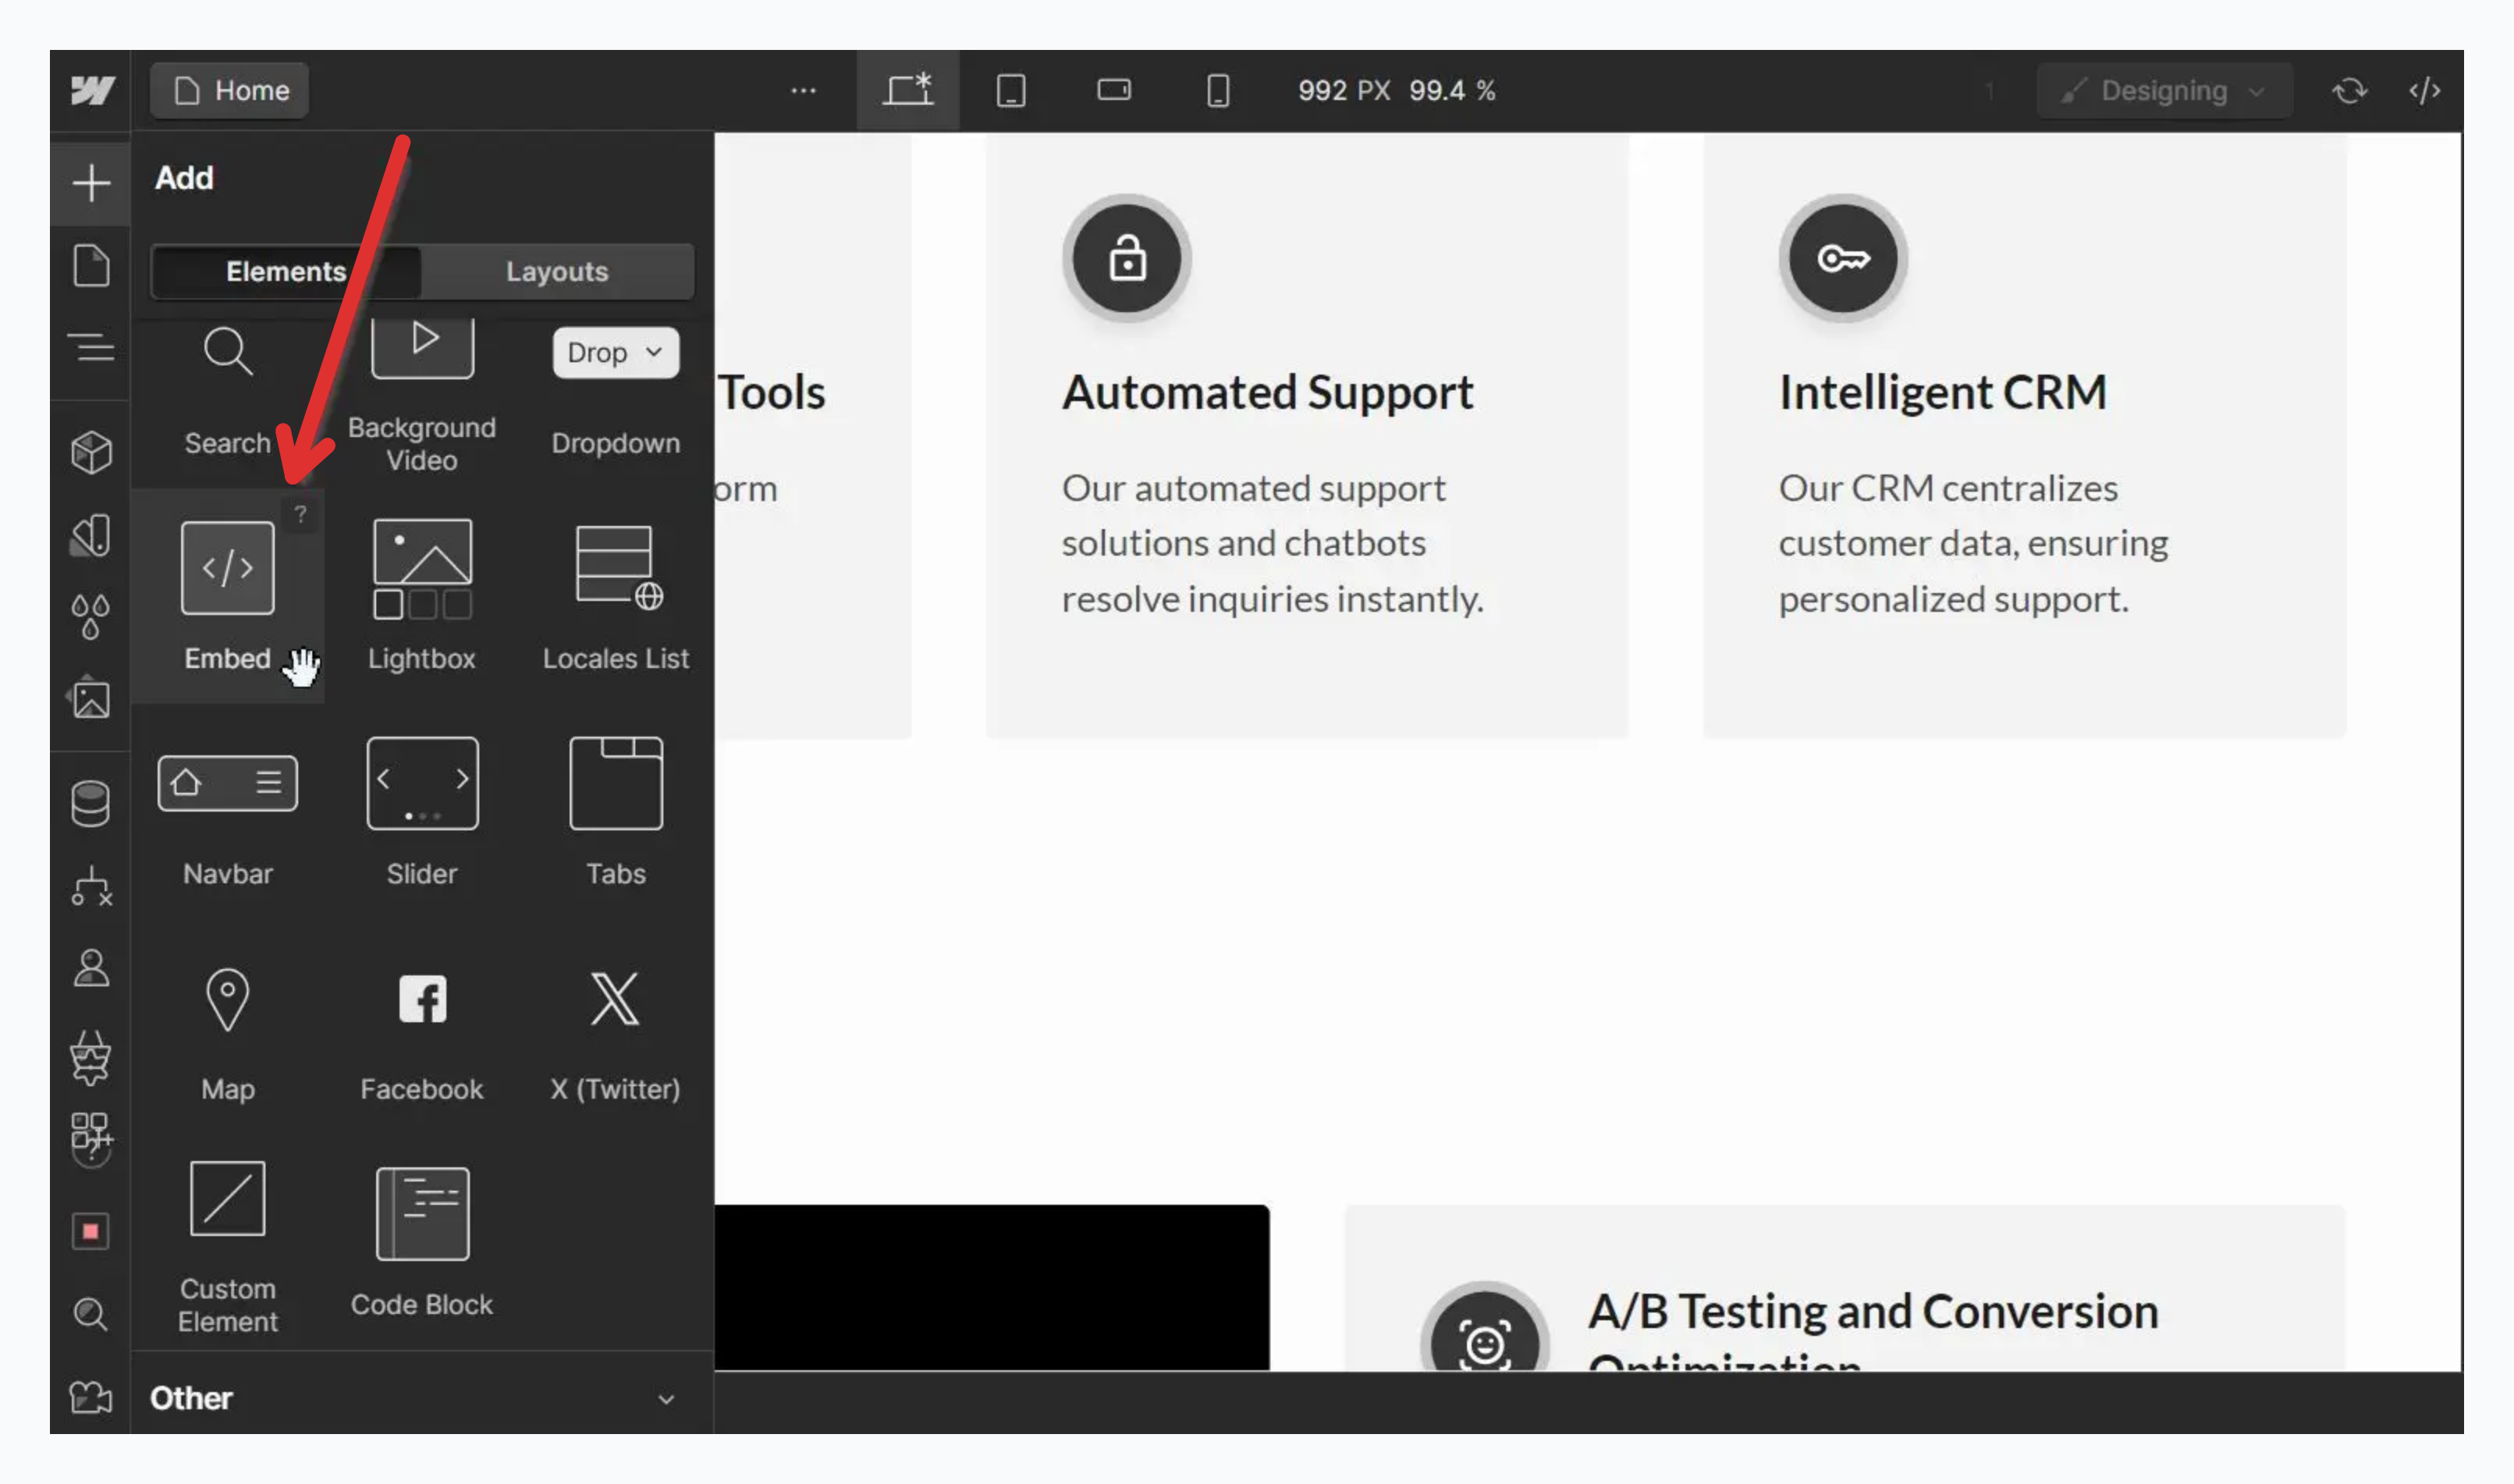
Select and double-click the Embed element to open the HTML Embed code editor.
Paste the Chat Data chatbot embed code from Step 2 and click Save & Close.
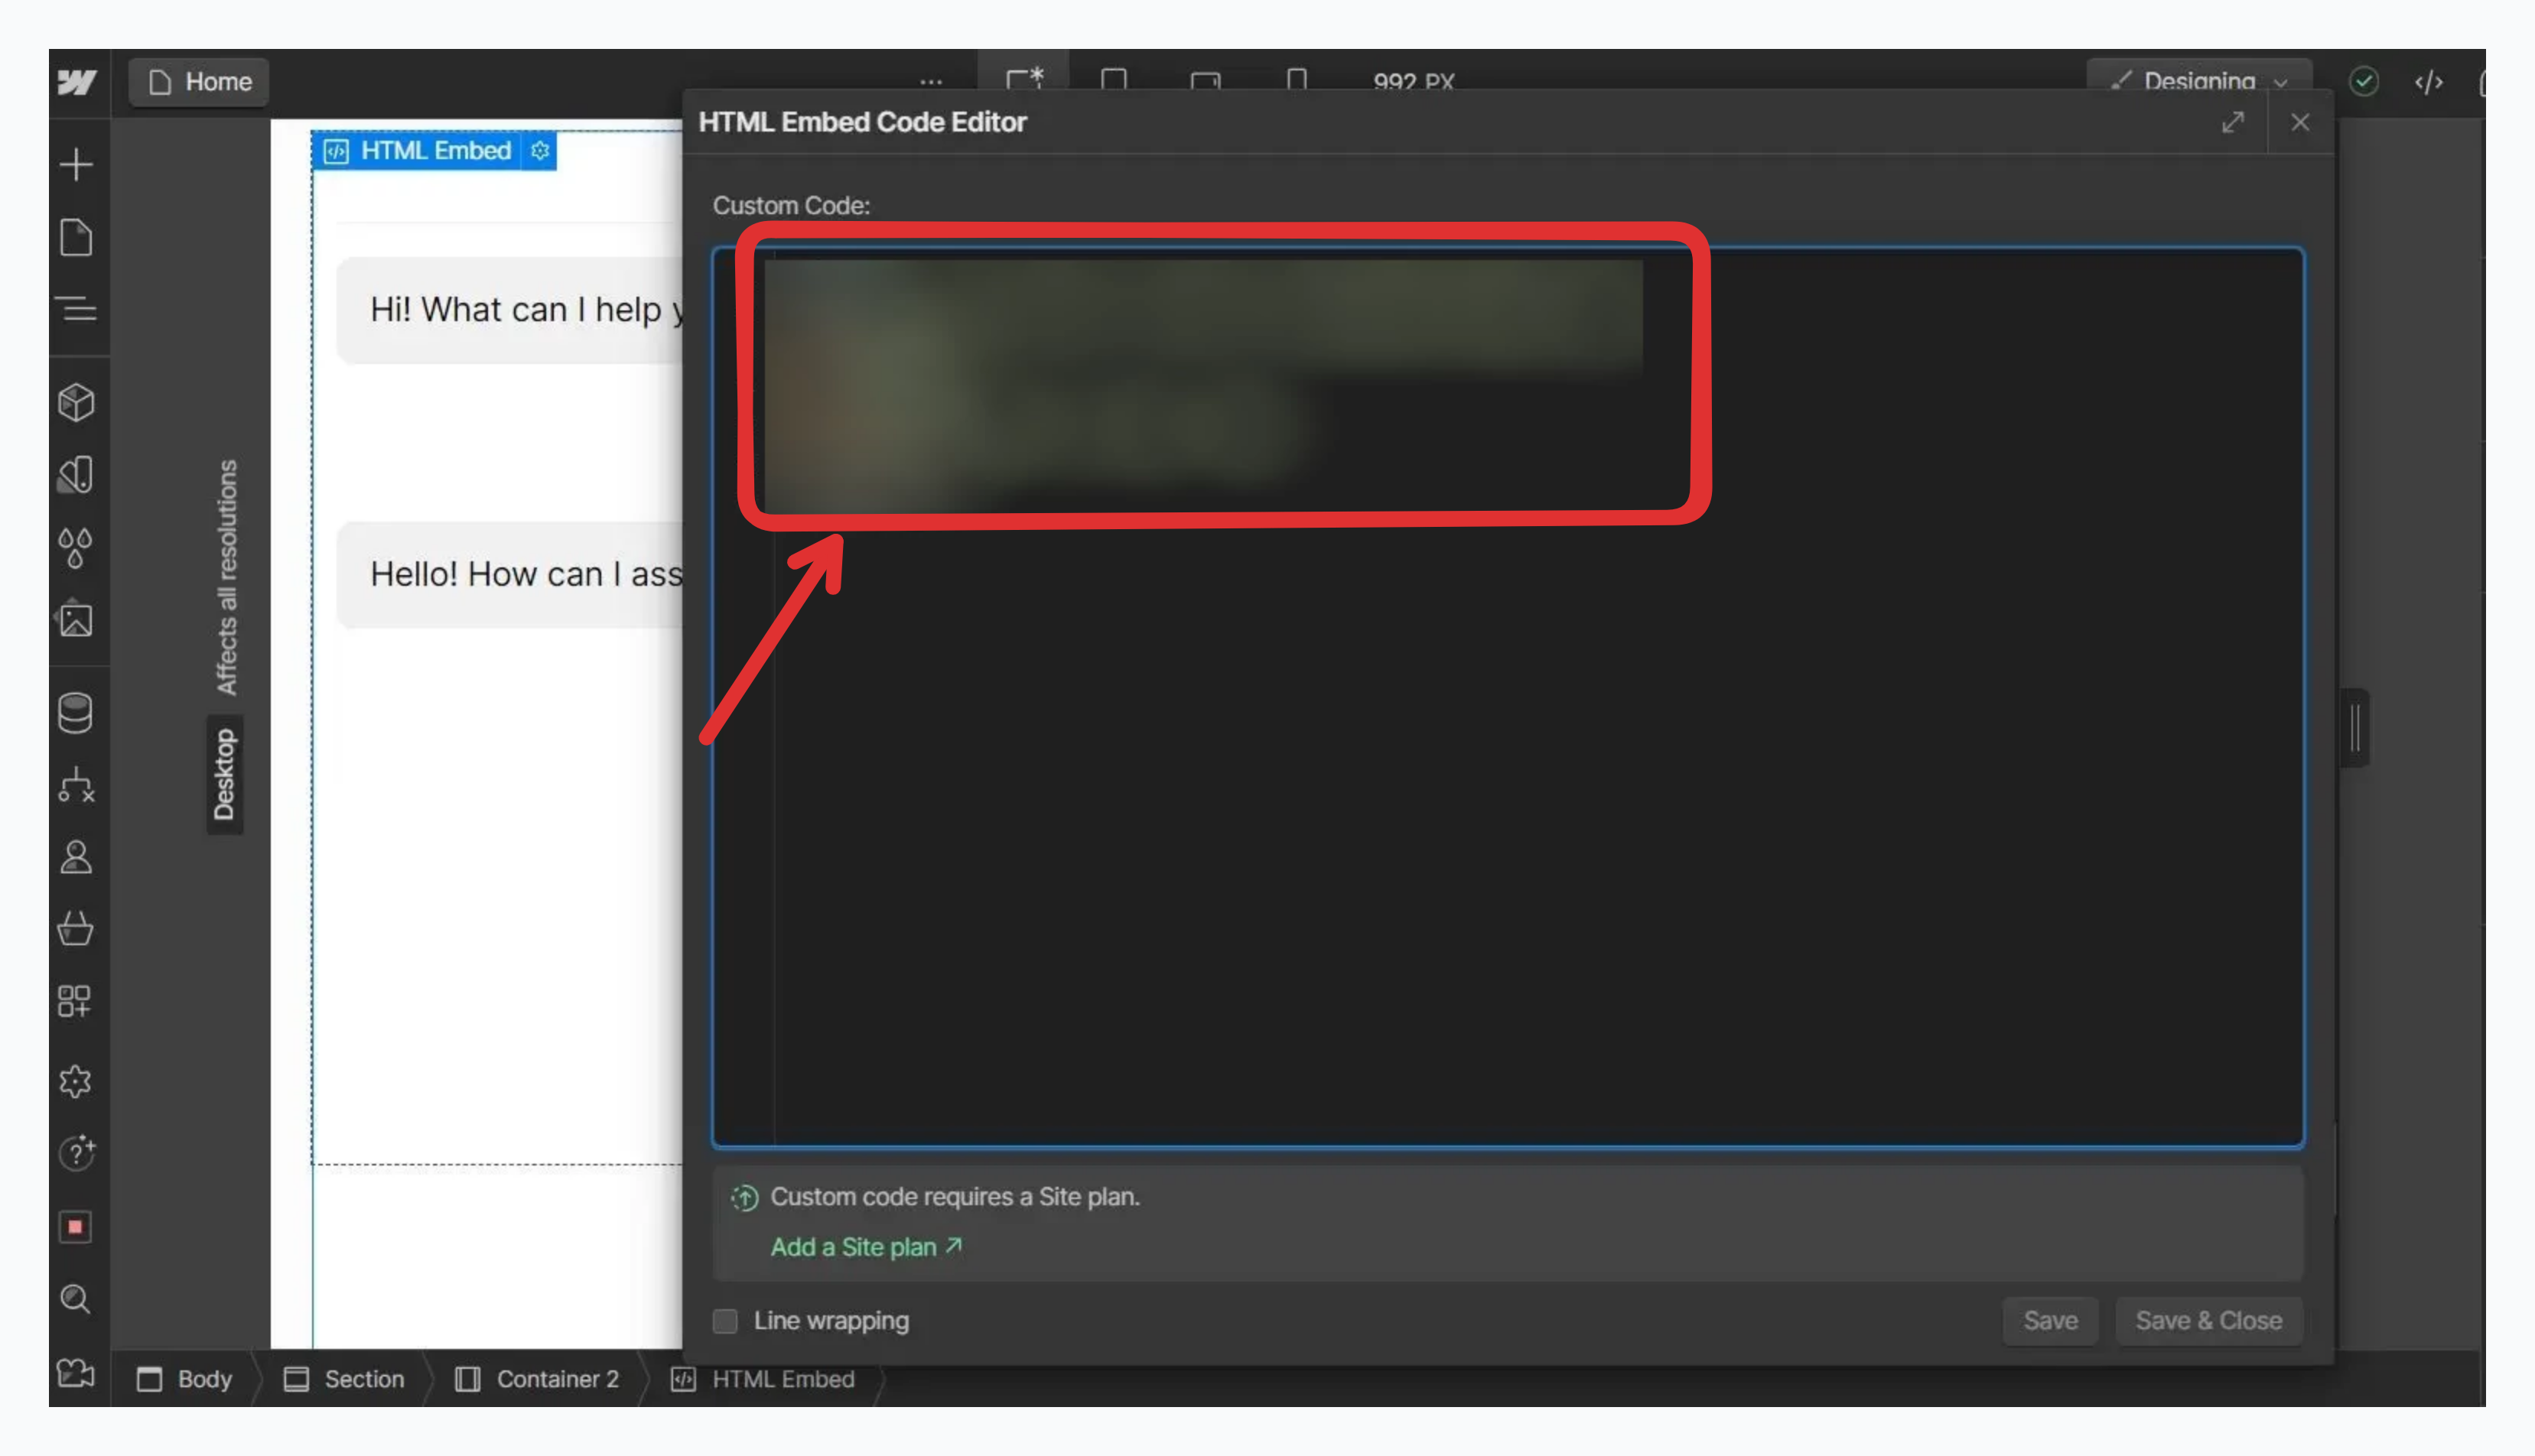 If everything is set up correctly, you should see a preview of the chatbot in the live preview of your Webflow website within the designer.
After following these steps, your chatbot will be ready to assist your website visitors!
If you encounter issues with managing the dimensions of your Embed and chatbot element, it's a common challenge. Webflow components can take some time to master. You can refer to this official Webflow documentation on the Embed element to learn more about embedding a third-party tool like the Chat Data chatbot on a Webflow website.
Great work! Your Chat Data chatbot is now successfully integrated with your Webflow website.
Tip: Want to modify your chatbot's look? Visit your Chat Data dashboard, select your bot, go to Settings, and look for Chat Interface in the left menu to access all customization options.