Multi-platform Integrations
Add Chatbots to Wix Websites
Learn how to easily add a chatbot widget to your Wix Website.
Step 1: Set Up Your Chat Data Chatbot
First, you'll need to access your Chat Data account. New users can create a free account here. After logging in, create your chatbot by adding your knowledge sources. You can use various formats including documents, text excerpts, web pages, or Q&A pairs to build your chatbot's knowledge foundation.
Need guidance on creating your Chat Data chatbot? Check out our comprehensive setup guide.
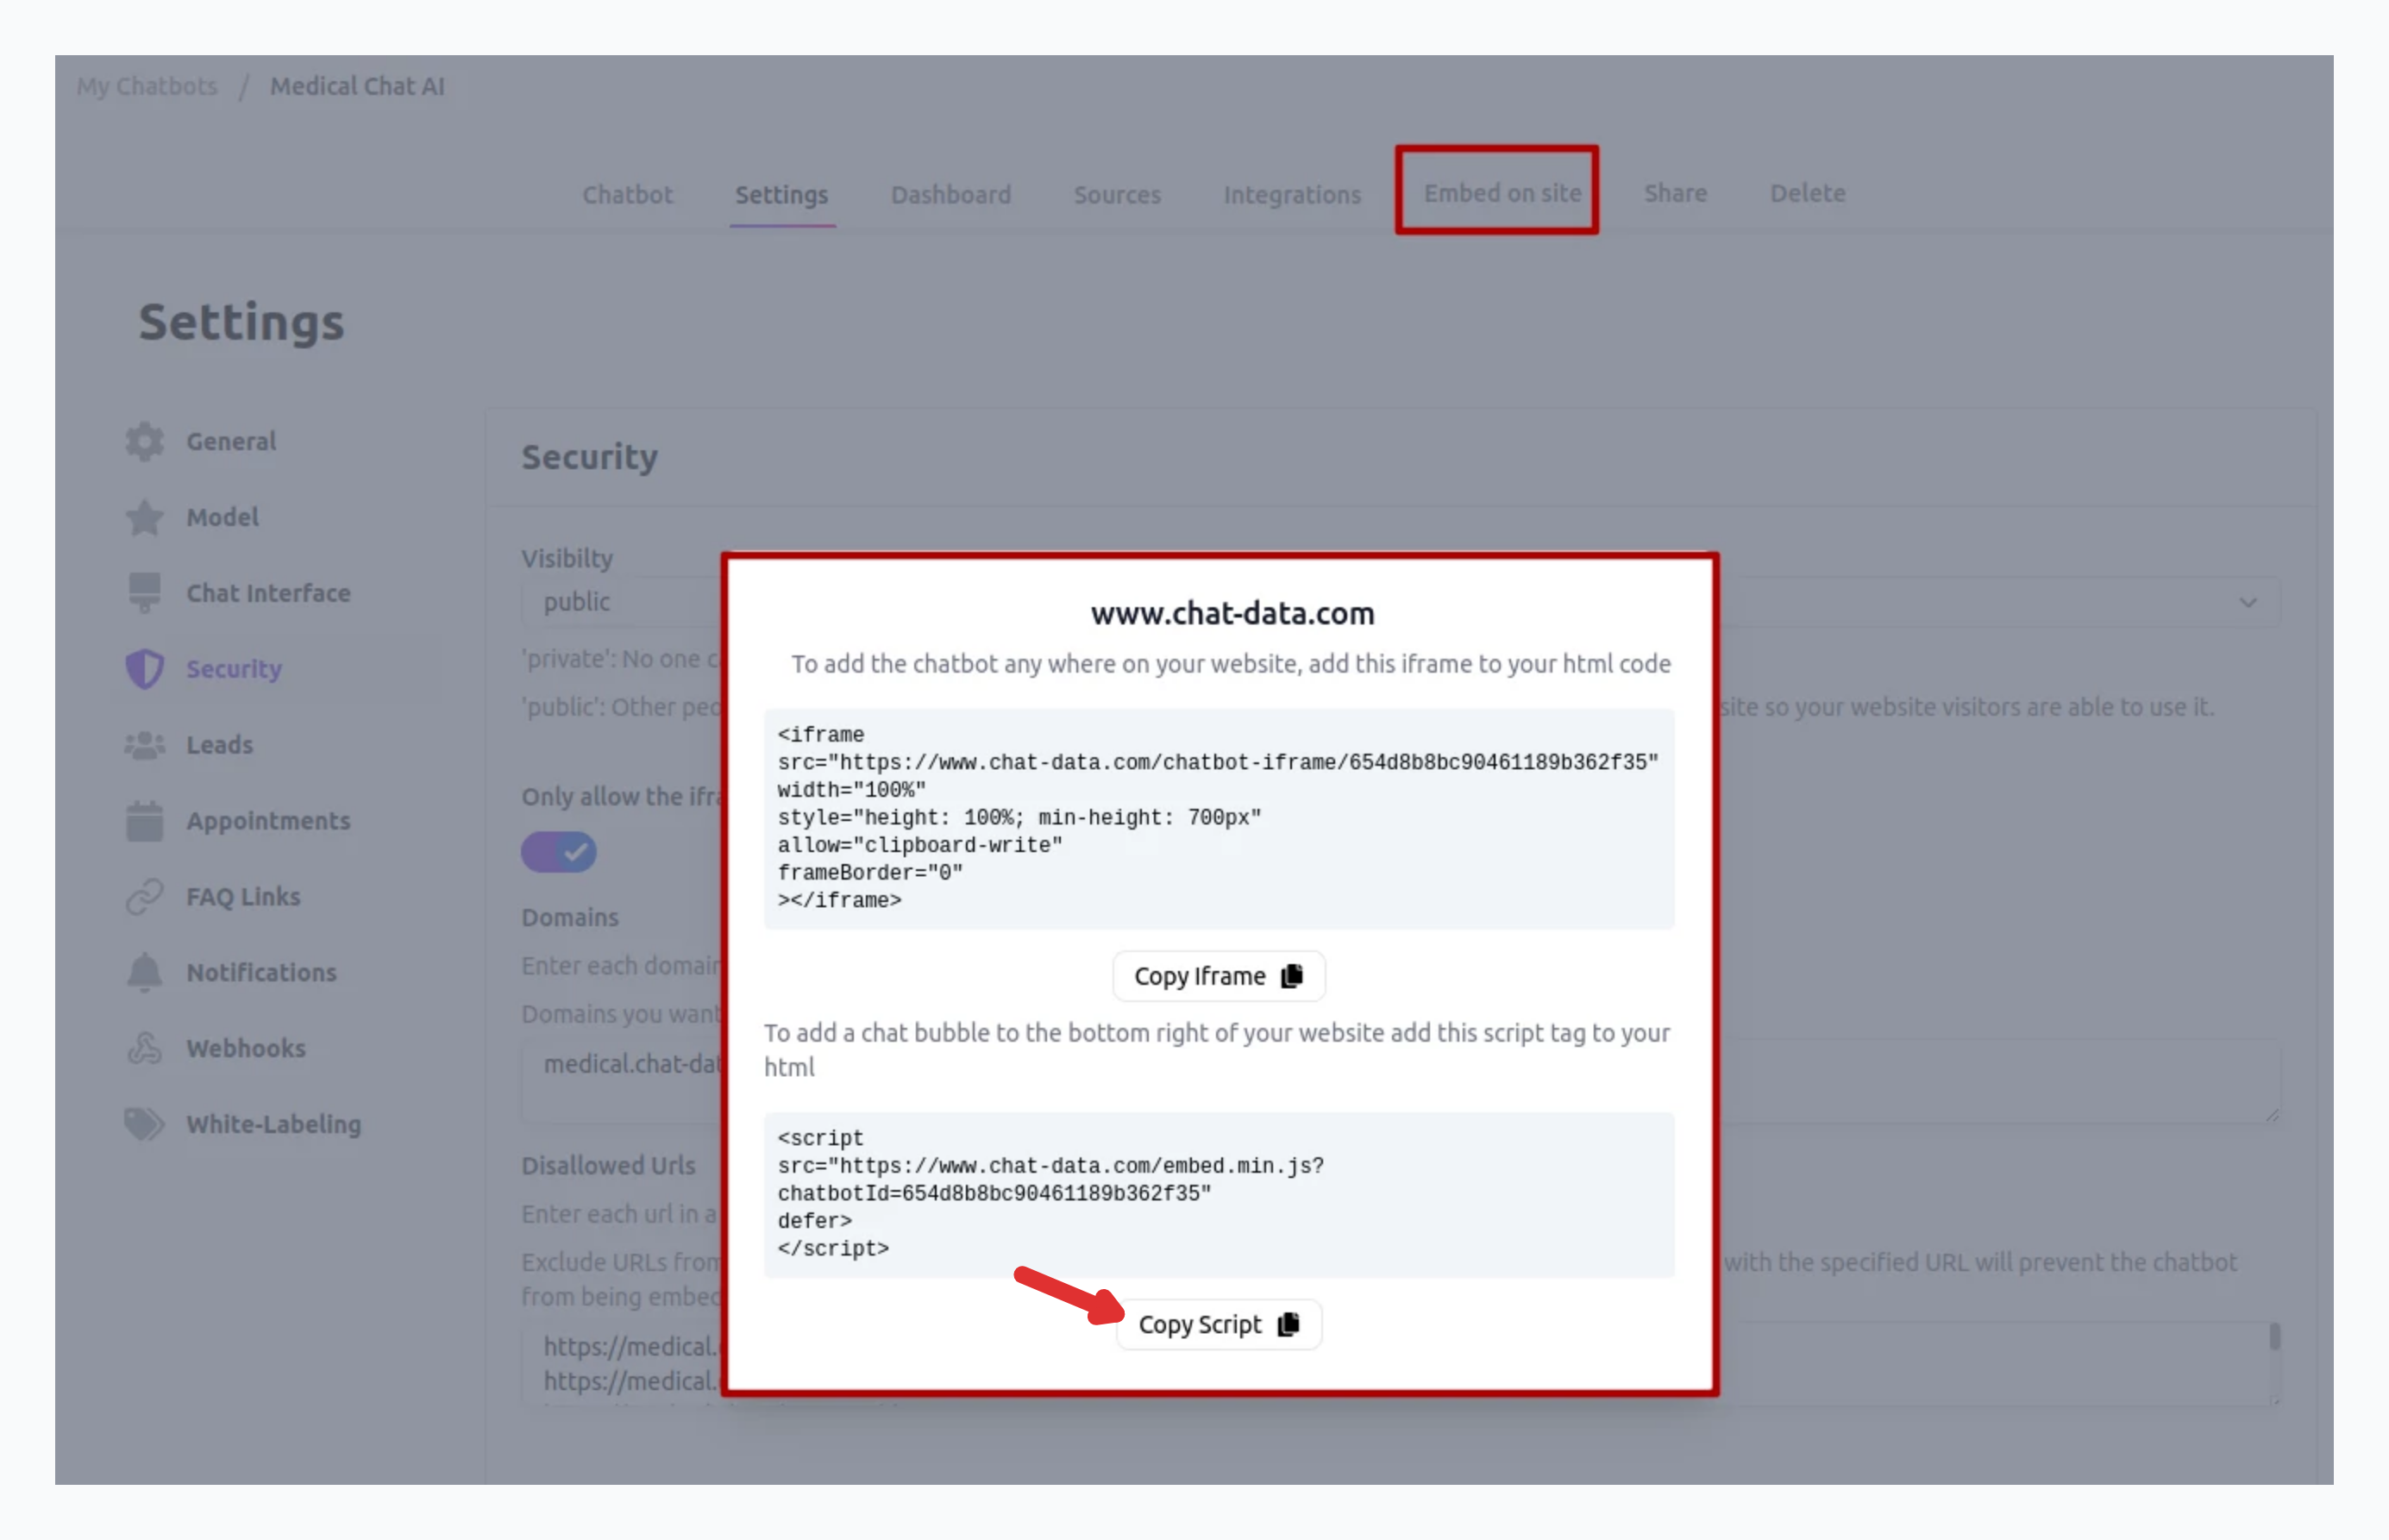
Step 2: Get Your Chatbot's Embed Code
Visit our Website Integration Guide to obtain your unique Chat Data chatbot embed code. 
Once you've copied your embed code, you're ready to add it to your Wix site.
Step 3: Add the Chatbot to Your Wix Website
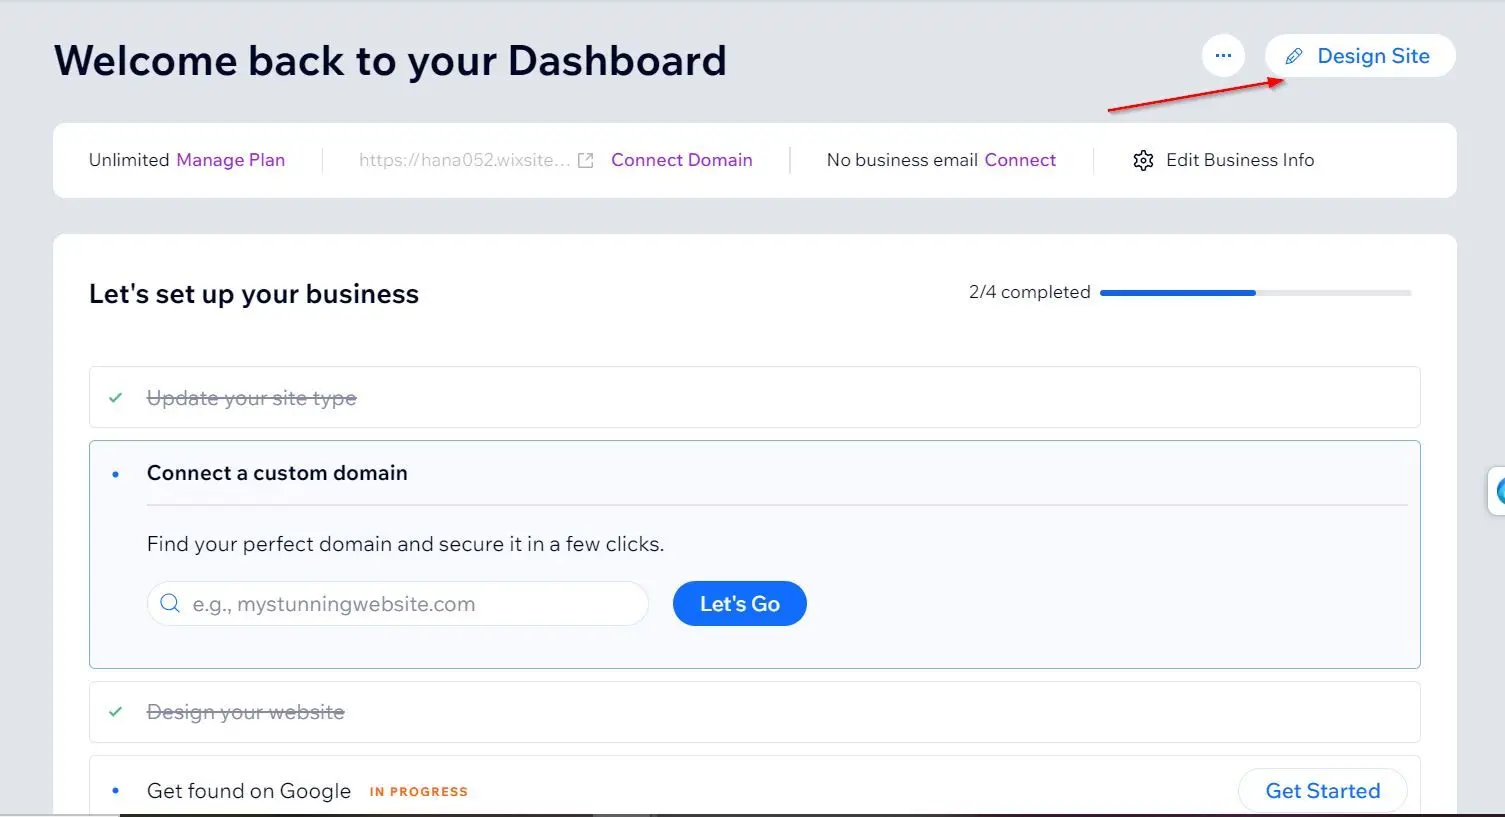
- Log into your Wix account and navigate to your dashboard.
- Look for and select Design Site in the upper right corner.

- Wait for the Wix website editor to display your site.
- Navigate to the area where you want your Chat Data chatbot to appear.
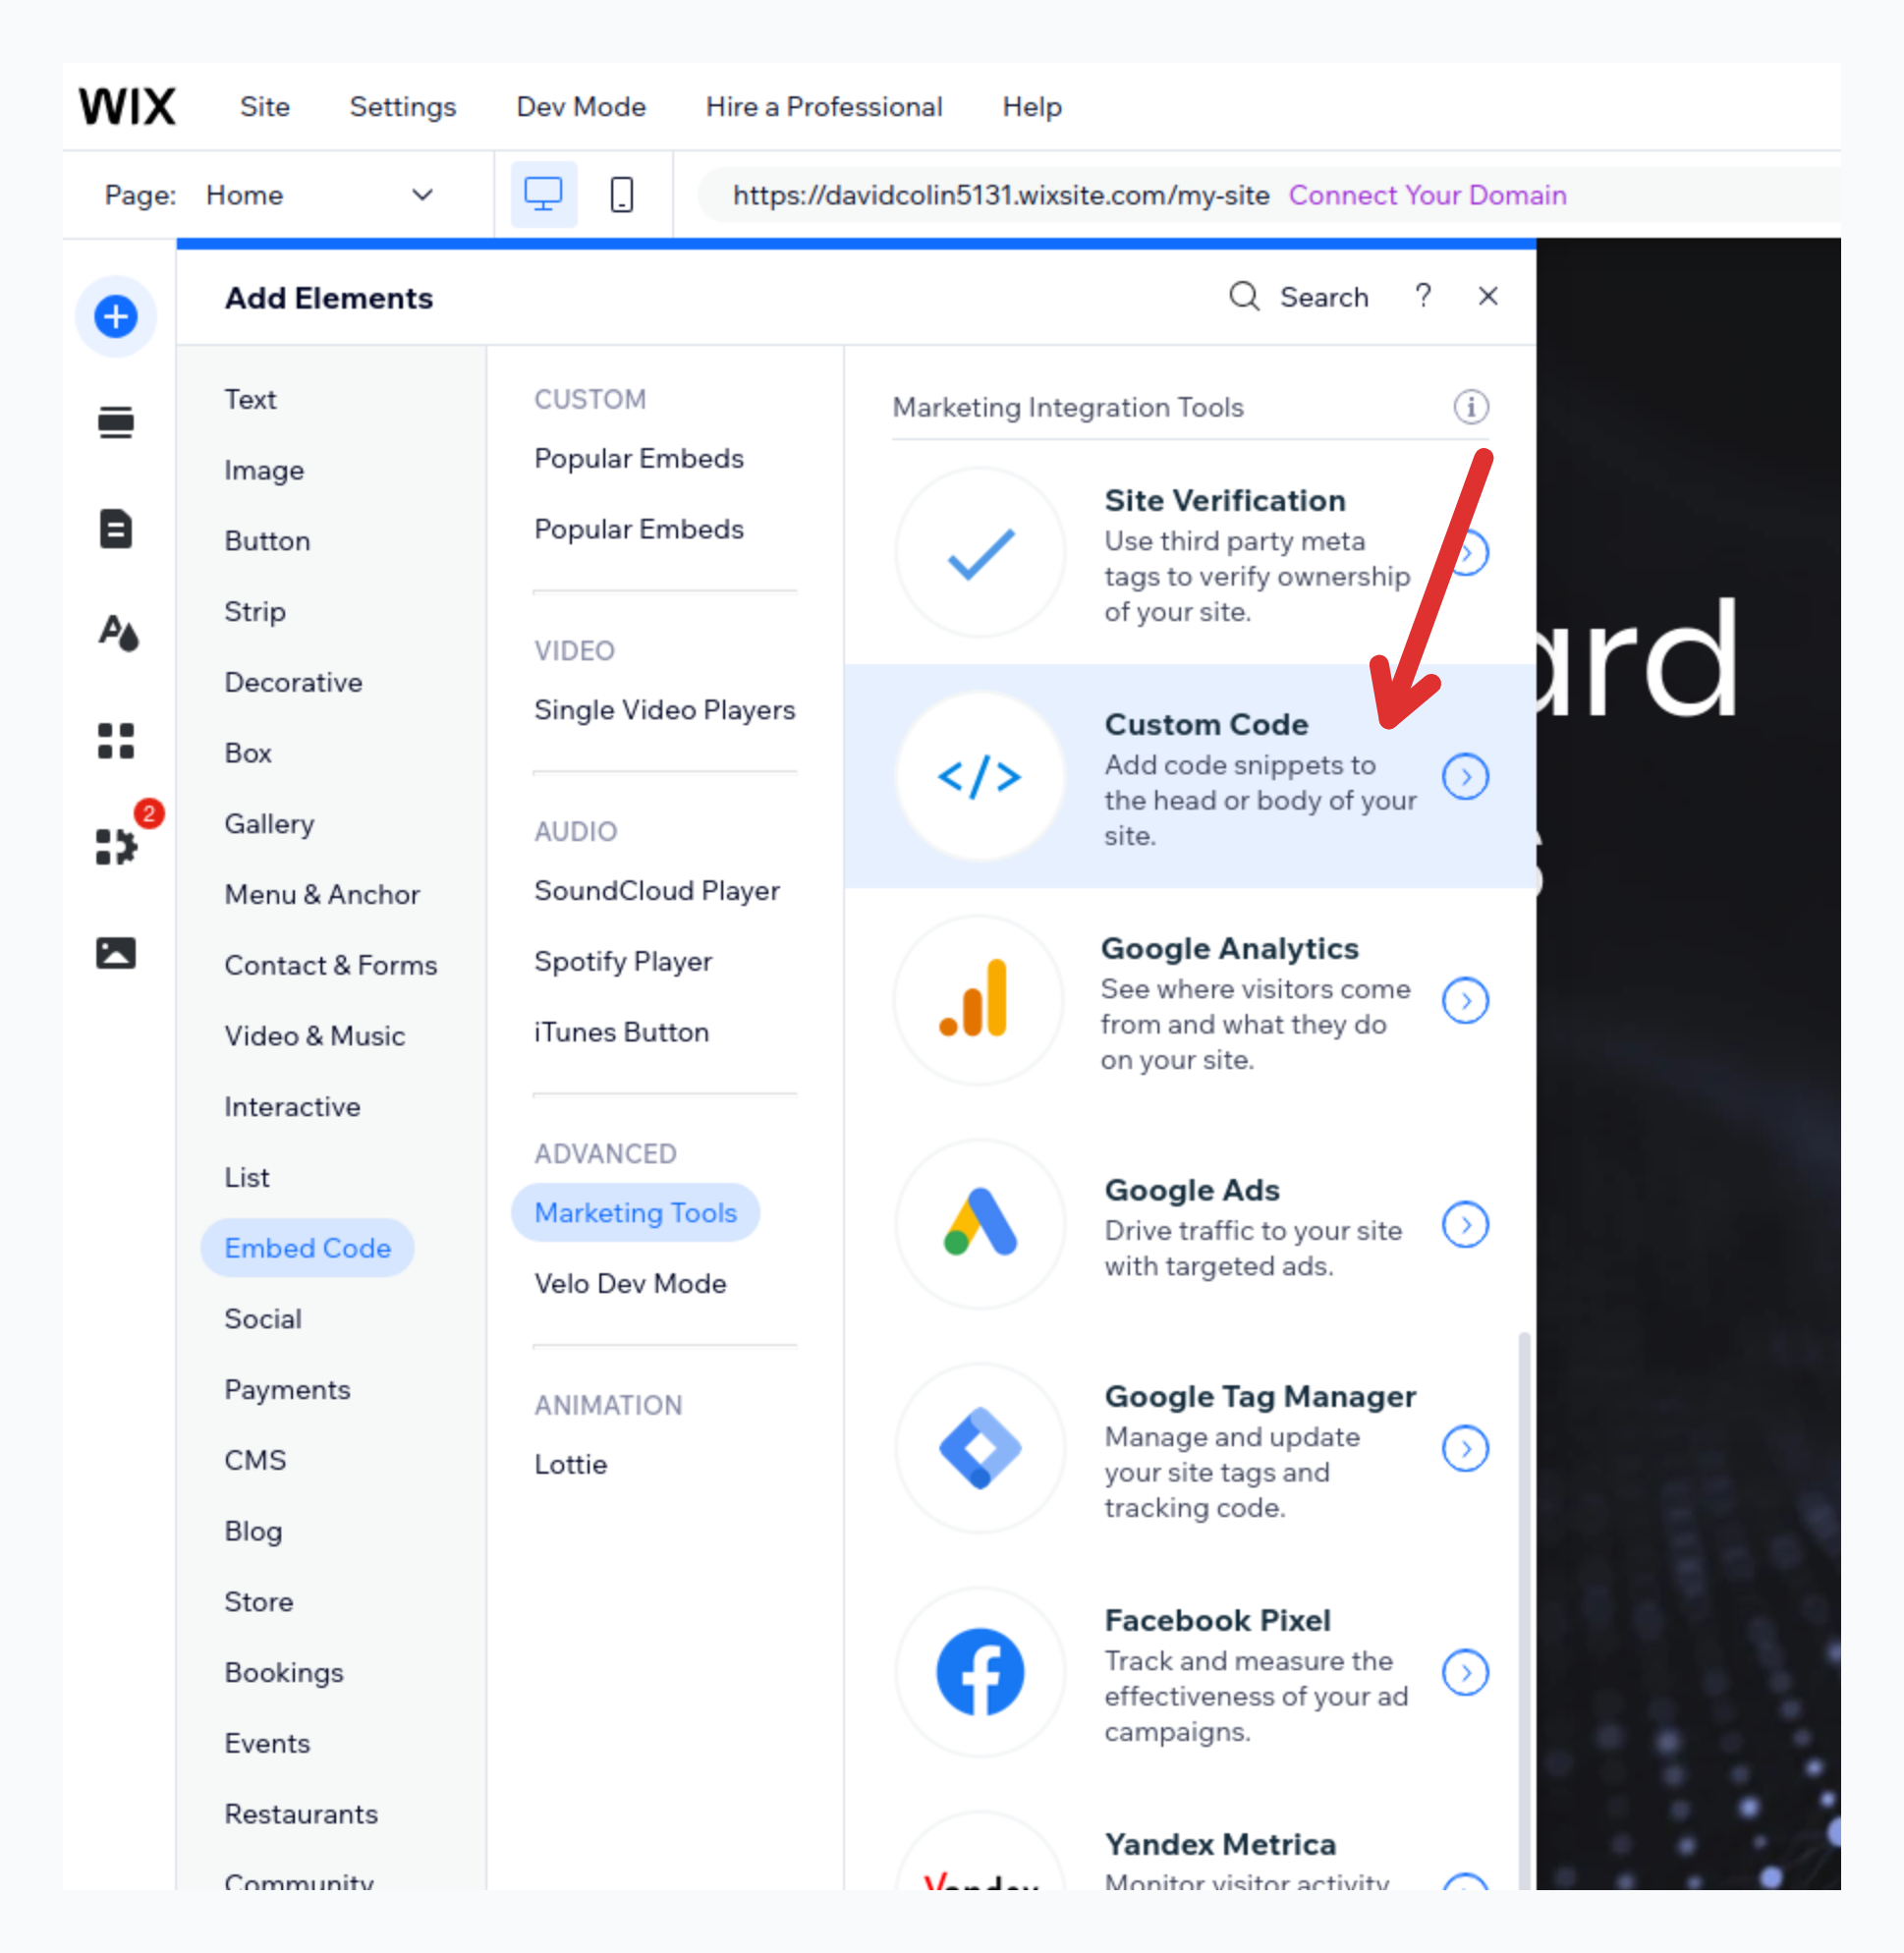
- Find and click the plus icon (Add Elements) on the editor's left panel.

- Navigate through Embed Code, then Popular Embeds, and select Custom Code.

- When the custom code window appears, select + Add Custom Code at the top right
- Insert your embed code into the provided editor.
- Give your custom code a descriptive name.
- Select your preferred page settings under Add Code to Pages.
- Specify the code placement using Place Code in.
- Select Apply. Test your site preview - you should now see the Chat Data chat icon floating on your page.
Great work! Your Chat Data chatbot is now successfully integrated with your Wix website.
Tip: Want to modify your chatbot's look? Visit your Chat Data dashboard, select your bot, go to Settings, and look for Chat Interface in the left menu to access all customization options.