Multi-platform Integrations
Slack Bot Integration
Transform your Slack workspace with Chat Data's seamless AI chatbot integration. Our platform offers a straightforward process to incorporate advanced AI capabilities directly into your Slack environment.
Setting up a Chat Data chatbot in your Slack channels takes just minutes and delivers immediate value. The chatbot enhances workplace efficiency by providing 24/7 automated assistance, handling routine questions, and accessing information on demand. With natural language processing abilities, it serves as a reliable digital assistant that helps streamline communication and boost team productivity across your organization.
Important Notes on Slack App Integration
- Each Slack workspace can accommodate only one Chat Data app installation at a time. When managing multiple chatbots, you'll need to select a single chatbot for integration with a particular Slack workspace. Note that installing a new Chat Data integration will automatically supersede any existing ones within the same workspace.
- A single Slack app integration offers unlimited workspace compatibility. You have the flexibility to deploy your chatbot across as many Slack workspaces as desired.
- In the channel, please use @chatbot to signal that you want to chat with the chatbot. When DMing the chatbot, you don't need to use @chatbot.
- Our chatbot remembers the previous conversation in the same thread. If you want to start a new conversation, please start a new thread in the channel or DM.
Here’s how to integrate a Chat Data chatbot into your Slack workspace:
Step 1: Create Your Custom AI Chatbot
Follow the Chatbot Creation section to create your chatbot based on your own needs.
Step 2: Locate the Slack Integration
Navigate to the Integrations tab in your chatbot menu. Click the Add to Slack button to start the integration process. A pop-up window will then appear, seeking authorization to integrate the chatbot with the selected Slack workspace. Authorize the Slack integration with the correct Slack workspace. You can check the following screenshot for reference: 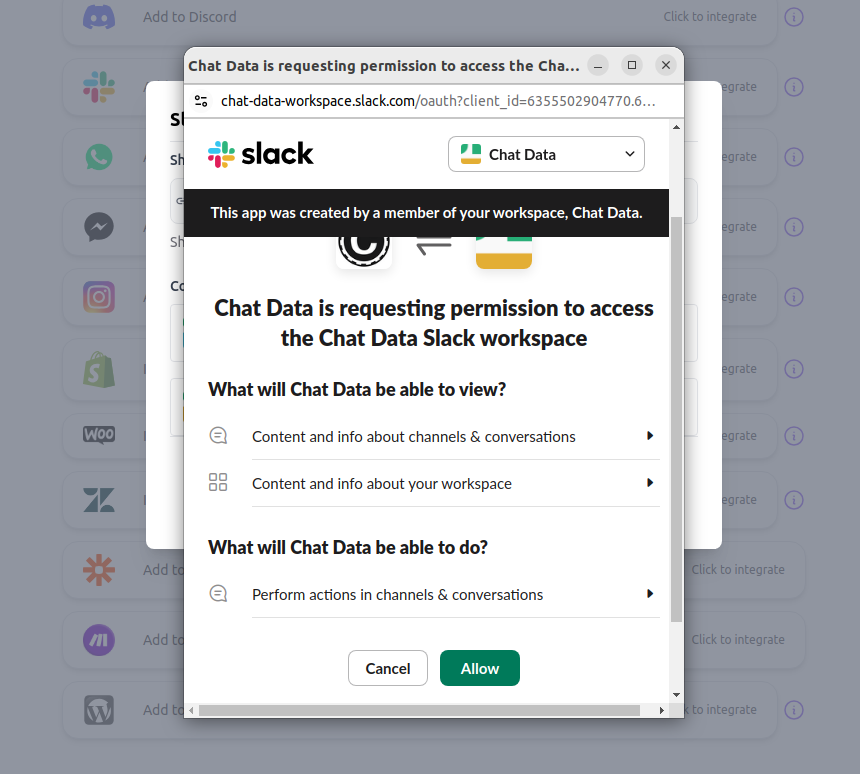
You can integrate the same chatbot in multiple Slack workspaces.
Step 3: Expand Your Chatbot's Reach: Multi-Workspace Installation
Once you complete the initial Slack integration, you'll receive a unique installation link. This link enables seamless deployment of your chatbot across additional Slack workspaces - simply share it with team members or workspace administrators who can install the chatbot directly, without needing Chat Data credentials. 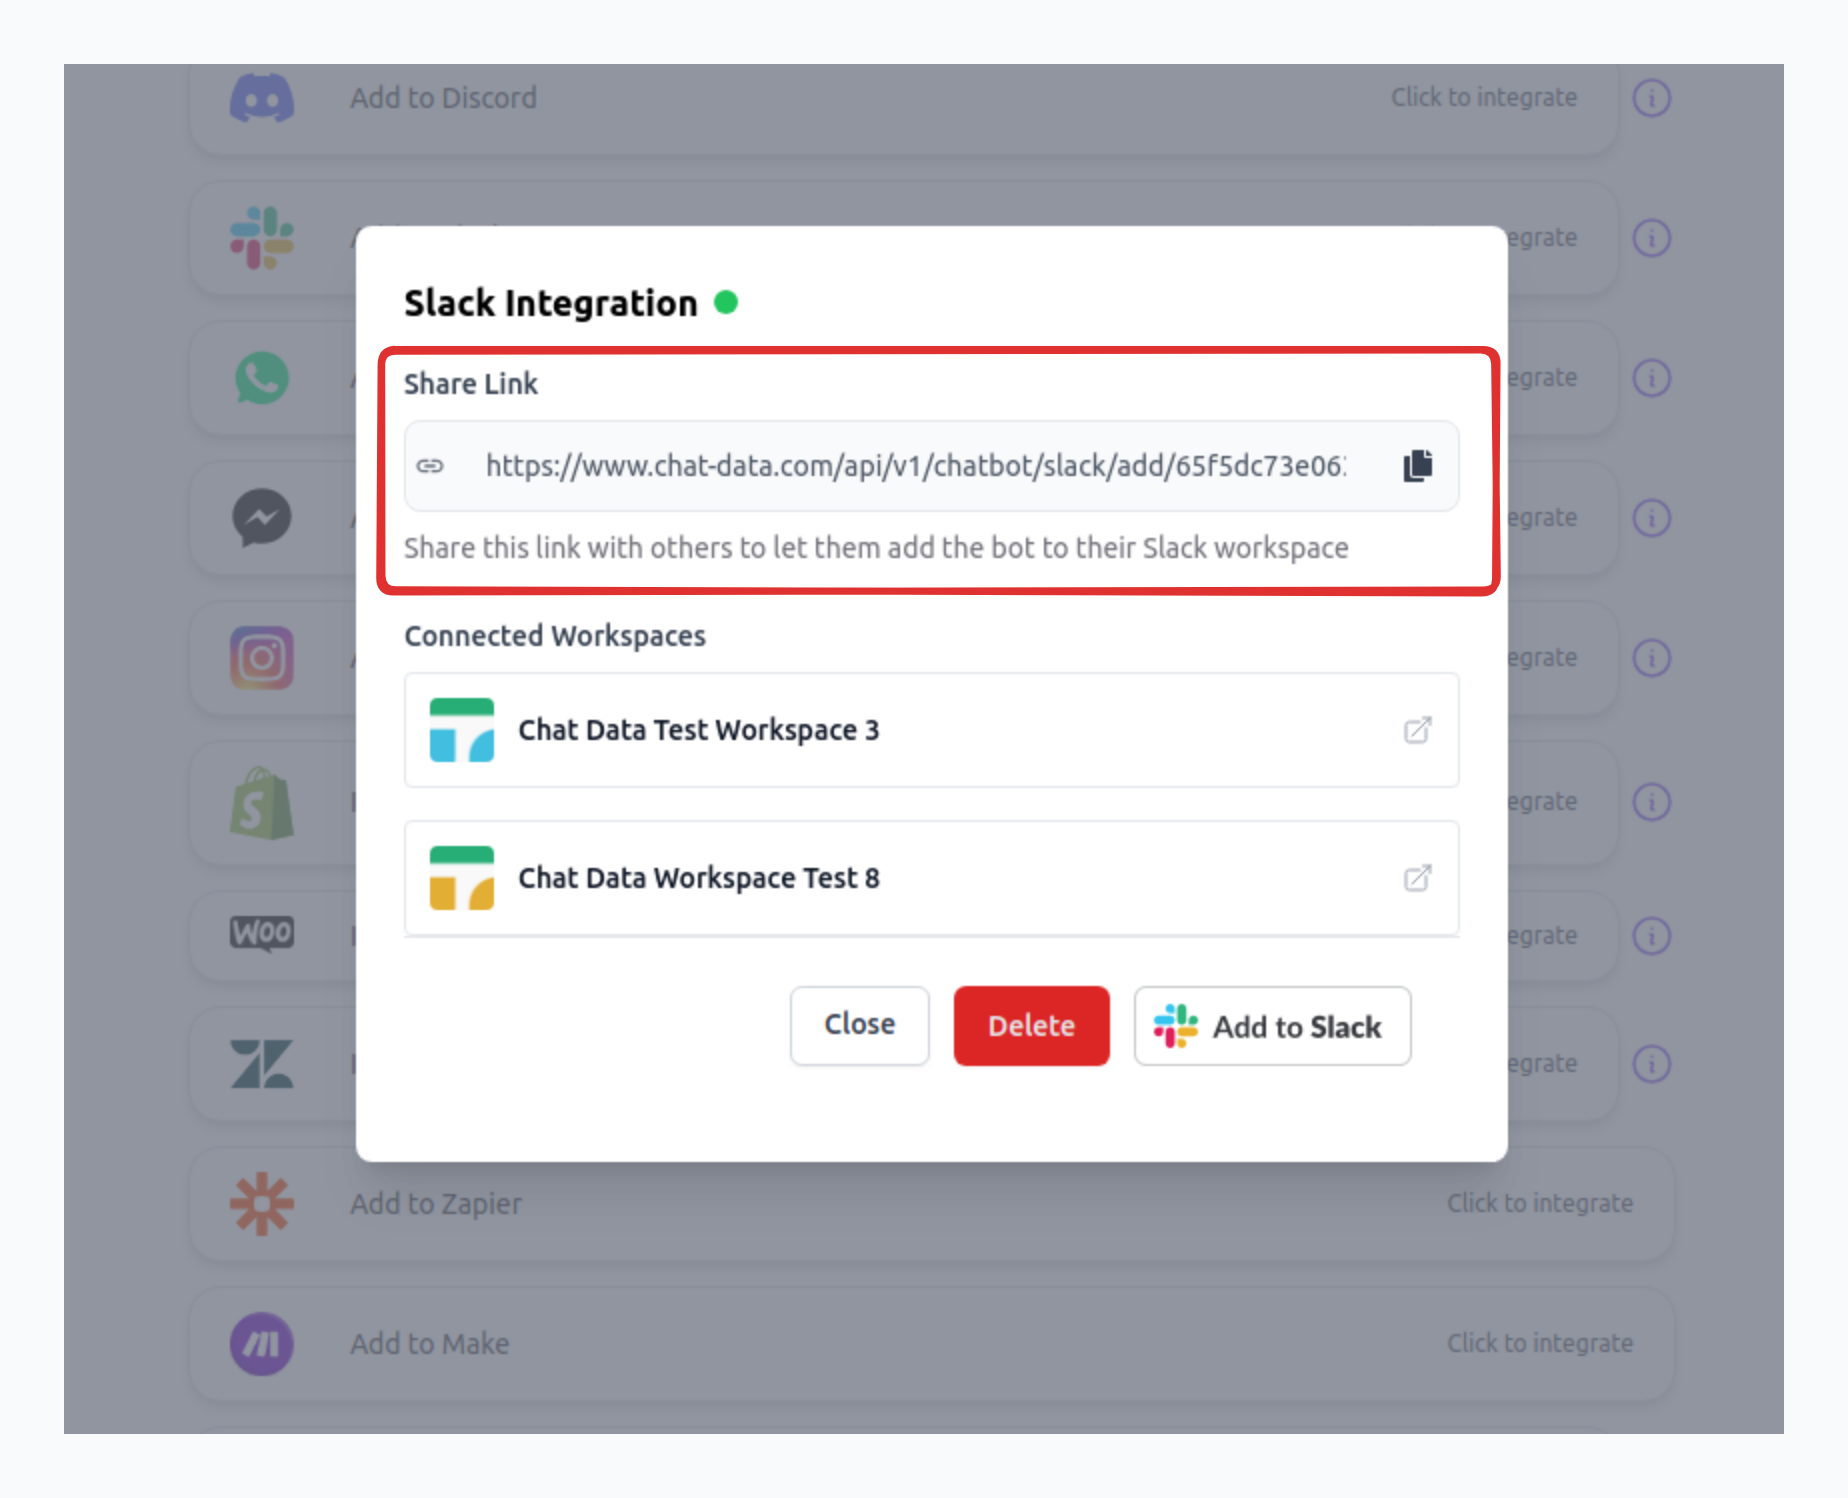
Step 4: Engage with Your Bot
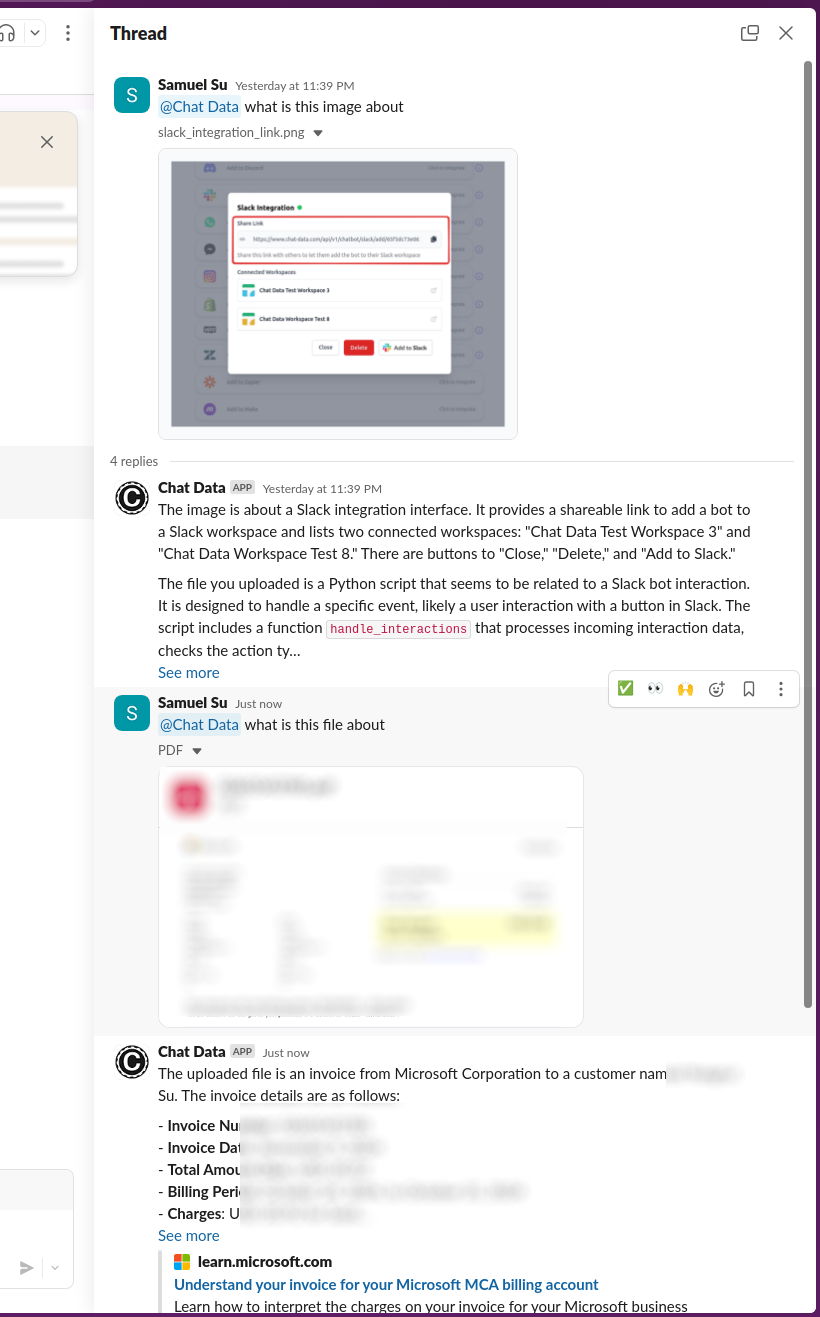
Engage with the chatbot by tagging (@) it in a workspace channel or sending a direct message. Please be aware that the chatbot will only respond when tagged or upon receiving direct messages. If your chatbot has multi-modal inputs enabled, your Slack chatbot will be able to understand and respond to images and files as well.
Each conversation thread will be saved as a chatbot conversation in the chatbot conversation history. If you start a new thread in the channel or DM, it will be saved as a new chatbot conversation, and the chatbot won't be able to remember the previous conversation in another thread.
Frequently Asked Questions
How do I connect a Chat Data chatbot to Slack?
Create the chatbot first, open its Integrations tab, click Add to Slack, and authorize the installation for the Slack workspace you want to use.
Can I install the same chatbot into multiple Slack workspaces?
Yes. After the first installation, Chat Data gives you an installation link that can be shared to deploy the same chatbot into additional Slack workspaces.
How do users talk to the chatbot inside Slack?
In channels, users should mention the bot with @chatbot to trigger a reply. In direct messages, they can chat without tagging it.
How does conversation memory work for Slack threads?
The chatbot remembers context within the same Slack thread. Starting a new channel thread or a new DM conversation creates a separate chatbot conversation and does not carry over the previous thread's memory.