Advanced Features
White Label Your Chatbot
Learn how to replace or remove the 'Powered by "Chat Data"' branding and use your own custom domain to embed the chatbot on your website, use your own email to send notifications regarding the chatbot.
Remove the 'Powered by "Chat Data"'
If you are subscribed to one of the three eligible plans, you have the option to replace the 'Powered by "Chat Data"' message with your own branding, such as 'Built by "Your Company"', or to completely remove this message. This can be done in the White-Label settings at the following URL: https://www.chat-data.com/chatbot/{chatbotId}/settings/white-labeling. 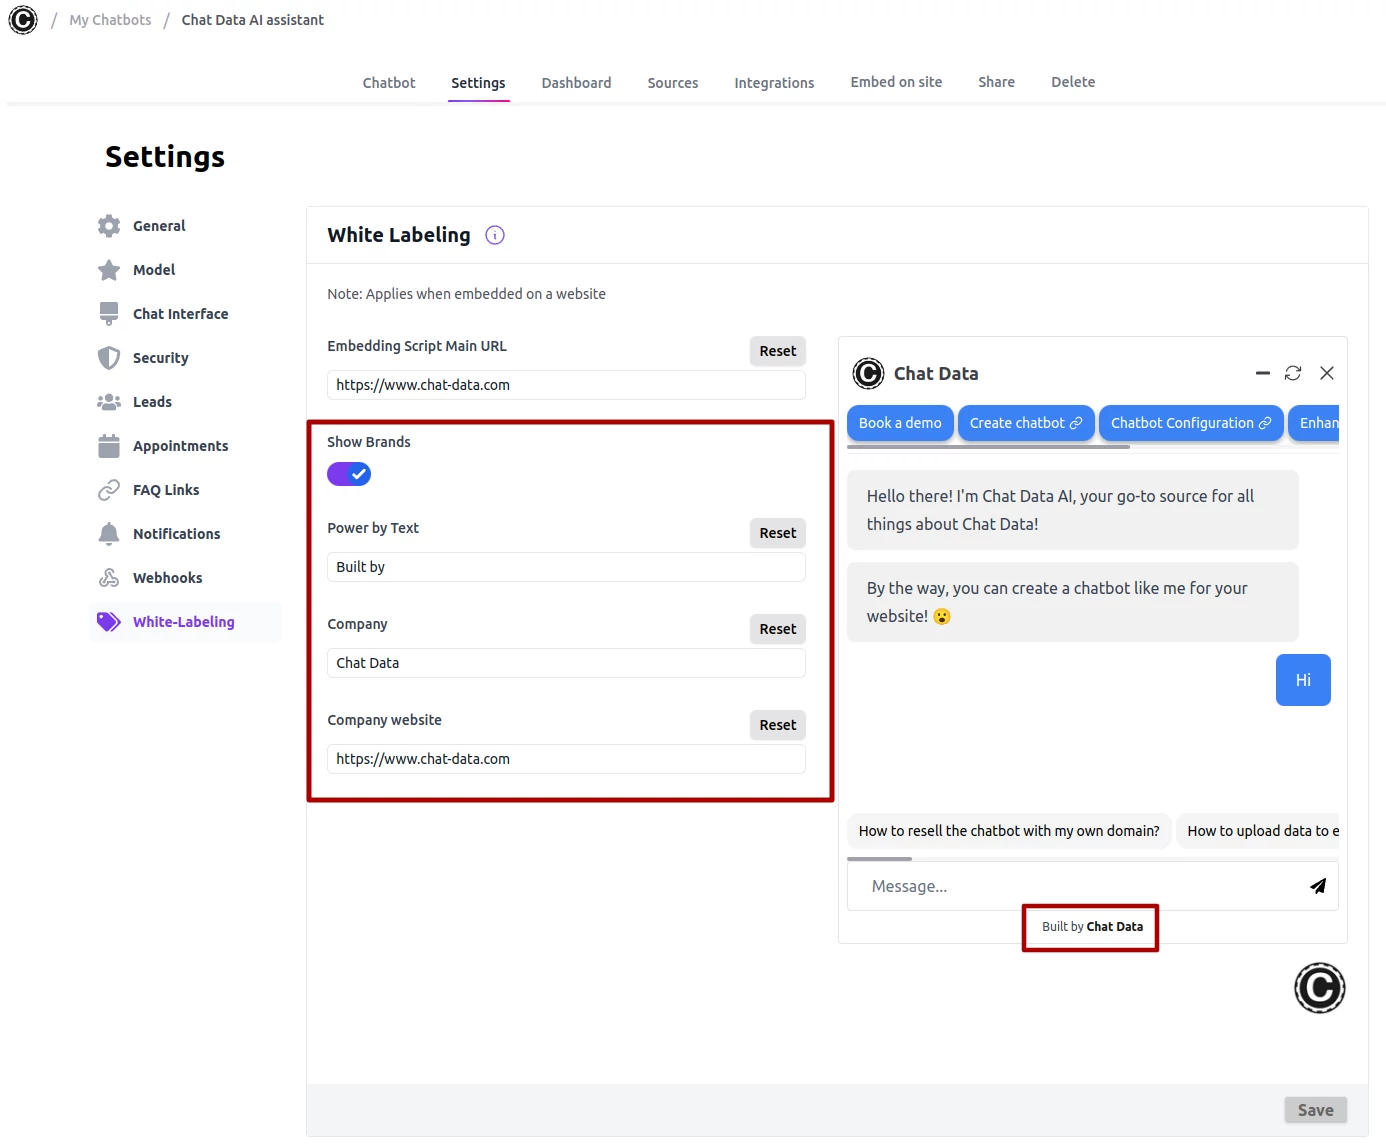 The eligible plans include:
- Professional Plan
- Reseller Plan
- Remove 'Powered By Chat Data' Plan
Customizing Your Domain for Embedding Scripts
To tailor the embedding script to your own domain, you must subscribe to either the Professional Plan or Reseller Plan. Follow these steps to customize the embedding script, iframe script, and the iframe script within the embedding script to your domain.
Step1: Add a CNAME Record
First, you need to add a DNS record as follows:
{
  Type: CNAME
  Host: <hostname>
  Value: www.chat-data.com
}
This step involves configuring a CNAME record to point your domain to the service provider's domain.
Step2: Update the White-Labeling Setting
Next, update the chatbot with your own embedding script's main page URL. This URL is the one you've set in the DNS record during Step 1. Additionally, include information about your brand. Below is an example of how the white-labeling setting might appear: 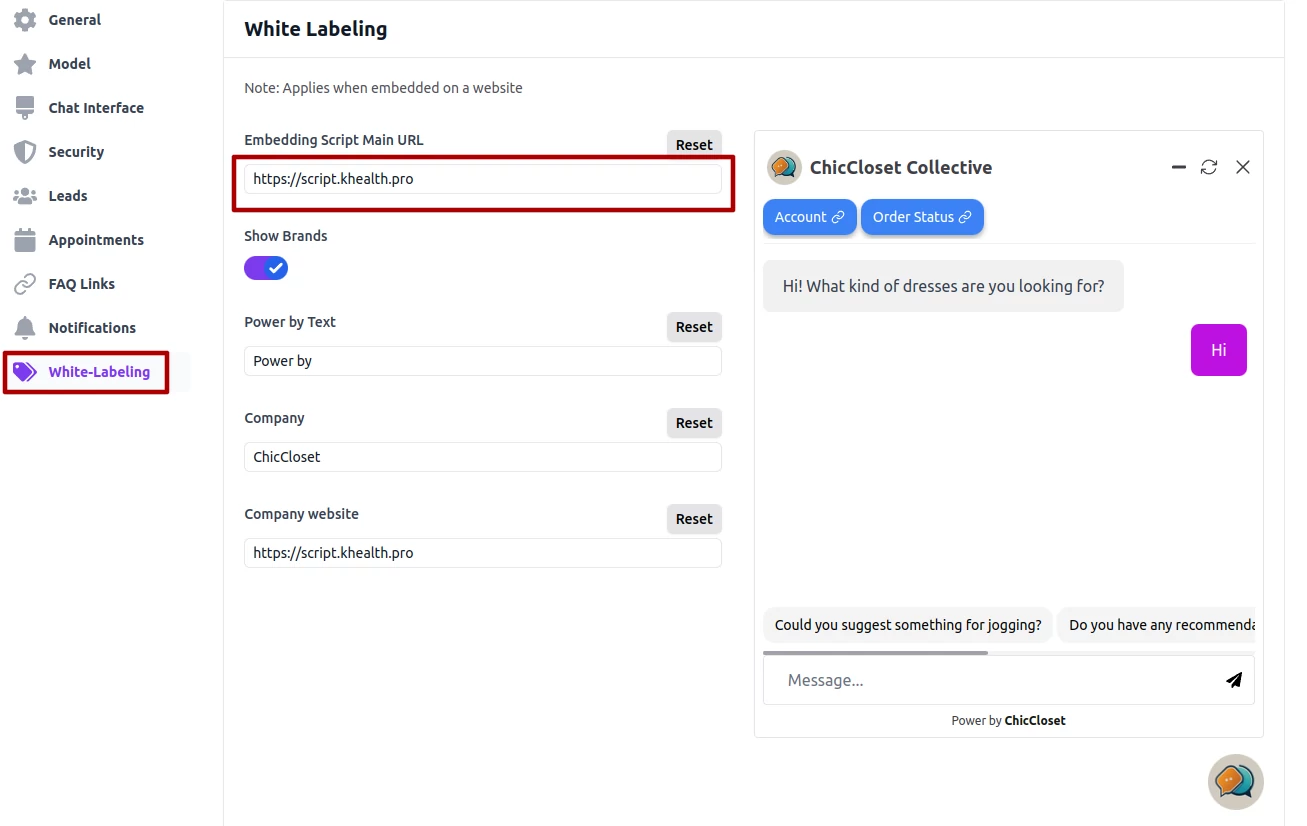 This step allows you to customize the chatbot's appearance and branding to match your own.
Step3: Implement Cloudflare SSL
To ensure that the SSL provided by Chat Data encompasses the HTTPS request for your domain, it's necessary for your domain to adapt in order to utilize Cloudflare's SSL. There are two approaches to implement Cloudflare SSL:
Option 1: Switch Your DNS Nameservers to Cloudflare
If your DNS nameservers are already hosted on Cloudflare, no further action is required. If not, you can migrate your DNS nameservers to Cloudflare at no cost by following this tutorial to migrate your DNS nameservers to Cloudfare, which is totally free.
Option 2: Adding an Additional CNAME Record
For domains that you wish to link to your custom domain without transferring your nameservers to Cloudflare, add the following CNAME record to your DNS settings. Replace <hostname> with your desired actual hostname.
{
  Type: CNAME
  Host: _acme-challenge.<hostname>
  Value: <hostname>.e7c5afd44f1a18fb.dcv.cloudflare.com
}
This record should also appear in your Cloudflare dashboard. Once you have configured both required CNAME records, please allow up to 24 hours for the SSL certificate status to update to Active. This status confirms that Cloudflare has issued an SSL certificate for your domain. You must wait for this activation before using your custom domain; otherwise, continue using https://www.chat-data.com to embed your script. You can still use the original domainhttps://www.chat-data.com during the waiting period. Below is an example of a successful setup: 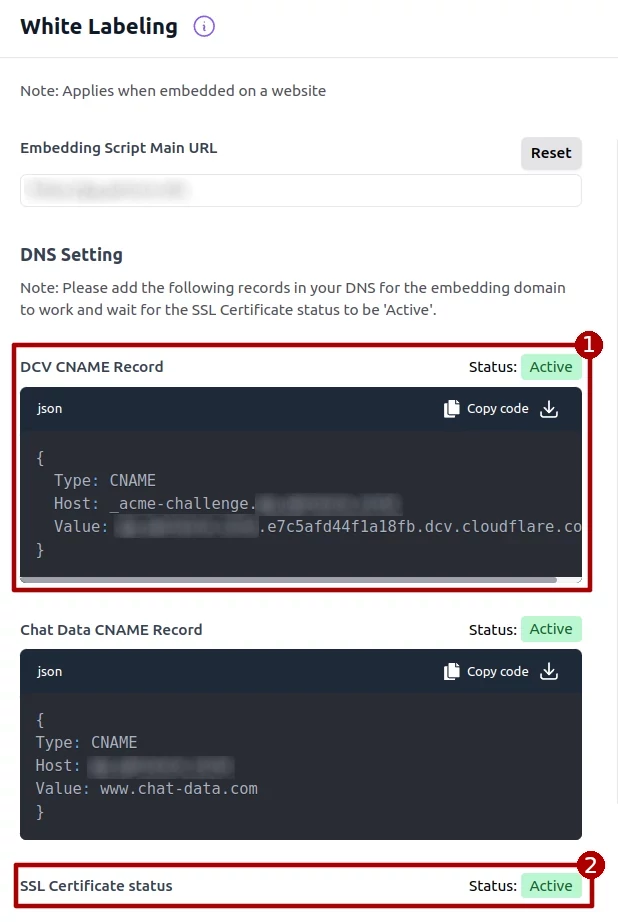
Step4: Embed the Updated Script on Your Website
Finally, embed the updated script on your website to integrate your customized chatbot. For demonstration purposes, https://script.khealth.prois used as an example of a custom domain:
<iframe
src="https://script.khealth.pro/chatbot-iframe/65d53b57552626e341f47727"
width="100%"
style="height: 100%; min-height: 700px"
allow="clipboard-write"
frameBorder="0"
></iframe>
<script
src="https://script.khealth.pro/embed.min.js?chatbotId=65d53b57552626e341f47727"
defer>
</script>
Upon completing these steps, the embedding script will be displayed on your website as shown below: 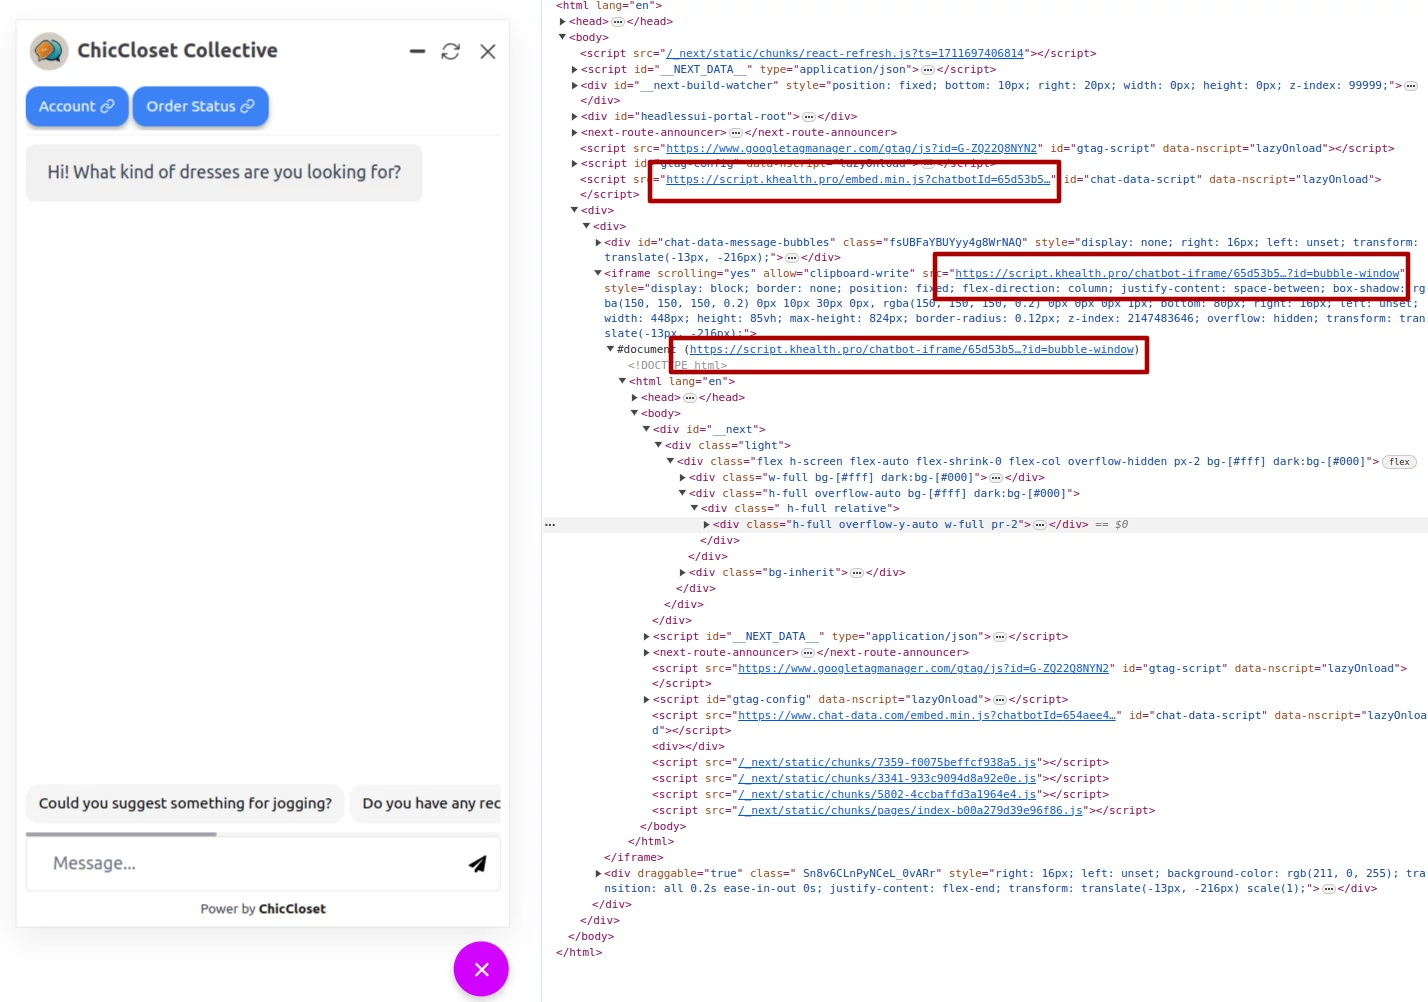
By following these steps, you can effectively customize the chatbot embedding script to align with your domain, enhancing your brand's consistency and professionalism.
Email Whitelabeling
By email whitelabeling, all of the notification emails about the chatbot, including daily conversation summaries, daily leads summaries, live chat escalation notifications, and new message notifications will be sent by your own email address if you own the domain.
If you are on our Reseller or Professional plan, you can configure this feature by going to Settings > White Labeling, as shown below: 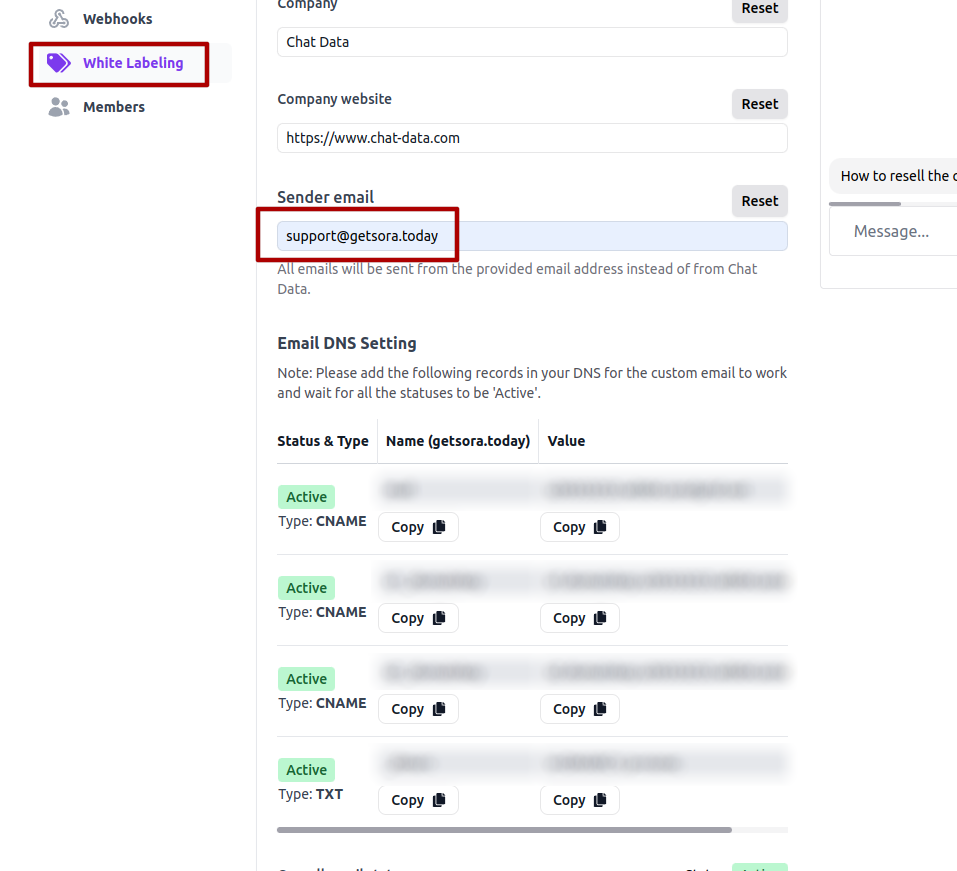
After adding a customer email and updating your DNS as indicated in the table, all notification emails related to your chatbot will be sent from the email address you provided, instead of from Chat Data. Here is an example for a live chat escalation notification: 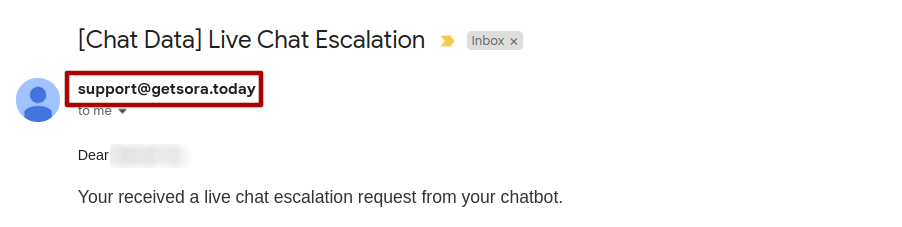
Frequently Asked Questions
Which plans let me remove or replace the Powered by Chat Data branding?
This branding can be changed or removed on the Professional Plan, Reseller Plan, or the dedicated Remove Powered By Chat Data plan.
What DNS changes are required for white-label custom domains?
The guide requires a CNAME from your chosen hostname to www.chat-data.com, and for some SSL setups it also requires an _acme-challenge CNAME record tied to Cloudflare certificate validation.
Why does the white-label setup mention Cloudflare SSL?
Because Chat Data relies on Cloudflare SSL for the custom domain. you either move your nameservers to Cloudflare or add the extra ACME challenge CNAME, then wait for the certificate status to become Active before using the custom domain.
What changes after the white-label custom domain is active?
Once active, you can embed the iframe and embed.min.js script from your own domain instead of www.chat-data.com, so the chatbot experience matches your brand.