Multi-platform Integrations
Add Chatbots to Squarespace Websites
Learn how to easily add a chatbot widget to your Squarespace Website.
Step 1: Set Up Your Chat Data Chatbot
First, you'll need to access your Chat Data account. New users can create a free account here. After logging in, create your chatbot by adding your knowledge sources. You can use various formats including documents, text excerpts, web pages, or Q&A pairs to build your chatbot's knowledge foundation.
Need guidance on creating your Chat Data chatbot? Check out our comprehensive setup guide.
Step 2: Get Your Chatbot's Embed Code
Visit our Website Integration Guide to obtain your unique Chat Data chatbot embed code. 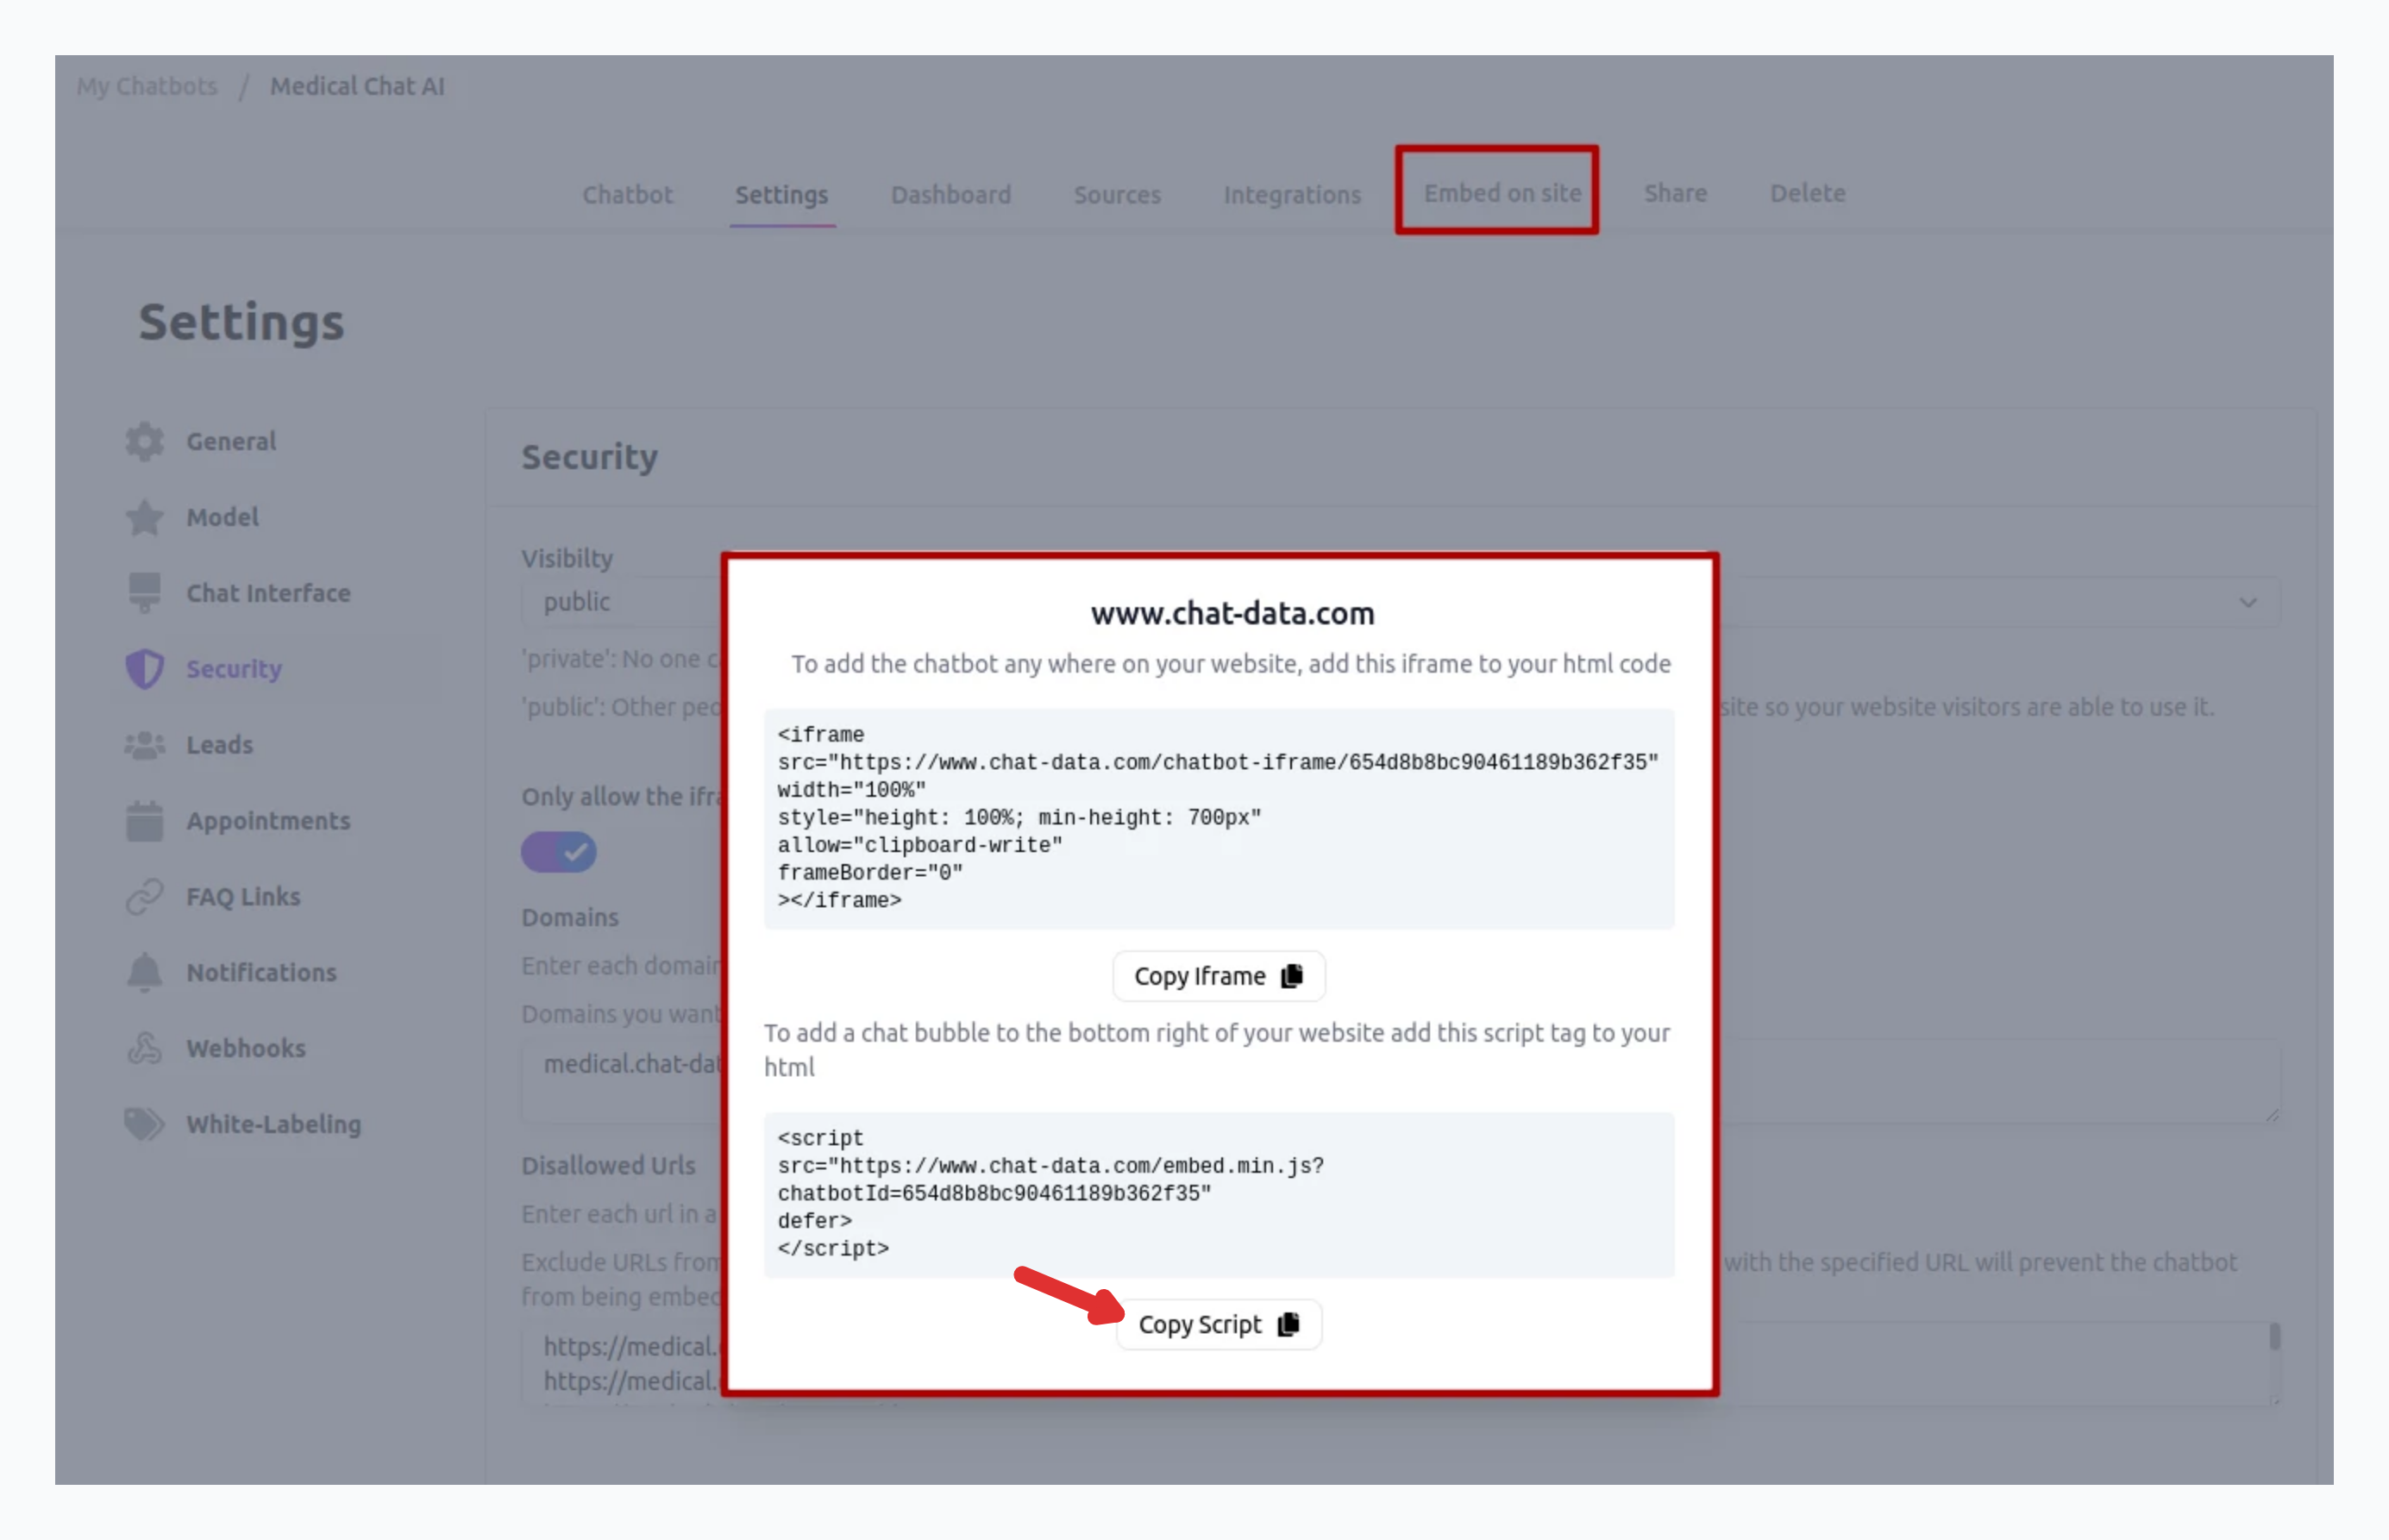
Once you've copied your embed code, you're ready to add it to your Squarespace site.
Step 3: Add the Chatbot to Your Squarespace Website
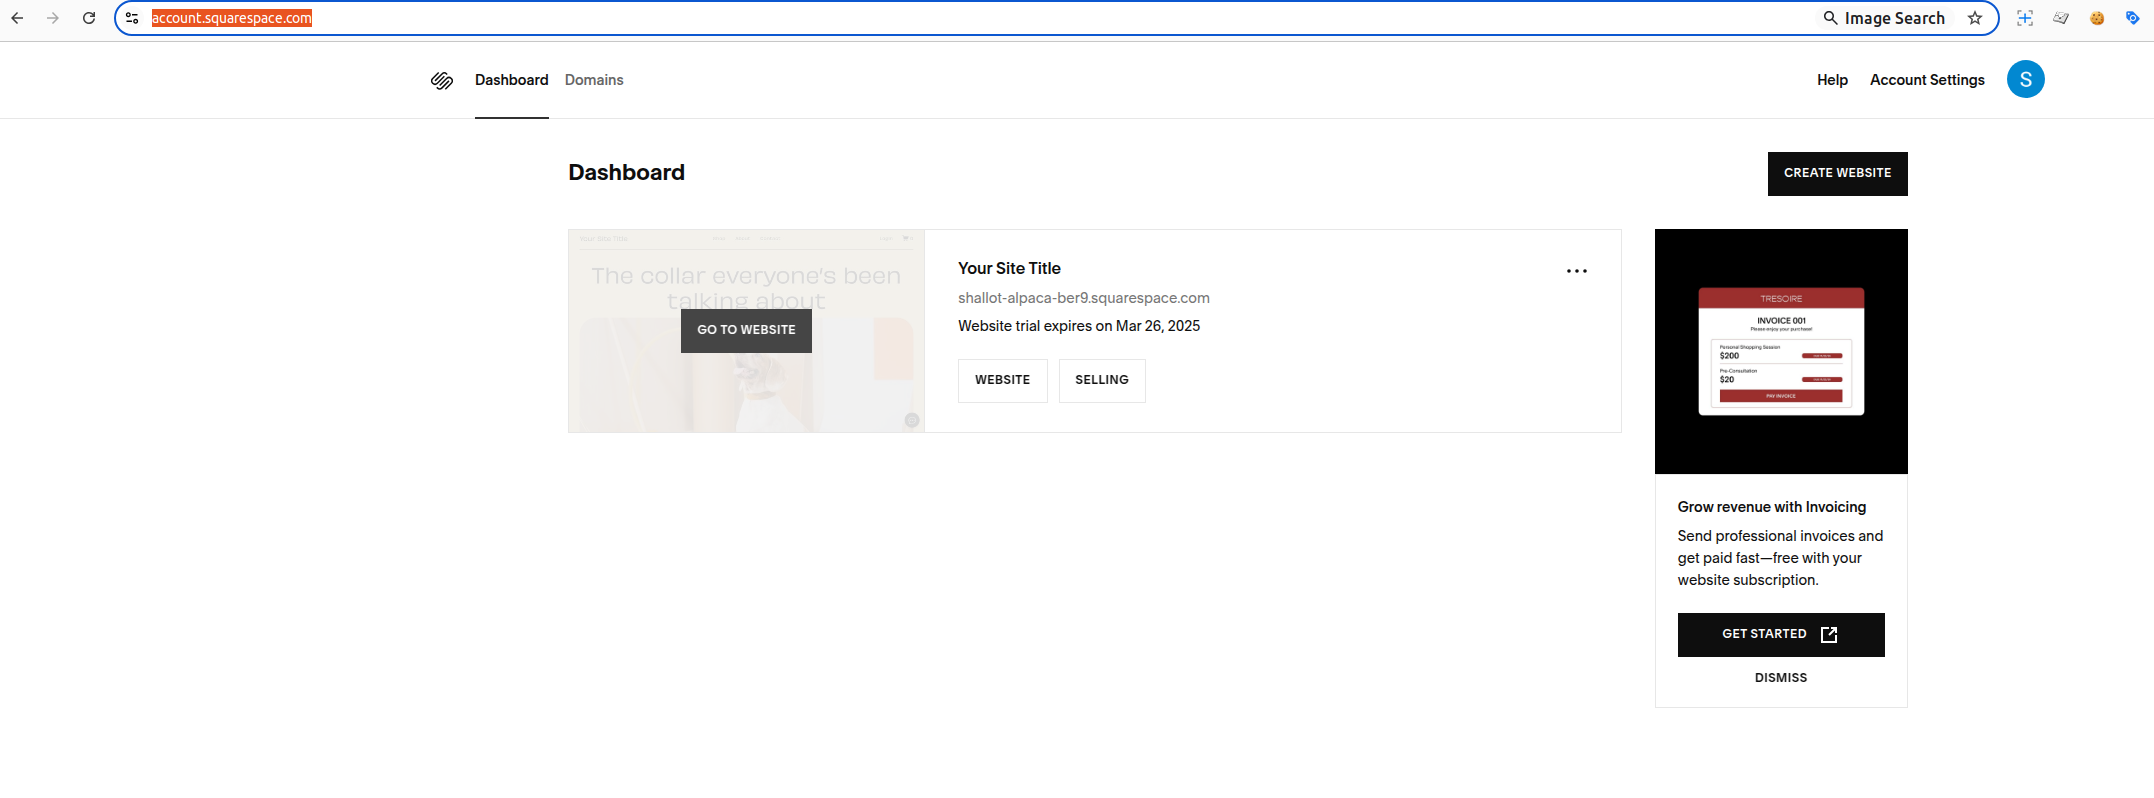
- Log into your Squarespace account and navigate to your dashboard.
- Look for and select GO TO WEBSITE bubble in the corresponding website or choose the CREATE WEBSITE button to create a new website.
- Wait for the Squarespace website editor to display your site.
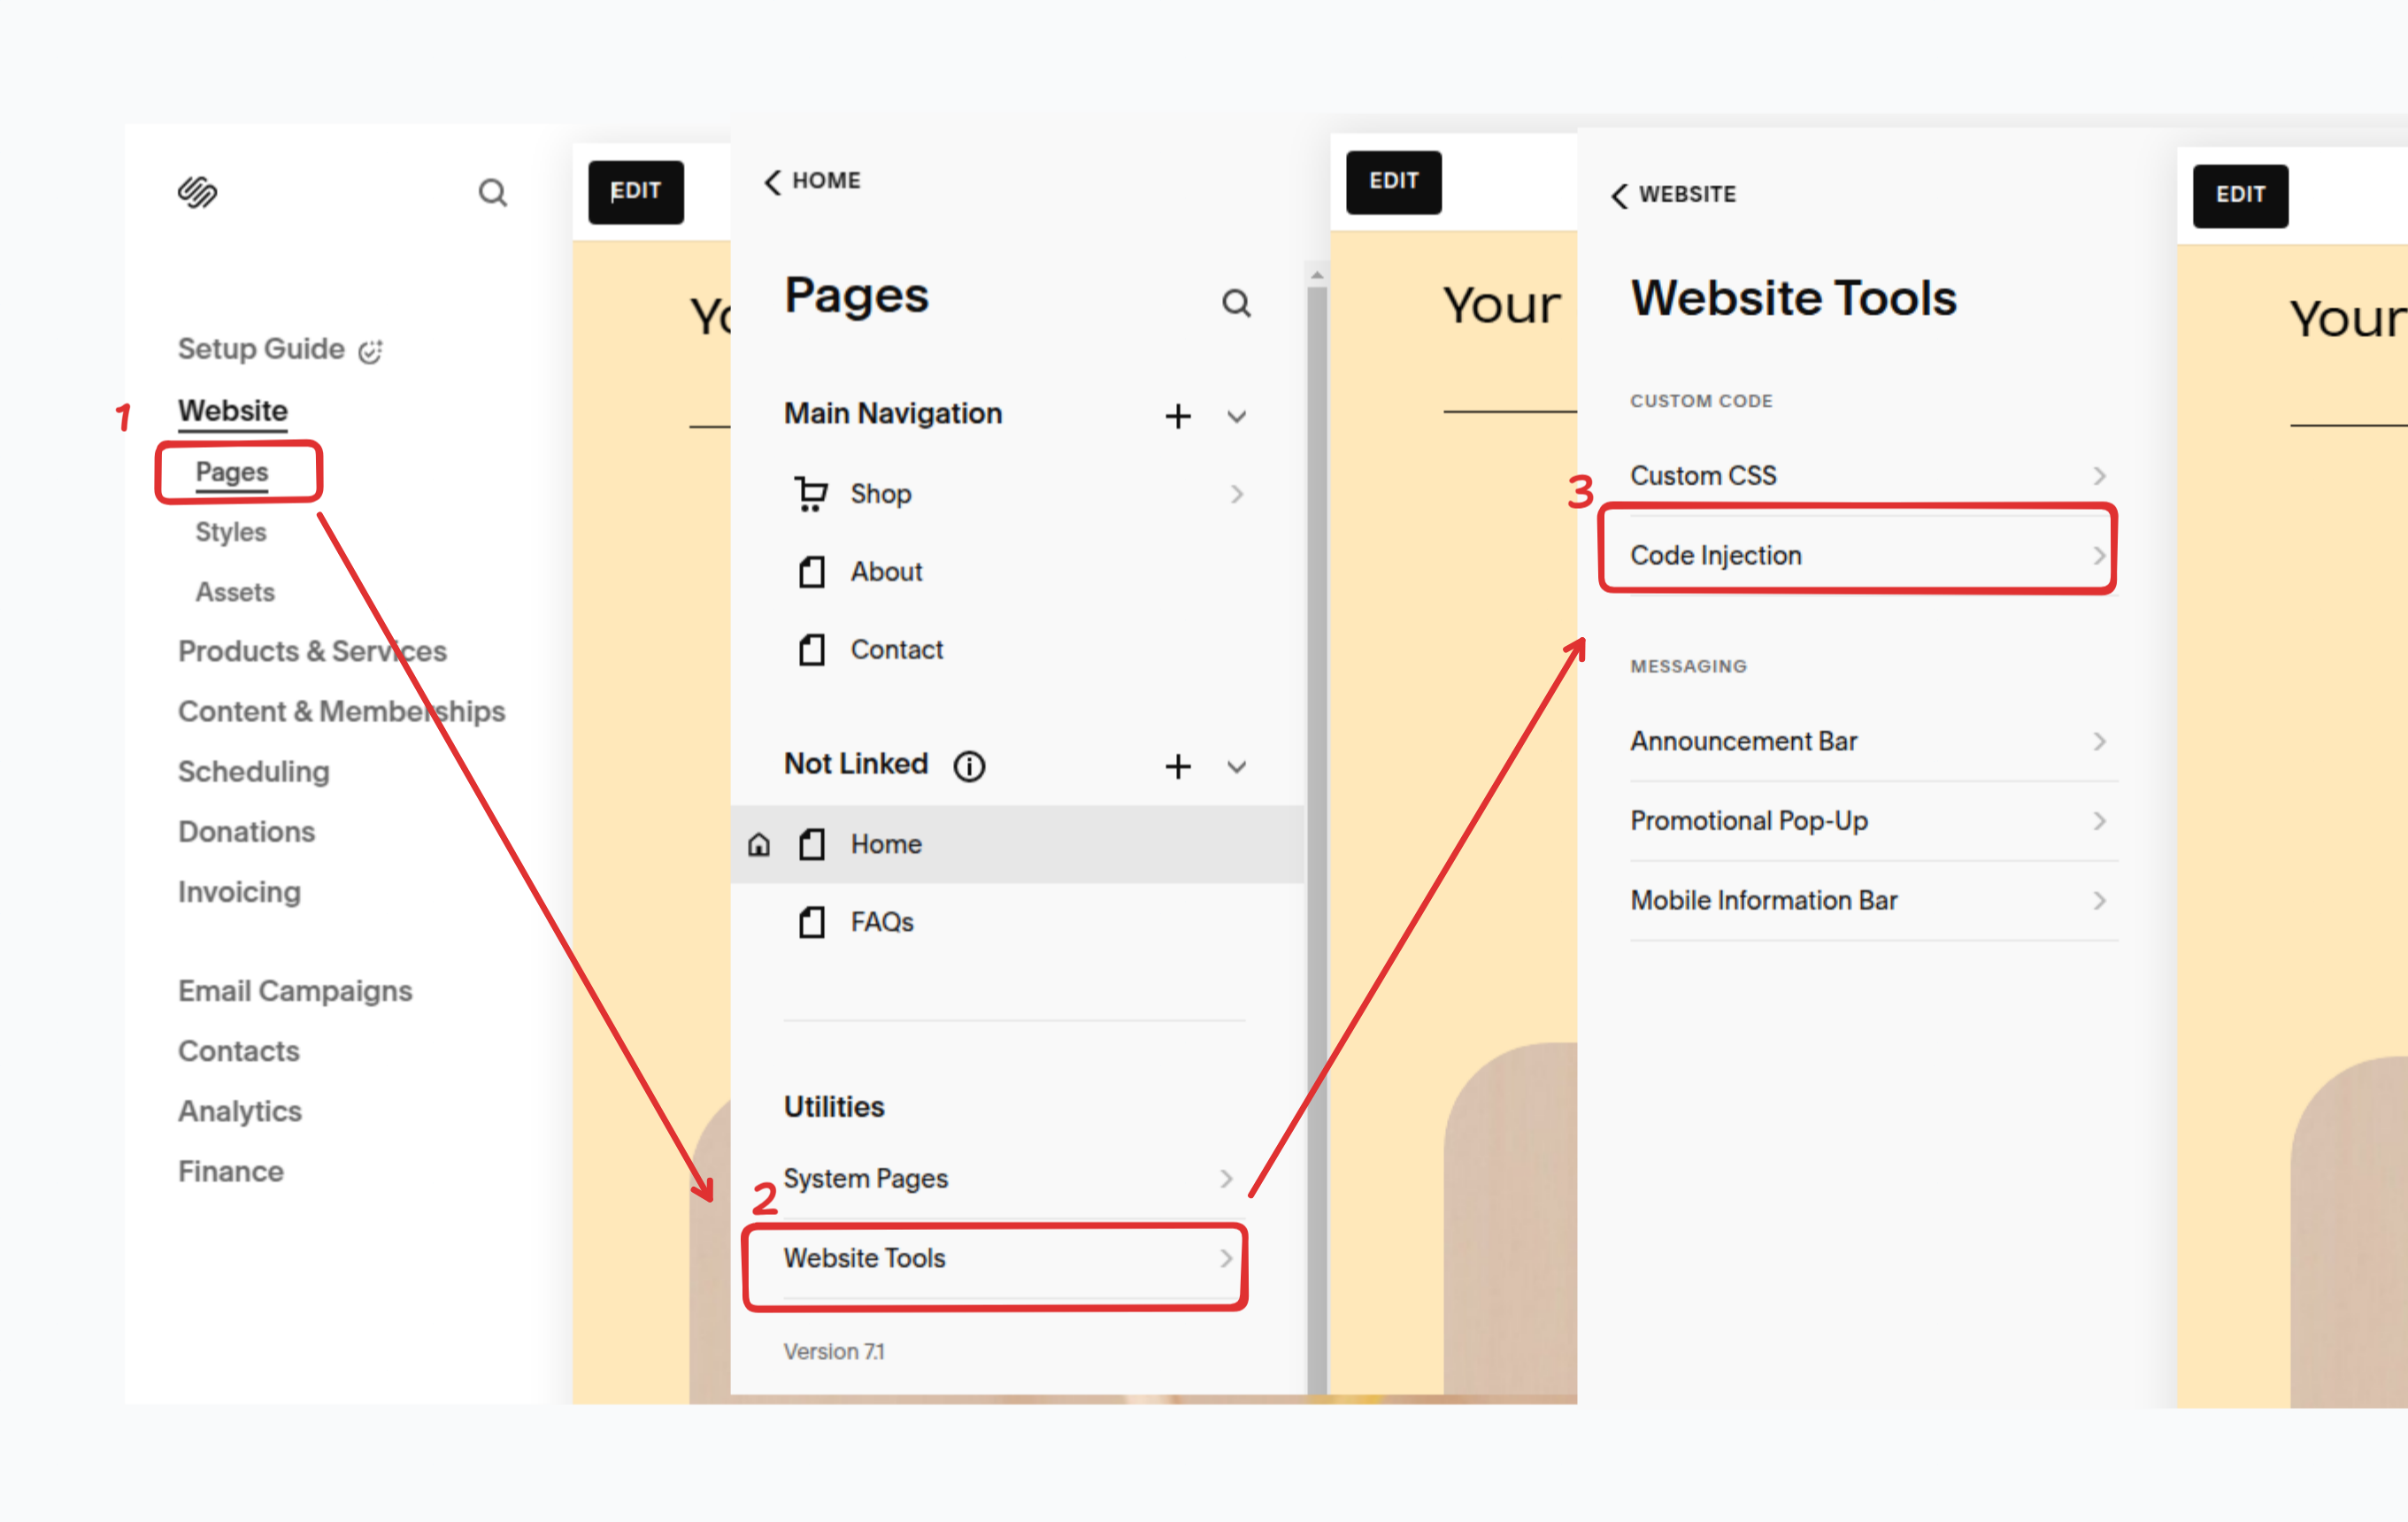
- On the left panel, click on the Pages >Website Tools > Code Injection tab in sequence.
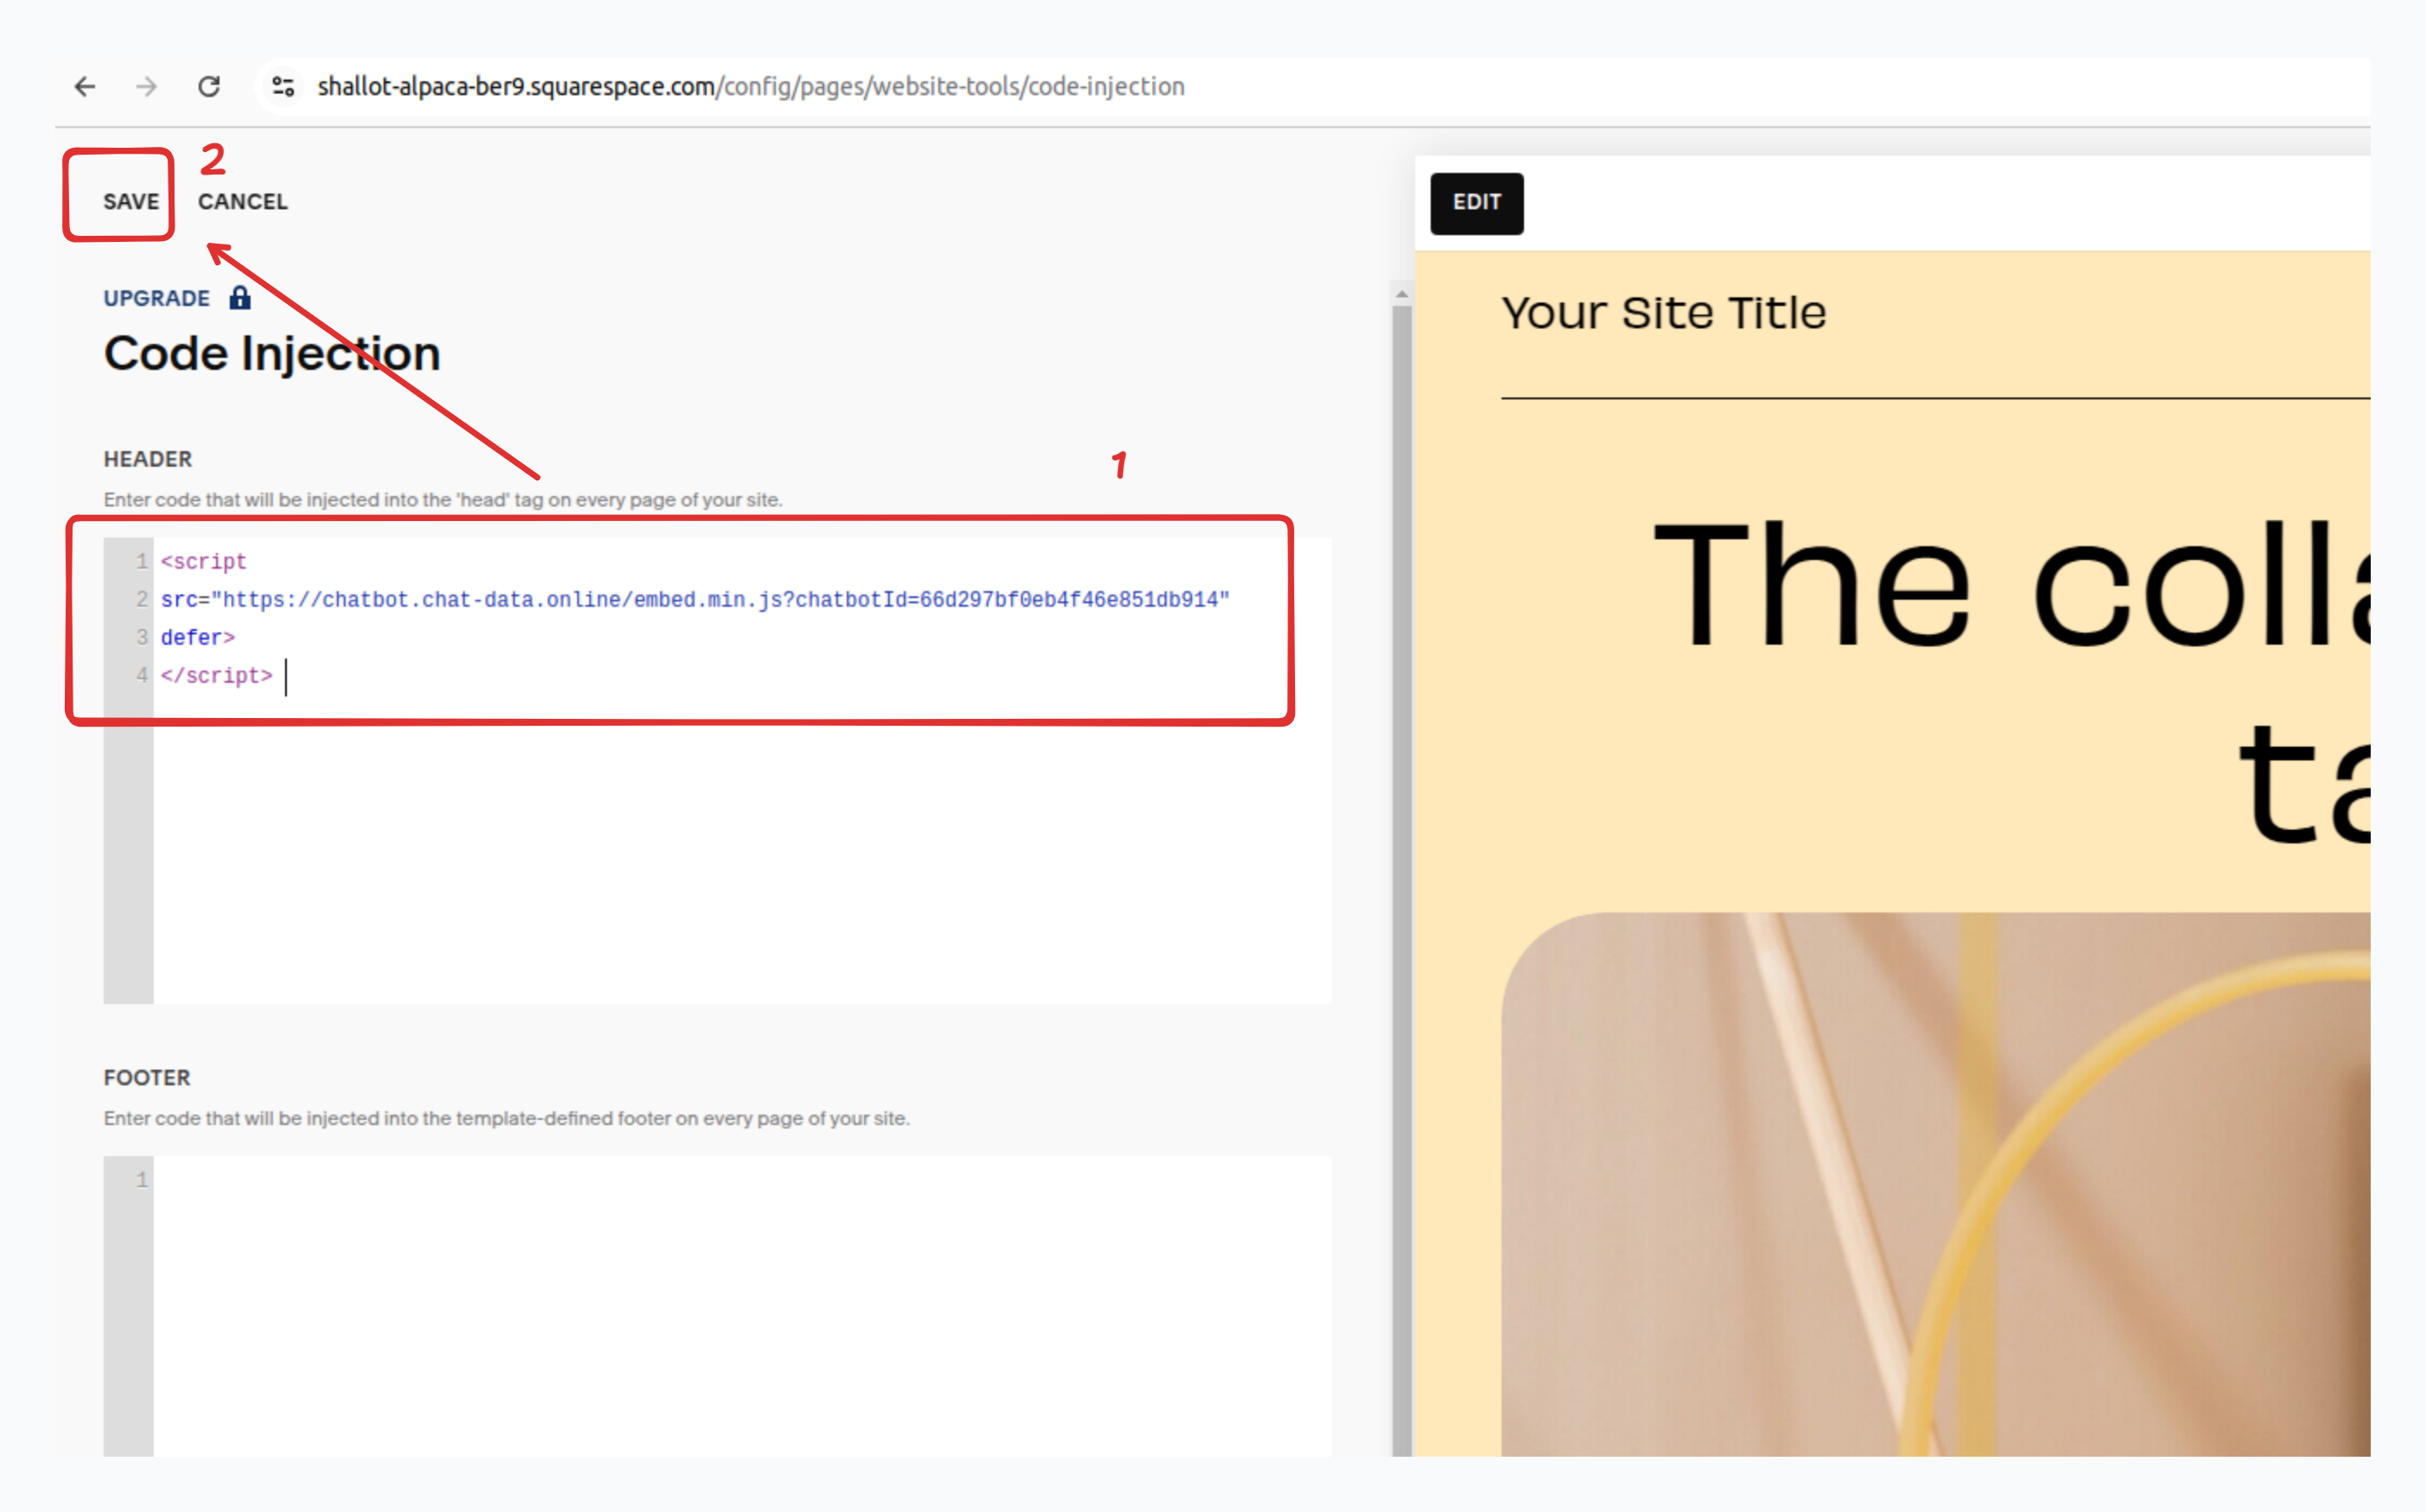
- Inject the embedding code into the header section and save the changes.
- Then you can publish your website and get the production URL.
- Allow list your domain so that your chatbot can be displayed on your website.
- Use the production URL to see the chatbot.

Great work! Your Chat Data chatbot is now successfully integrated with your Squarespace website.
Tip: Want to modify your chatbot's look? Visit your Chat Data dashboard, select your bot, go to Settings, and look for Chat Interface in the left menu to access all customization options.
Frequently Asked Questions
How do I add a Chat Data chatbot to a Squarespace website?
Three stages: build the chatbot in Chat Data, copy the website embed code, and then add that code to Squarespace through the site's code injection settings before publishing the website.
What should I prepare in Chat Data before embedding on Squarespace?
Before the embed step, the guide says to log in to Chat Data and create the chatbot with its knowledge sources. It specifically mentions using documents, text excerpts, webpages, or Q&A pairs so the bot is ready to answer when it goes live.
Where do I add the chatbot code in Squarespace?
In Squarespace, you open the website editor and navigate through `Pages`, then `Website Tools`, then `Code Injection`. The guide says to place the chatbot embed code in the header section and save the change.
Do I need to publish and allowlist the Squarespace domain before testing?
Yes. After adding the code, the page says to publish the website, obtain the production URL, and then allowlist that domain in Chat Data so the chatbot is allowed to display on the live Squarespace site.