Multi-platform Integrations
Messenger Integration
Integrating Facebook Messenger with Chat Data empowers your custom chatbot to communicate directly with customers through your Facebook pages. This powerful combination not only automates responses but also allows you to seamlessly take over conversations whenever needed, providing a perfect balance of efficiency and personal touch.
By connecting Messenger to Chat Data, you'll create a versatile system that handles inquiries automatically while giving you the flexibility to engage with customers directly at any time. Additionally, you can leverage our provided Make workflow template to send messages in batches, further enhancing your ability to reach out to multiple customers efficiently.
This guide will walk you through the step-by-step process of linking your chatbot to Messenger for your Facebook pages, ensuring smooth, effective, and personalized customer interactions. It will also cover how to use the Make workflow template for batch messaging.
Connect Messenger with Chat Data
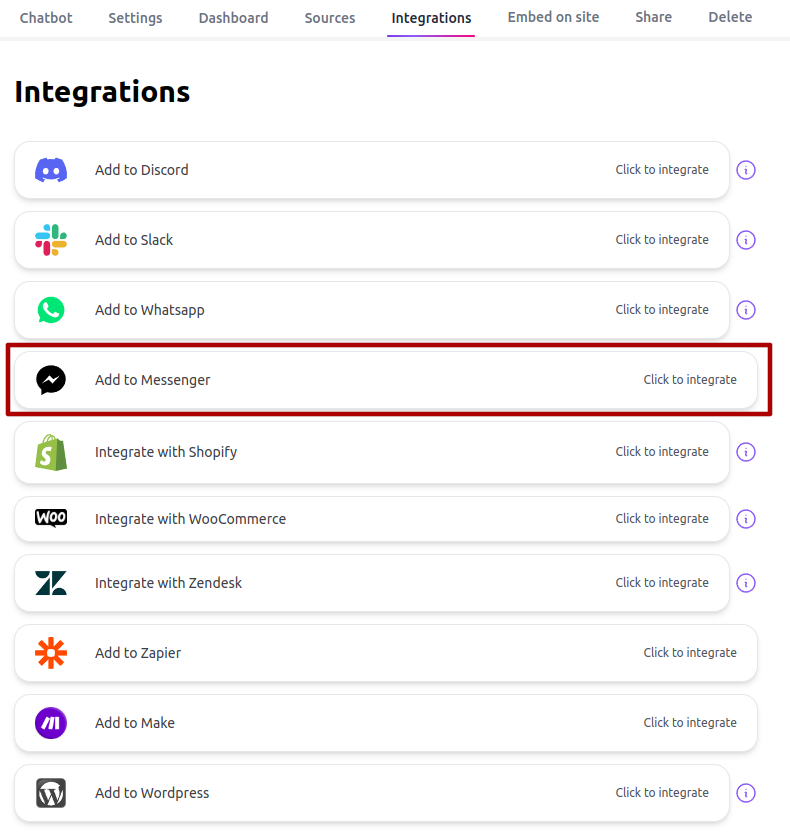
- Go to Dashboard > [Chatbot] > Integrations.
- Select the Messenger integration card.
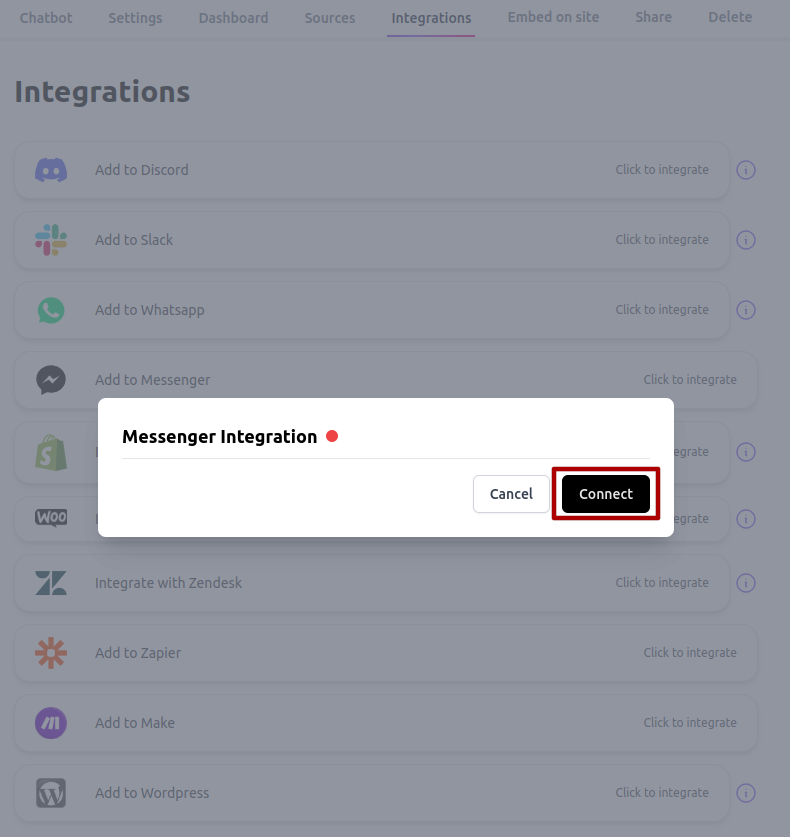
- Click the Connect button in the pop-up window.
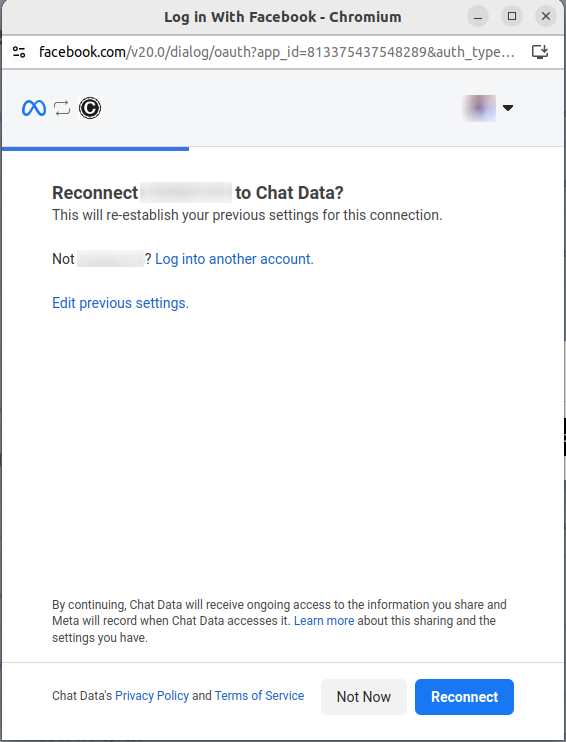
- If this is the first time, you will be asked for permission to allow Chat Data to use your information. Note: if you have integrated some pages and would like to modify your selection, pick the Edit Previous Settings option.
- Select the Facebook Page you want to connect to your chatbot.
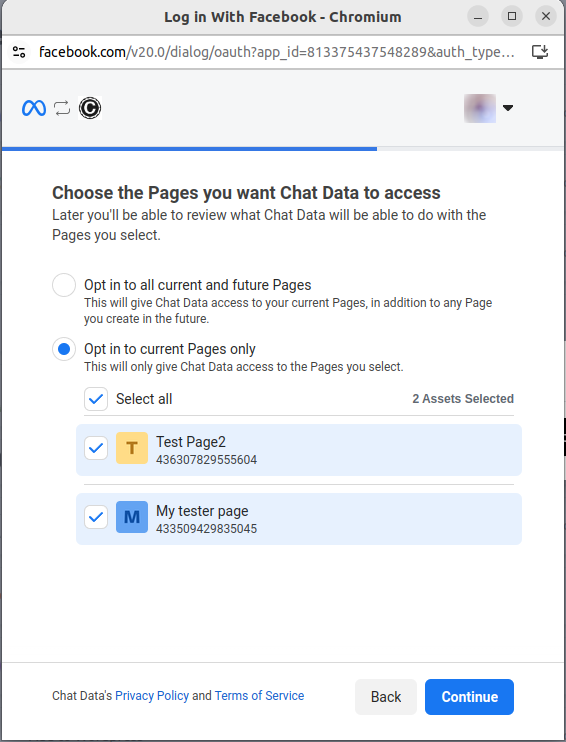
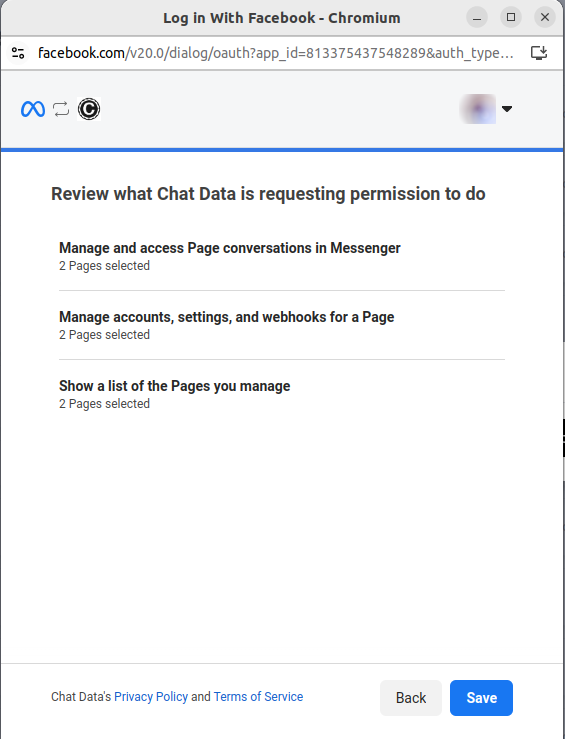
- Review and grant the necessary permissions for the integration.
- Confirm everything and click got it to close the pop-up window. The integration may take a few moments to finish.
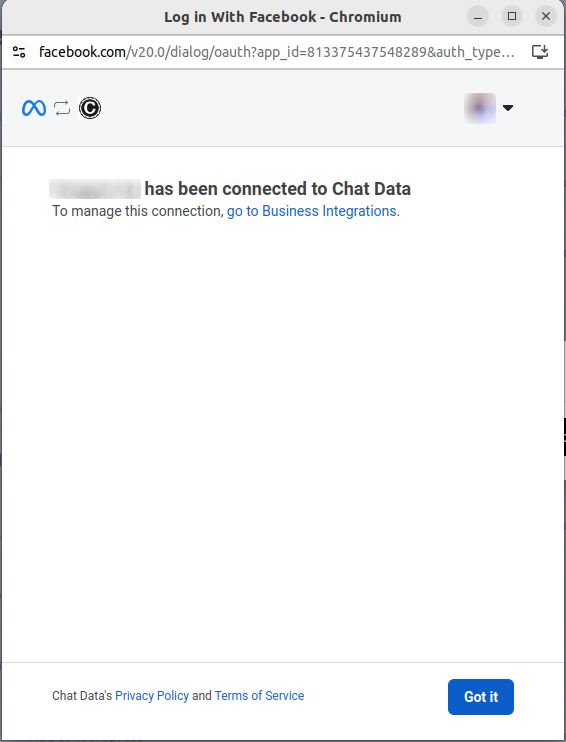
- Once completed, you'll see a success message and your connected Facebook Page.

With the integration now active, your chatbot is ready to respond to all messages received through Facebook Messenger.
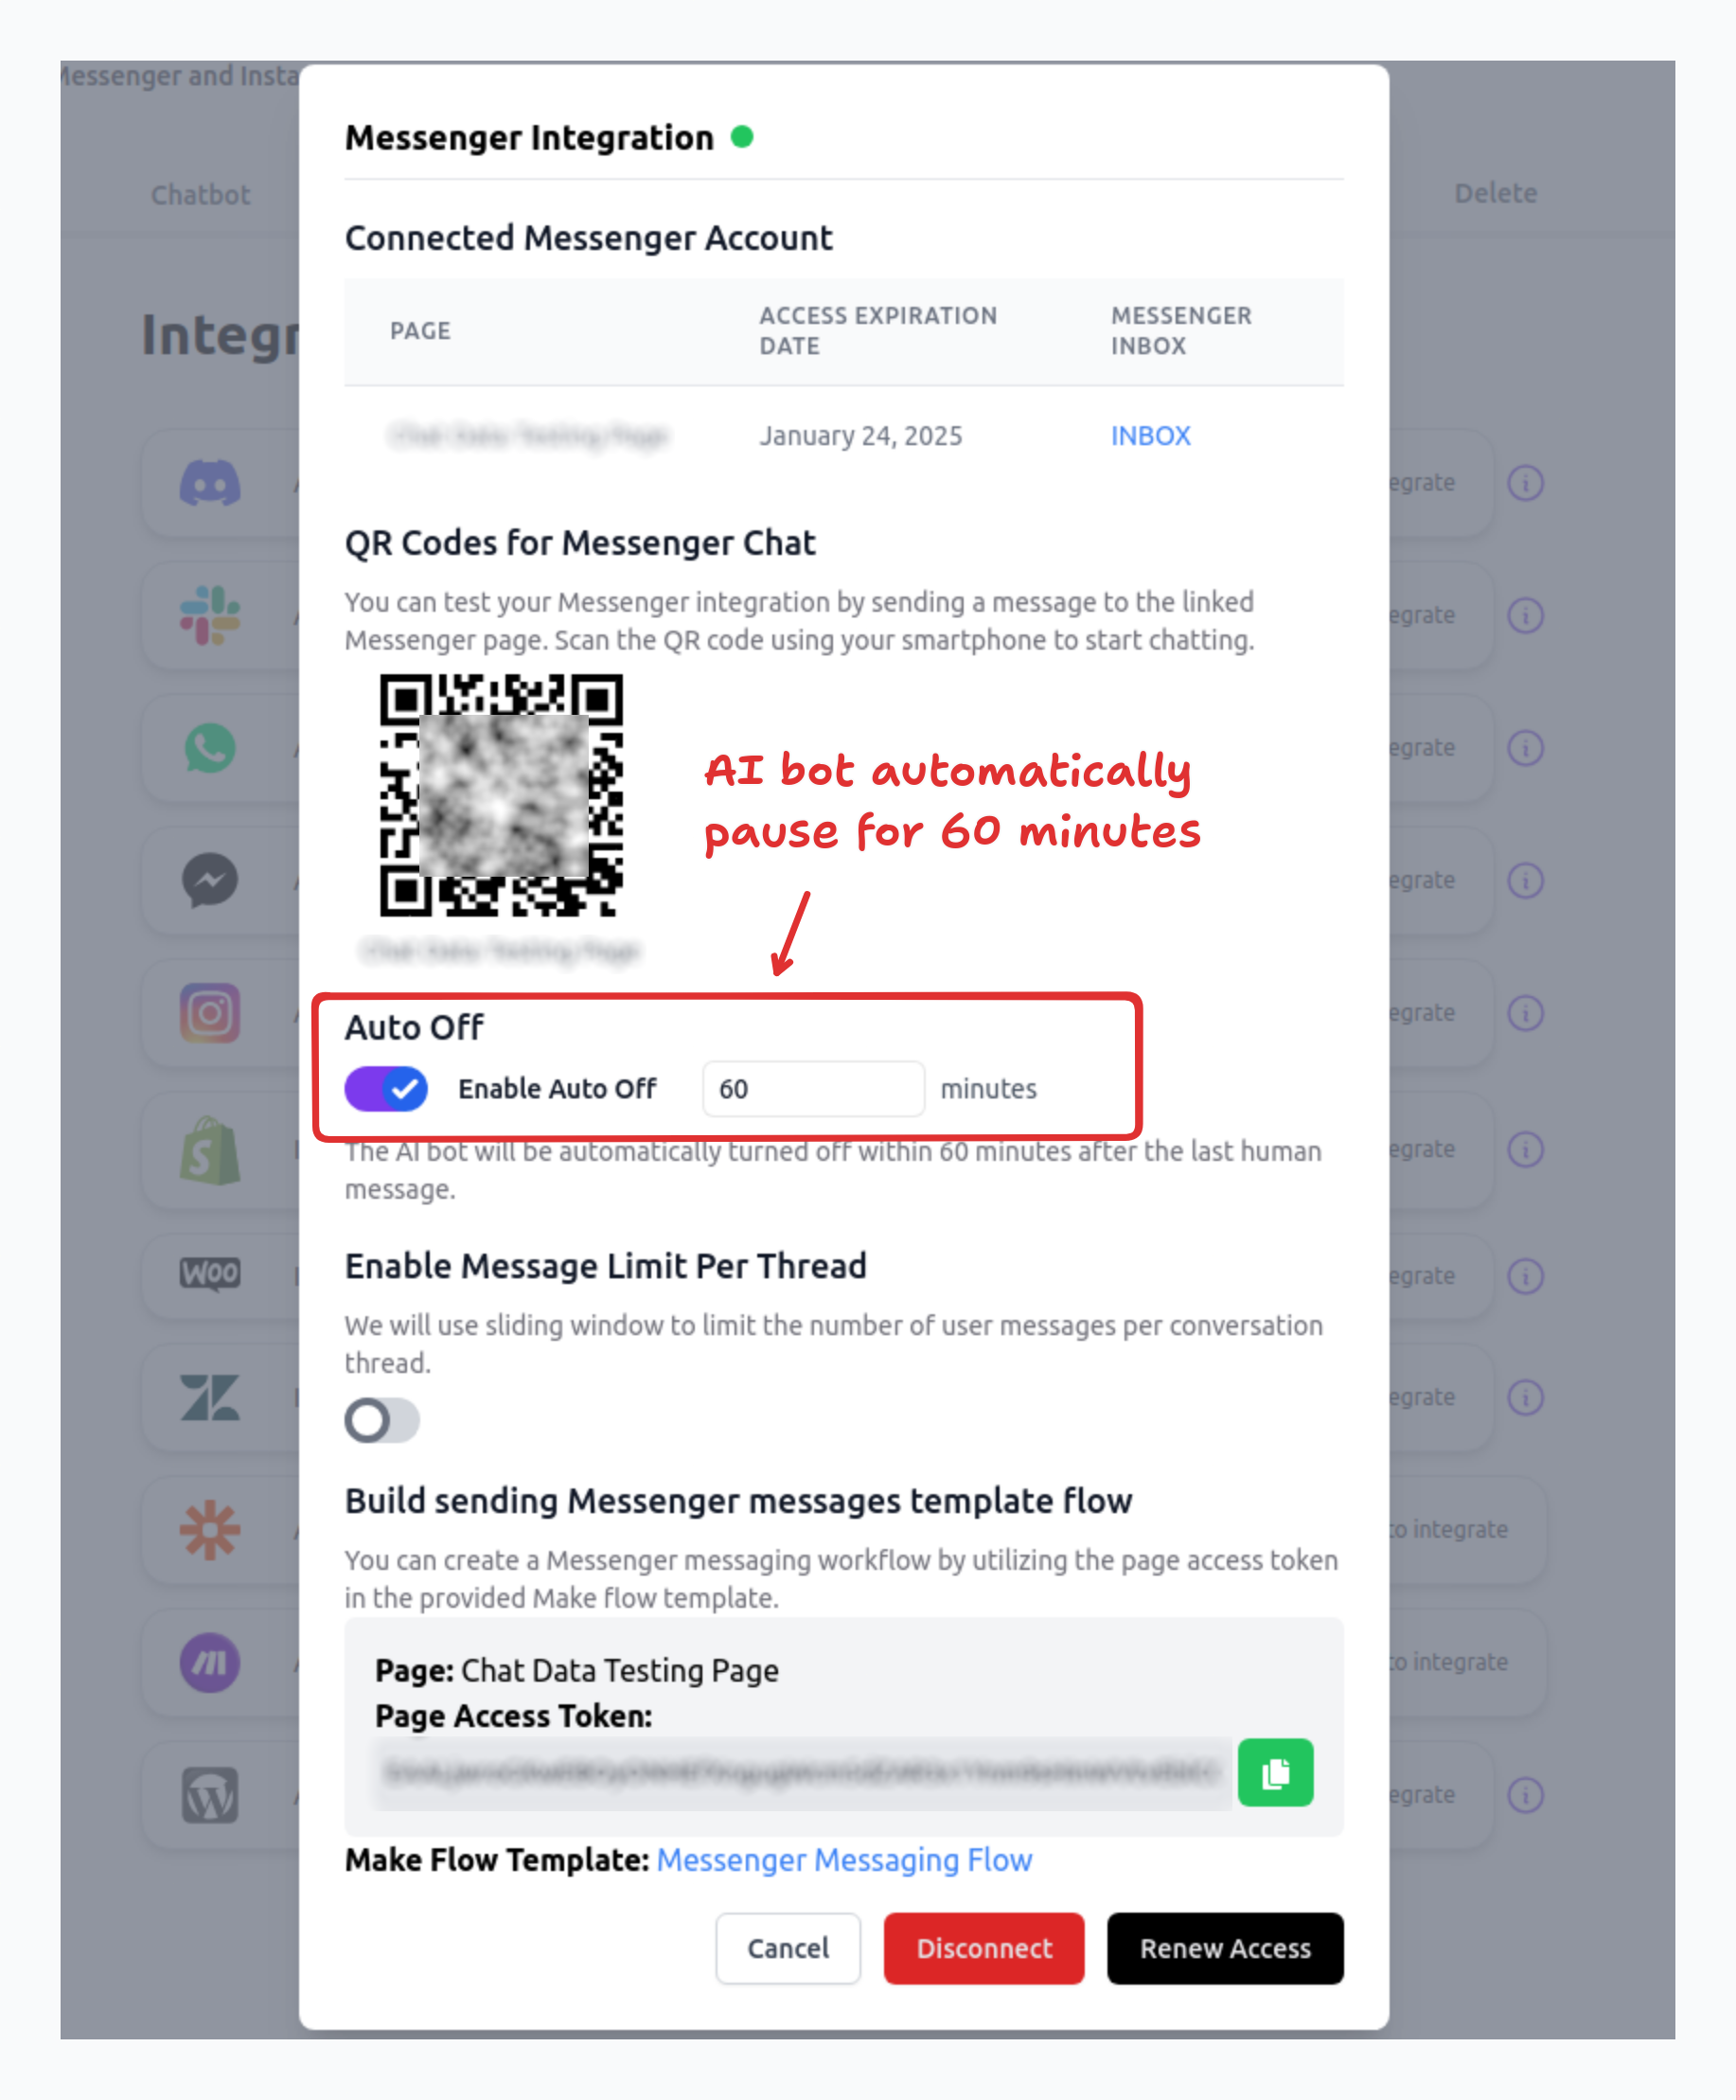
For testing purposes, you can scan the QR code provided in step 8 using your smartphone camera to message your Messenger bot. Additionally, you can access the INBOX link to navigate to your Facebook Business Suite inbox, allowing you to directly respond to customers as part of a human takeover.
Renew Your Integration Before the Access Token Expires
Please note that the Messenger integration requires manual renewal of the access token every 60 days. There is no automated way to renew the token without your intervention. We will send you a notification email 10 days before the access token expires. Alternatively, you can manually renew the access token before the expiration date, which will extend its validity for another 60 days.
Delayed Message Sending
If you want the AI chatbot to delay sending messages to users, you can set a random delay time for the AI chatbot to postpone its responses to customers. You can configure this in the Messenger integration modal as shown below: 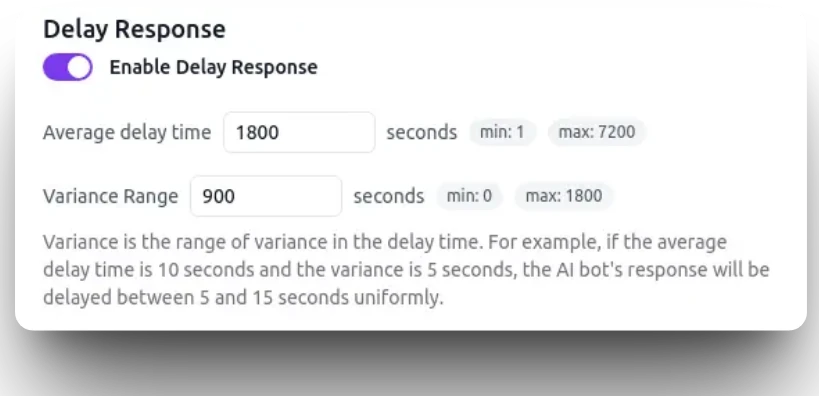
The AI chatbot will randomly delay its response within the range you set, making it harder to detect as an AI bot.
AI Re-engagement
Timely follow-ups are crucial for ensuring customer satisfaction. If you want the AI chatbot to follow up with customers after their last interaction, you can customize three key aspects of the AI follow-up:
- The time window for follow-up after the last message
- The specific conditions that trigger a follow-up
- The style and content of the re-engagement message
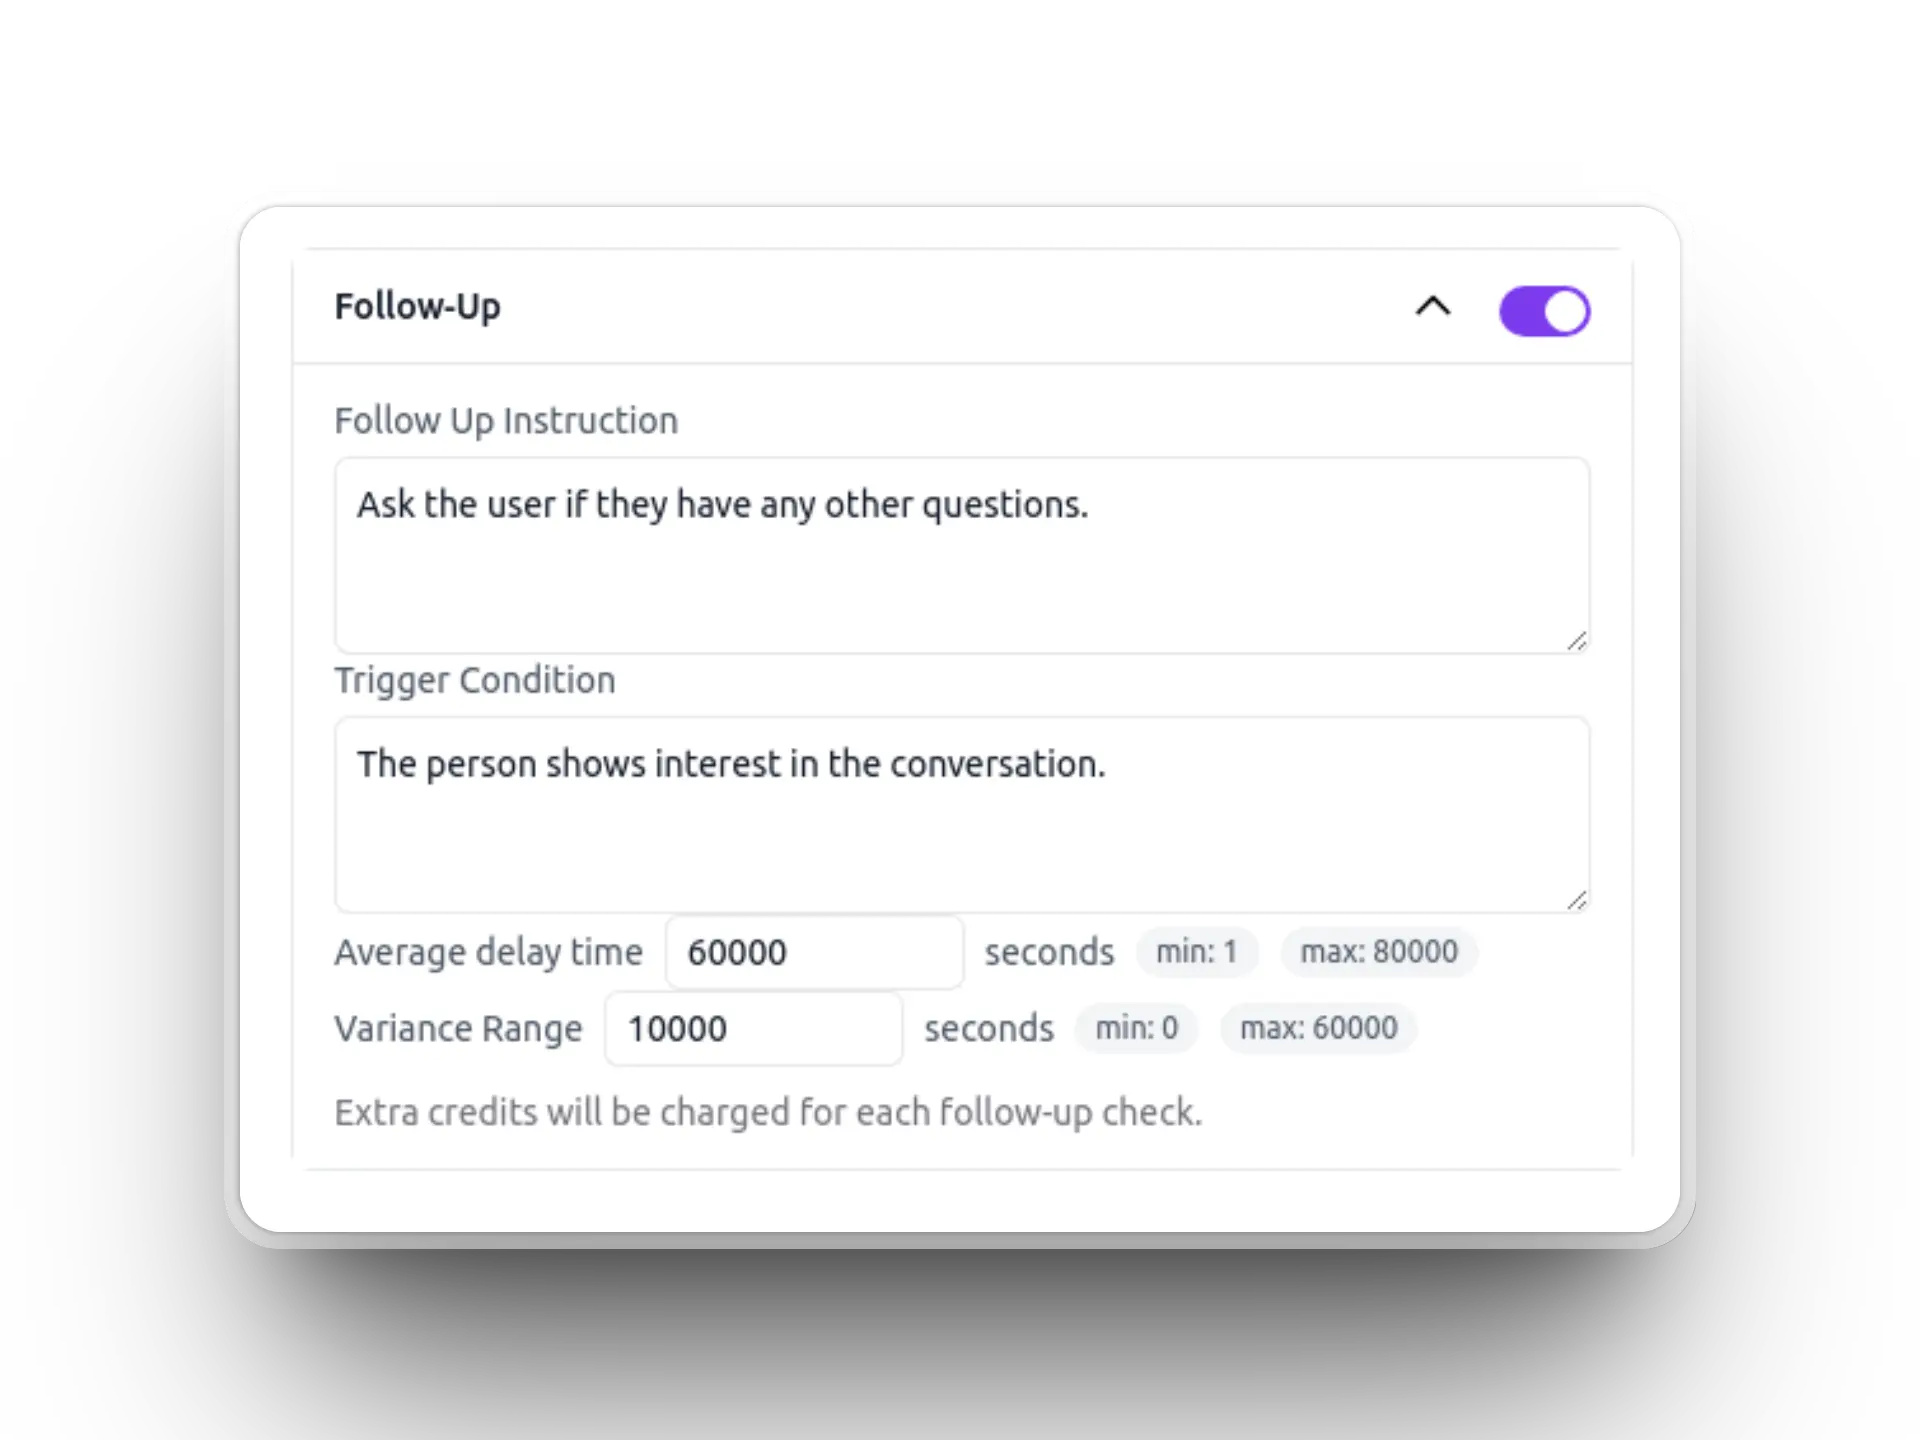
When the specified time arrives, the AI evaluates whether the conversation meets your defined re-engagement criteria. If the conditions are met, it sends a contextually appropriate follow-up message based on the previous conversation.
Live Chat Handover
You can chat with the customer by clicking the INBOX link above or in the Chat logs Dashboard as shown below to chat with the customer.
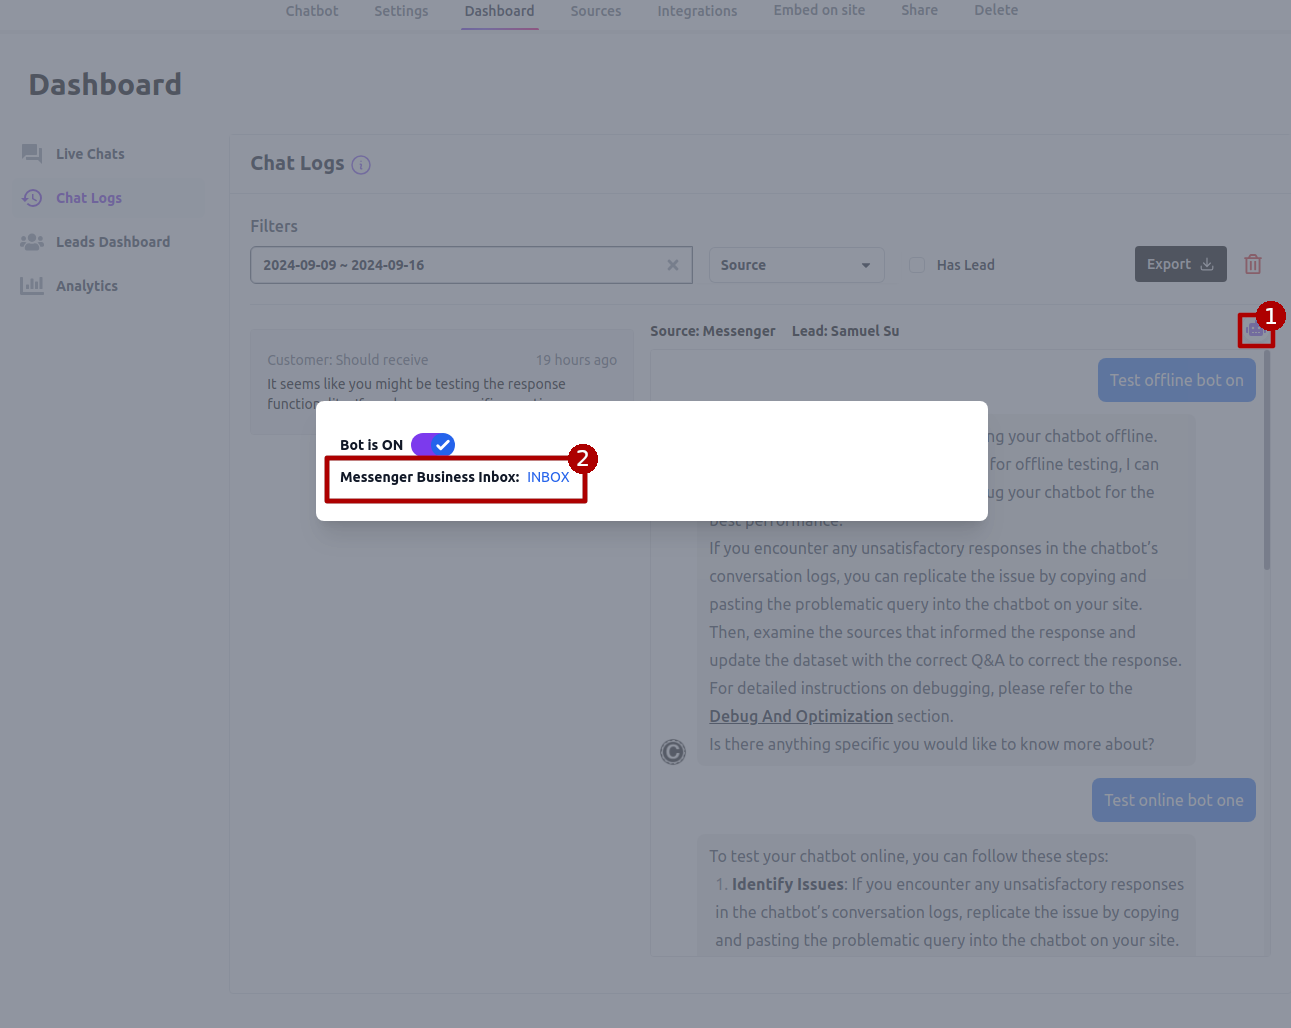
If you have access to our live chat feature, you can also click the Live Chat dashboard tab and select the corresponding Messenger conversation thread to chat with the customer. Alternatively, you can use the checklist filter to filter the Messenger conversations only.
You should turn off the AI chatbot for the corresponding conversation so that the chatbot won't respond to the message when you are chatting with the customer. Otherwise, the AI chatbot will respond to the same query again even if you have typed your response in the admin live chat panel.

After you send the human response, we will send the Messenger message to the customer's Messenger account directly. When the customer responds back and if the AI bot is turned off and you are offline, we will send an email along with the chat portal link to your email address registered in the live chat setting, which is similar to how the offline live message works in New Message To the Agent.
You can switch the AI bot on at any time after you have finished the live chat with the customer.
Automatic AI chatbot pause
To improve user experience, you can configure an automatic pause duration for the AI chatbot during Messenger integration setup. During this pause (up to 1 week), customer messages bypass the AI and go directly to you with email notifications. The chatbot automatically resumes after the configured time period. Note that this feature only works with Chat Data's native live chat interface, not Facebook's Business Platform interface, since Facebook doesn't relay Business Platform messages to Chat Data, preventing us from detecting human agent takeovers.
Difference between INBOX Live Chat and Live Chat Dashboard
You can send the live chat message in both the INBOX and the live chat dashboard. The main difference is that the INBOX is offered by Facebook and the message sent to Facebook while the AI bot is off won't be delivered to Chat Data and Chat Data won't send you an email notification when you are offline. Chatting inside the live chat panel of Chat Data will send an offline email to alert you in case you are offline.
Sending Messenger Messages in Batch
Utilize our Make workflow template to send Messenger messages using the page access token from your integrated Messenger account. Note that messages can only be sent to users who have previously interacted with your Messenger pages, as the PSID is page-specific. 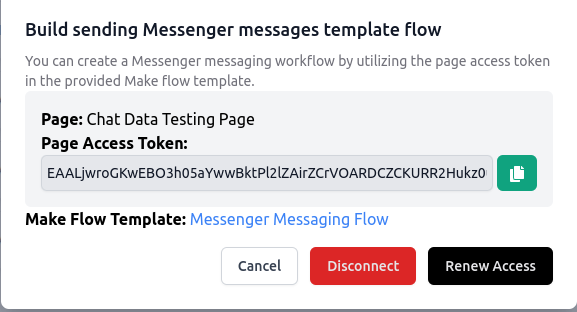 Below is a step-by-step guide on sending a Messenger template message using the Make workflow template.
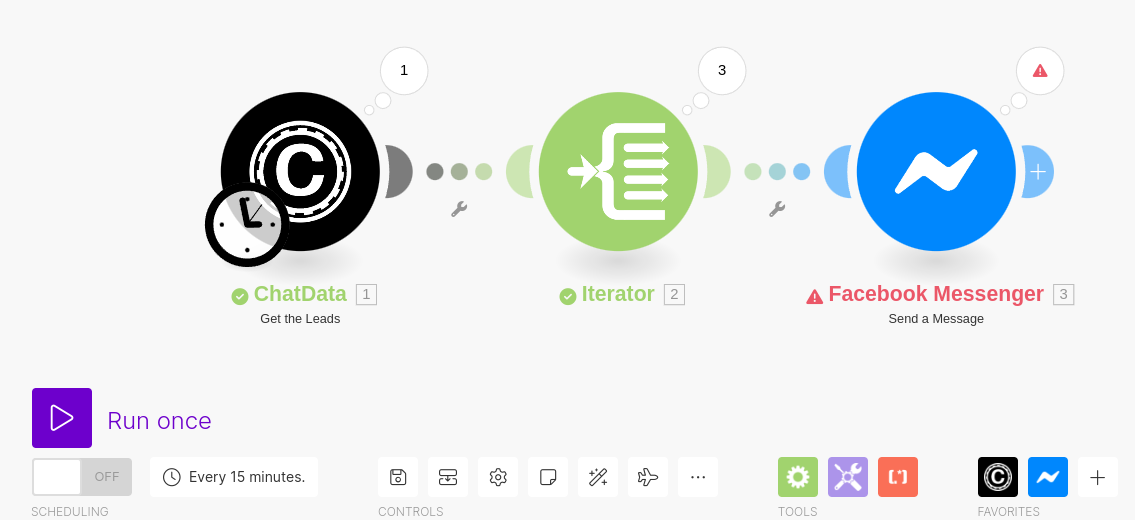
- Create a scenario based on the Make workflow template for Messenger.
- Configure the Chat Data's Get the Leads module with your API key from Chat Data.
- Select the chatbot from which you want to fetch leads and set the source to Messenger to retrieve leads specifically from Messenger.
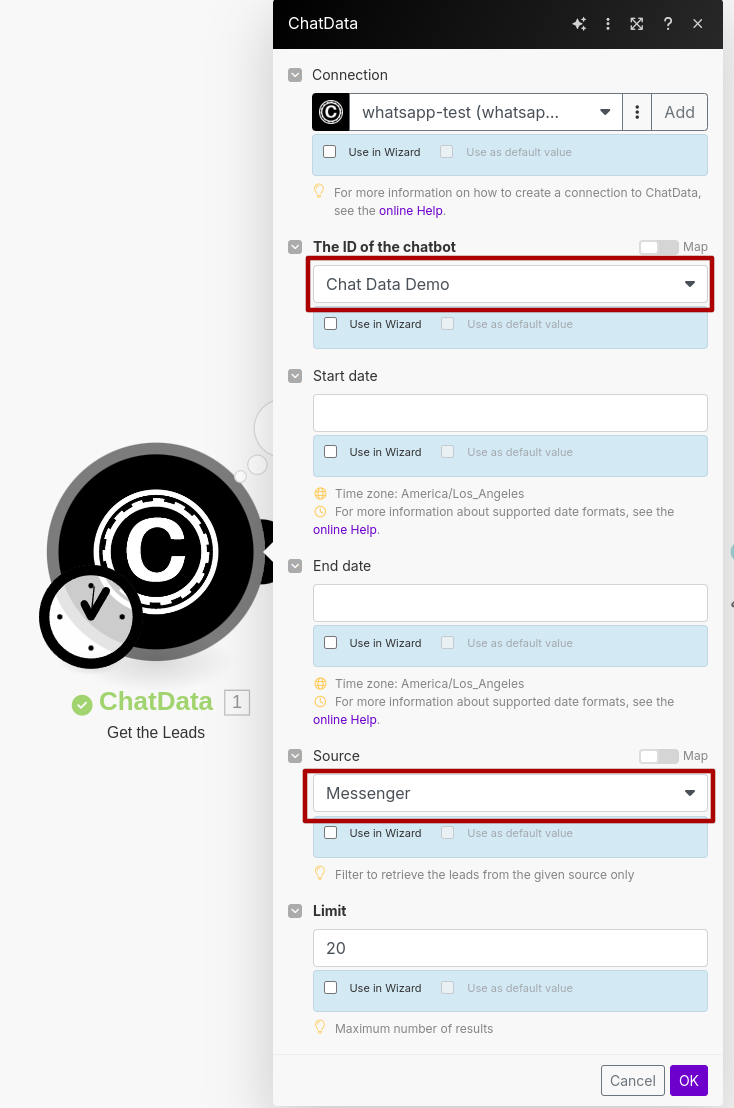
- Run the first module once to populate the fields and verify the data. The operations should return a list of users with the
psidfield.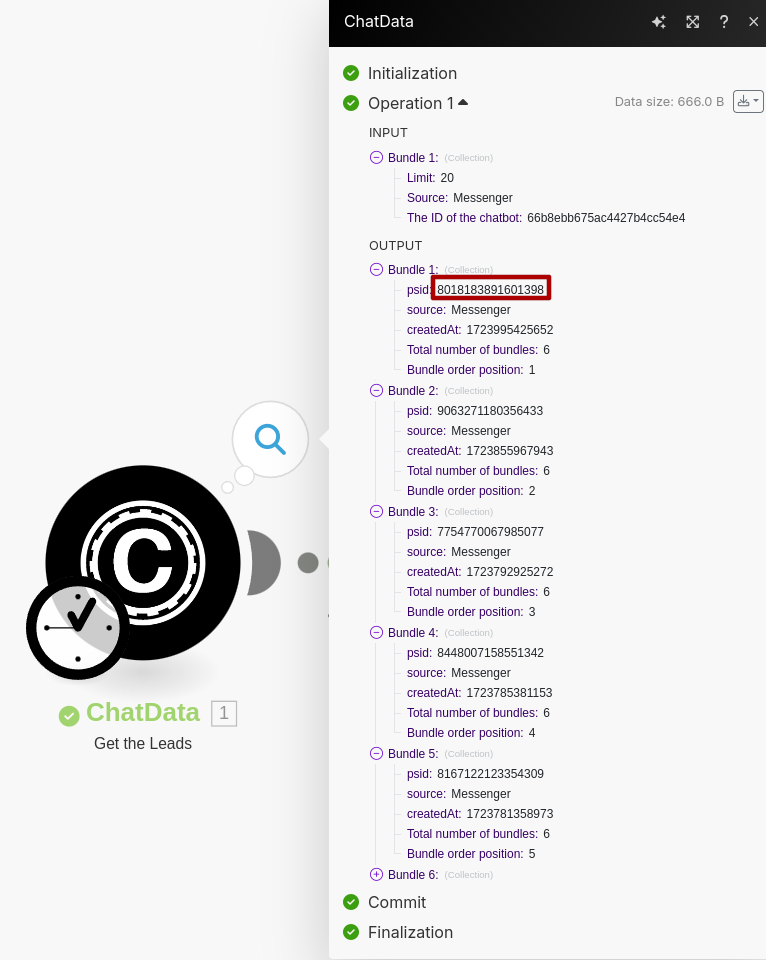
- Use the Iterator module to iterate over the users with the Array "psid".

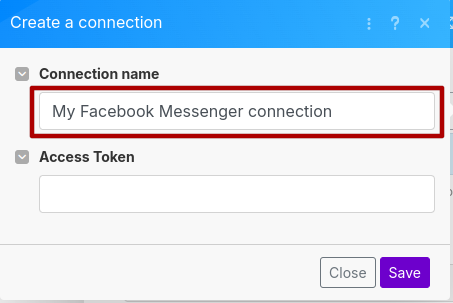
- Create your Messenger connection in the third module. Enter the page access token provided.
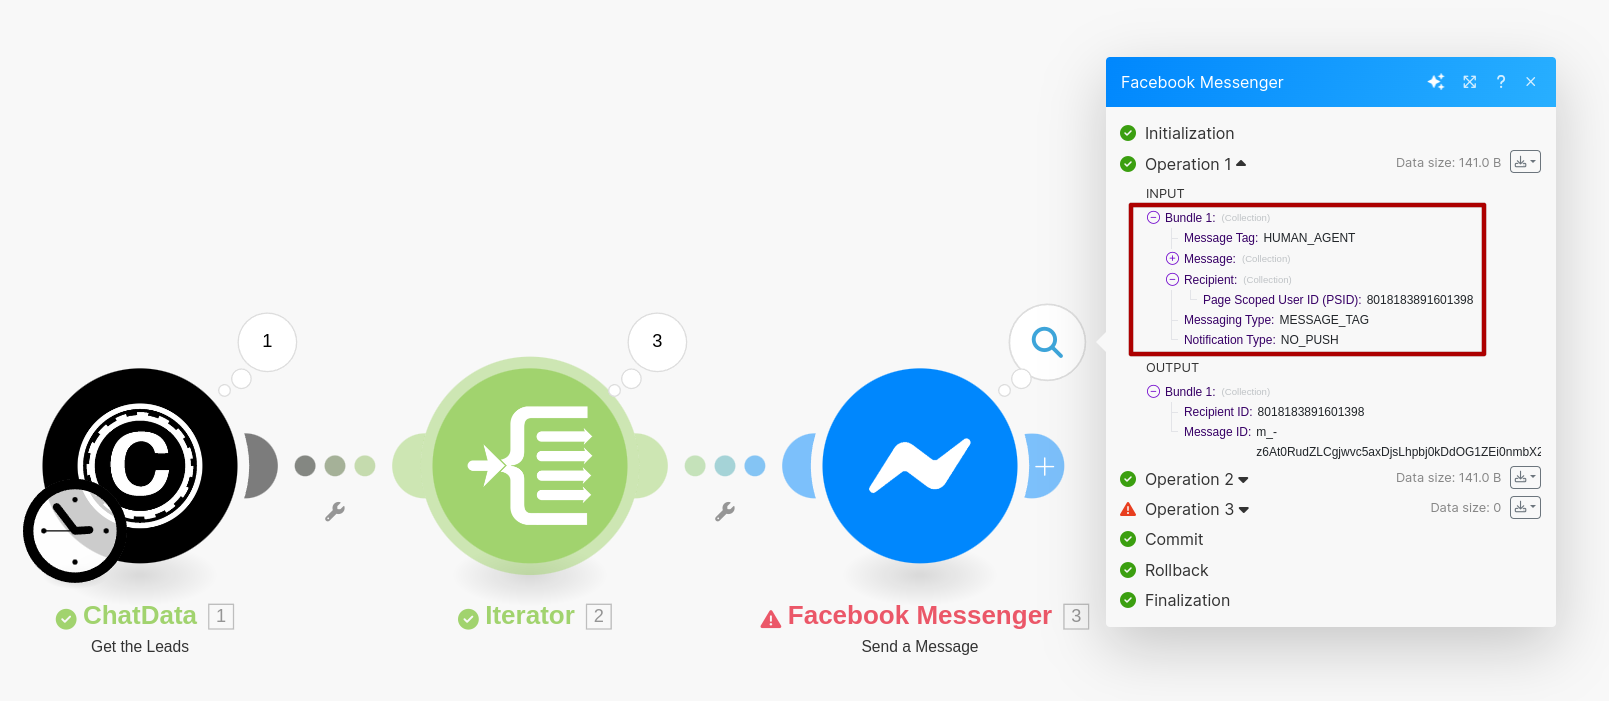
- Configure the parameters in the third module with the Page Scoped User ID (PSID) as the key "psid". Set the Message Type to Message Tag and the Message Tag to Human Agent. This allows the chatbot to send messages beyond the automatic message window. Add the message you wish to send in the text field. Click
OKto save the changes.
- Click the Run Once button to trigger the workflow. Messenger messages should be sent to the list of users. Note that some users may fail to receive messages if their page has been deleted or if their PSID is associated with a different page. You can just ignore those failures as long as some of the users were successfully sent messages.
- Review the operations of the third module to confirm successful message delivery to PSIDs.
- Set the schedule in the first module to trigger the workflow at your desired frequency, such as daily at 20:00 PDT.

- Save and activate the workflow.