Multi-platform Integrations
Add Chatbots to WordPress Websites
Discover how to seamlessly integrate a chatbot widget into your WordPress Website.
Step 1: Allowlist the Domain of Your WordPress website
To integrate the chatbot into your WordPress website, you need to allowlist the main domain of your WordPress website so that the chatbot can appear on your production website and set the visibility of your chatbot to be public. Additionally, you can specify certain URL paths of your store to be disallowed, preventing the chatbot from appearing on those pages. 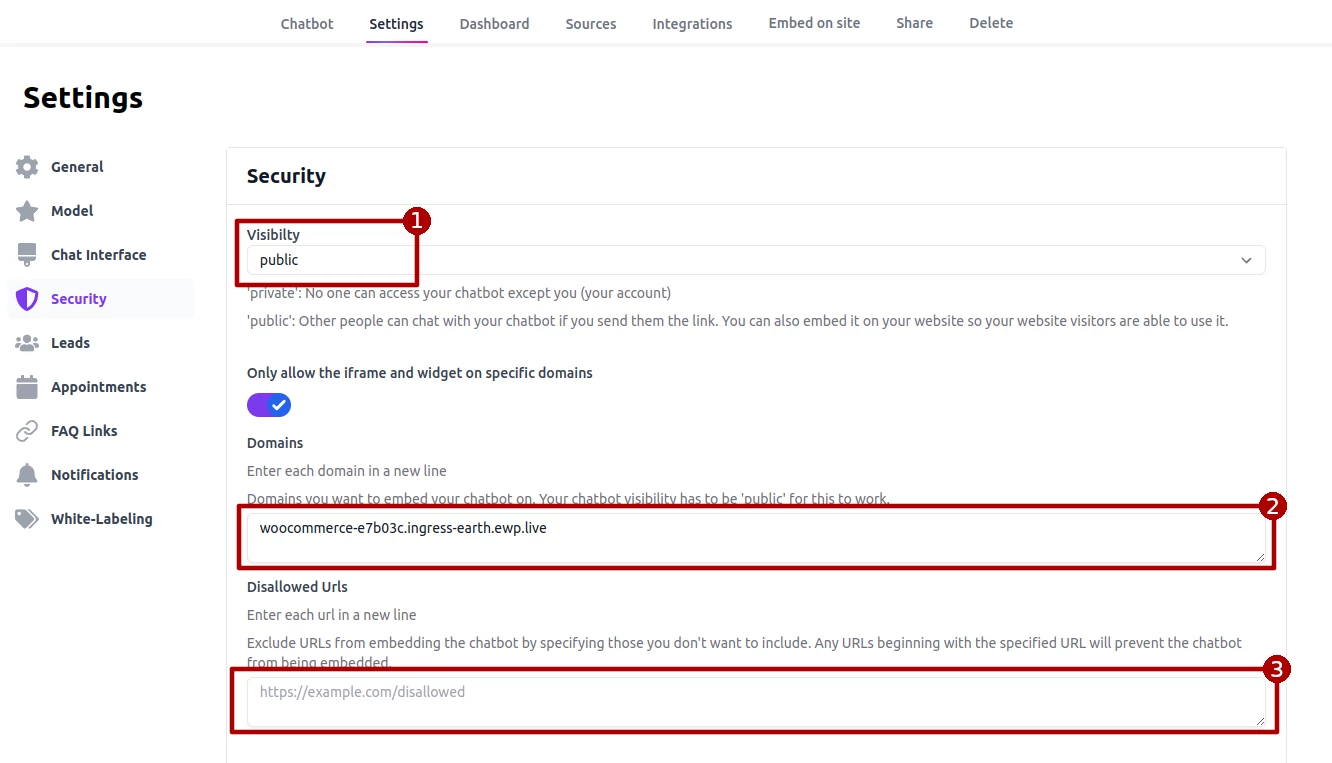
Step 2: Add the Embedding Script to <head>
There are two ways to add the embedding script to the head element of your WordPress website: Use a Plugin or Edit Theme's functions.php File.
Use a Plugin (Recommended)
Search for the key work "Chat Data", you can find our official plugin. Or you can find it directly through this link. 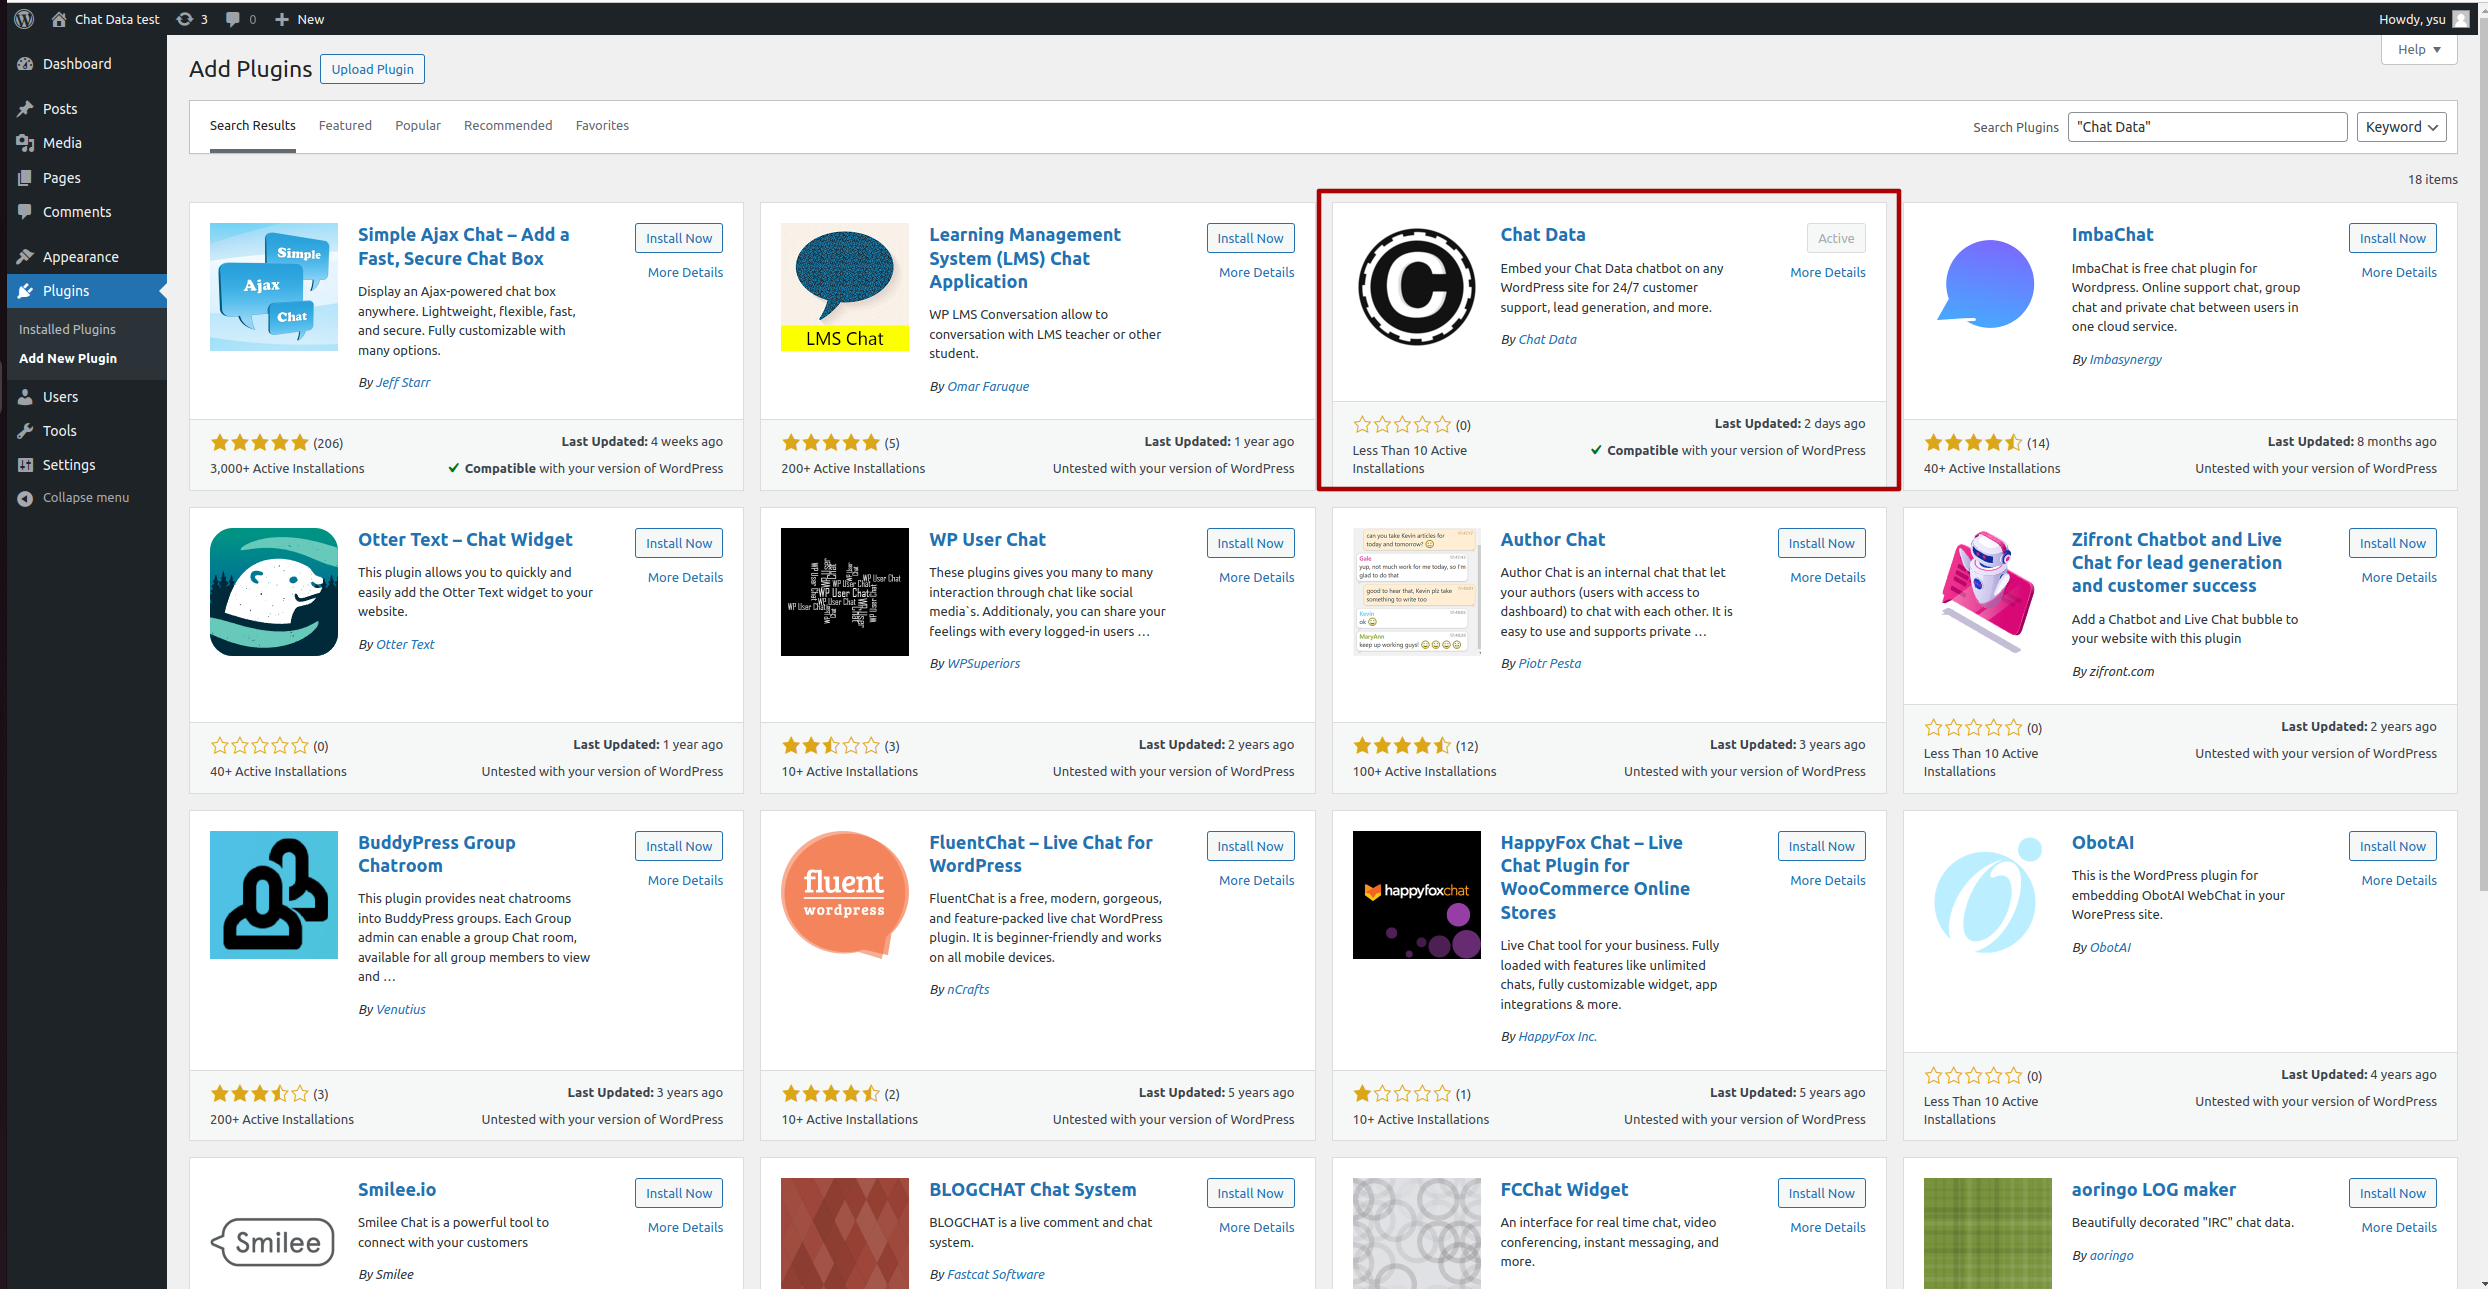
Fill in the chatbotId in the Chat Data setting tab. Optional: By default, we use www.chat-data.com as the embedding domain in the setting. If you are eligible for our reseller plan, you can set up your own domain for hosting the embedding script. Follow this guide for a complete setup. 
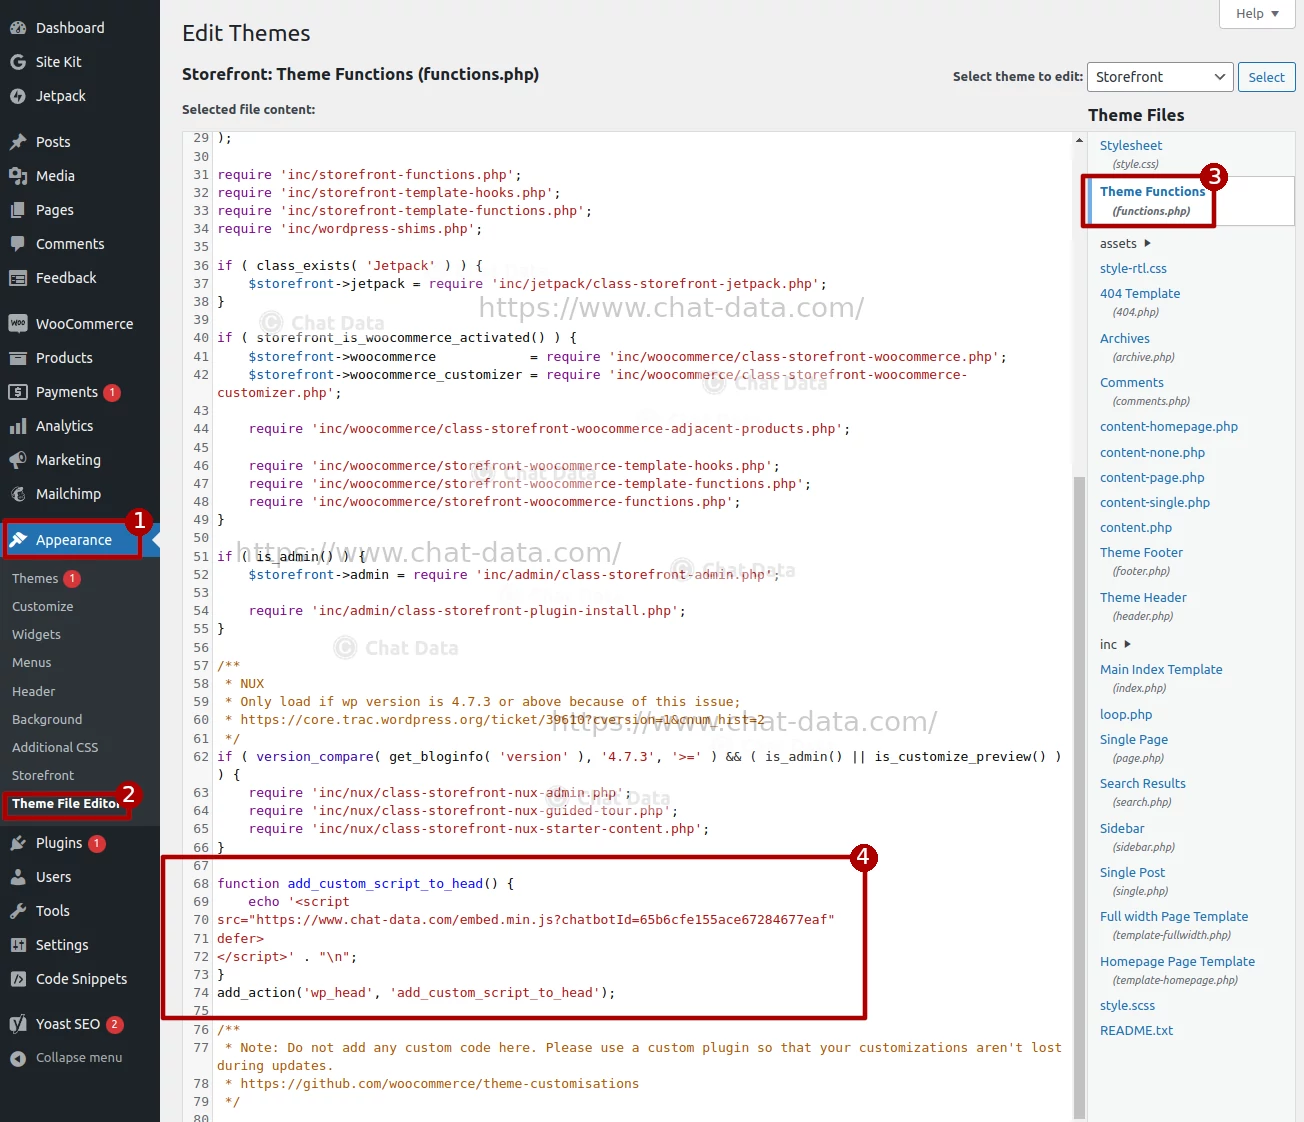
Edit Theme's functions.php File
If you're comfortable with editing theme files and want a more direct approach, you can add your script by editing the functions.php file of your theme. This method is more permanent but requires careful editing.
- Access Your Theme's functions.php File: You can access this file by going to Appearance > Theme Editor in the WordPress dashboard. Select your current theme and find the
functions.phpfile in the list of theme files. Alternatively, use an FTP client to access your server and edit the file directly within the theme's folder.
- Access Your Theme's functions.php File: You can access this file by going to Appearance > Theme Editor in the WordPress dashboard. Select your current theme and find the
- Add Your Script: Insert the following code at the end of your theme's functions.php file. Replace the following code with your actual embedding script and add it to your functions.php file.
function add_custom_script_to_head() {
echo '<script src="//your-script-url.js"></script>' . "\n";
}
add_action('wp_head', 'add_custom_script_to_head');