Multi-platform Integrations
Telegram Integration
Transform your Telegram presence with Chat Data's powerful AI chatbot integration. This comprehensive guide will walk you through creating your own Telegram bot and connecting it to Chat Data, enabling intelligent automated conversations with your users across Telegram's global messaging platform.
By integrating Chat Data with Telegram, you'll unlock AI-powered capabilities that work 24/7, handle multiple conversations simultaneously, and provide instant responses to your users. Whether you're building a customer support bot, an information assistant, or an interactive service bot, this integration delivers enterprise-level AI directly through Telegram's familiar interface.
Key Benefits of Telegram Integration
Before diving into the setup process, here are the main advantages of connecting your Chat Data chatbot to Telegram:
- Your Own Bot: Create and control your own branded Telegram bot with custom name and username
- Instant Setup: Connect your bot to Chat Data in minutes with a simple token-based integration
- Global Reach: Telegram works worldwide without phone number restrictions
- Secure & Official: Uses Telegram's official Bot API for secure, reliable communication
- Multi-language Support: Serve users in their preferred language with Chat Data's AI capabilities
- Rich Media Support: Handle text, images, documents, and other file types seamlessly
- No Infrastructure Required: Chat Data handles all the backend complexity
Prerequisites and Important Notes
Before you begin the integration process, please be aware of these important considerations:
Telegram Bot Limitations
- Each Telegram bot requires a unique bot token from BotFather
- Bots cannot initiate conversations - users must message the bot first
- One bot token can only be connected to one Chat Data chatbot at a time
- Bot usernames must be unique across all of Telegram and end with "bot"
Security Considerations
- Keep your bot token secure and never share it publicly
- The token provides full control over your bot
- If your token is compromised, regenerate it immediately through BotFather
- Chat Data encrypts and securely stores your bot token
Requirements
- A Telegram account (personal or business)
- Access to your Chat Data dashboard
- Basic understanding of messaging bots (helpful but not required)
Step-by-Step Integration Guide
Step 1: Create Your Chat Data Chatbot
Before connecting to Telegram, ensure you have created and configured your chatbot in Chat Data. Follow the Chatbot Creation guide to:
- Set up your chatbot's knowledge base
- Configure AI responses and behavior
- Test basic functionality
Step 2: Create Your Telegram Bot
Creating a Telegram bot involves interacting with BotFather, Telegram's official bot creation tool. Here's the detailed process:
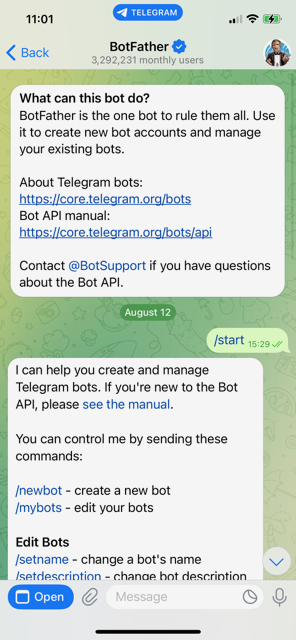
Finding BotFather
- Open Telegram on any device (mobile or desktop)
- Search for BotFather in the search bar
- Look for the verified account with a blue checkmark ✓
- Alternatively, visit directly: t.me/botfather
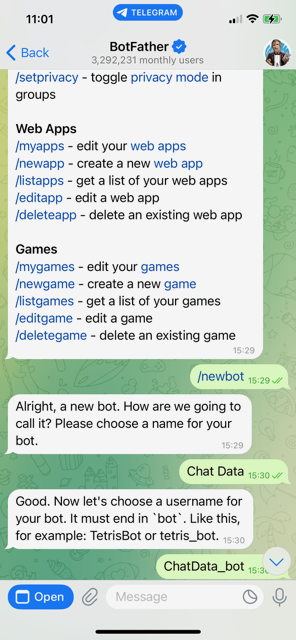
Creating Your Bot
- Start a conversation with BotFather by clicking "Start" or sending
/start - Send the command
/newbotto begin creating a new bot - Choose a display name for your bot
- This is the name users will see
- Example: "Customer Support", "AI Assistant", "Help Bot"
- Can be changed later
- Choose a username for your bot
- Must be unique across all of Telegram
- Must end with "bot" (lowercase)
- Examples:
mycompany_bot,support_assistant_bot,help_ai_bot - Cannot be changed later, so choose carefully
Obtaining Your Bot Token
After successfully creating your bot, BotFather will provide you with:
- A confirmation message with your bot's details
- Your bot token - a string like
1234567890:ABCdefGHIjklMNOpqrsTUVwxyz - A link to your bot -
t.me/your_bot_username
Important: Copy and save your bot token immediately. You'll need it for the next step.
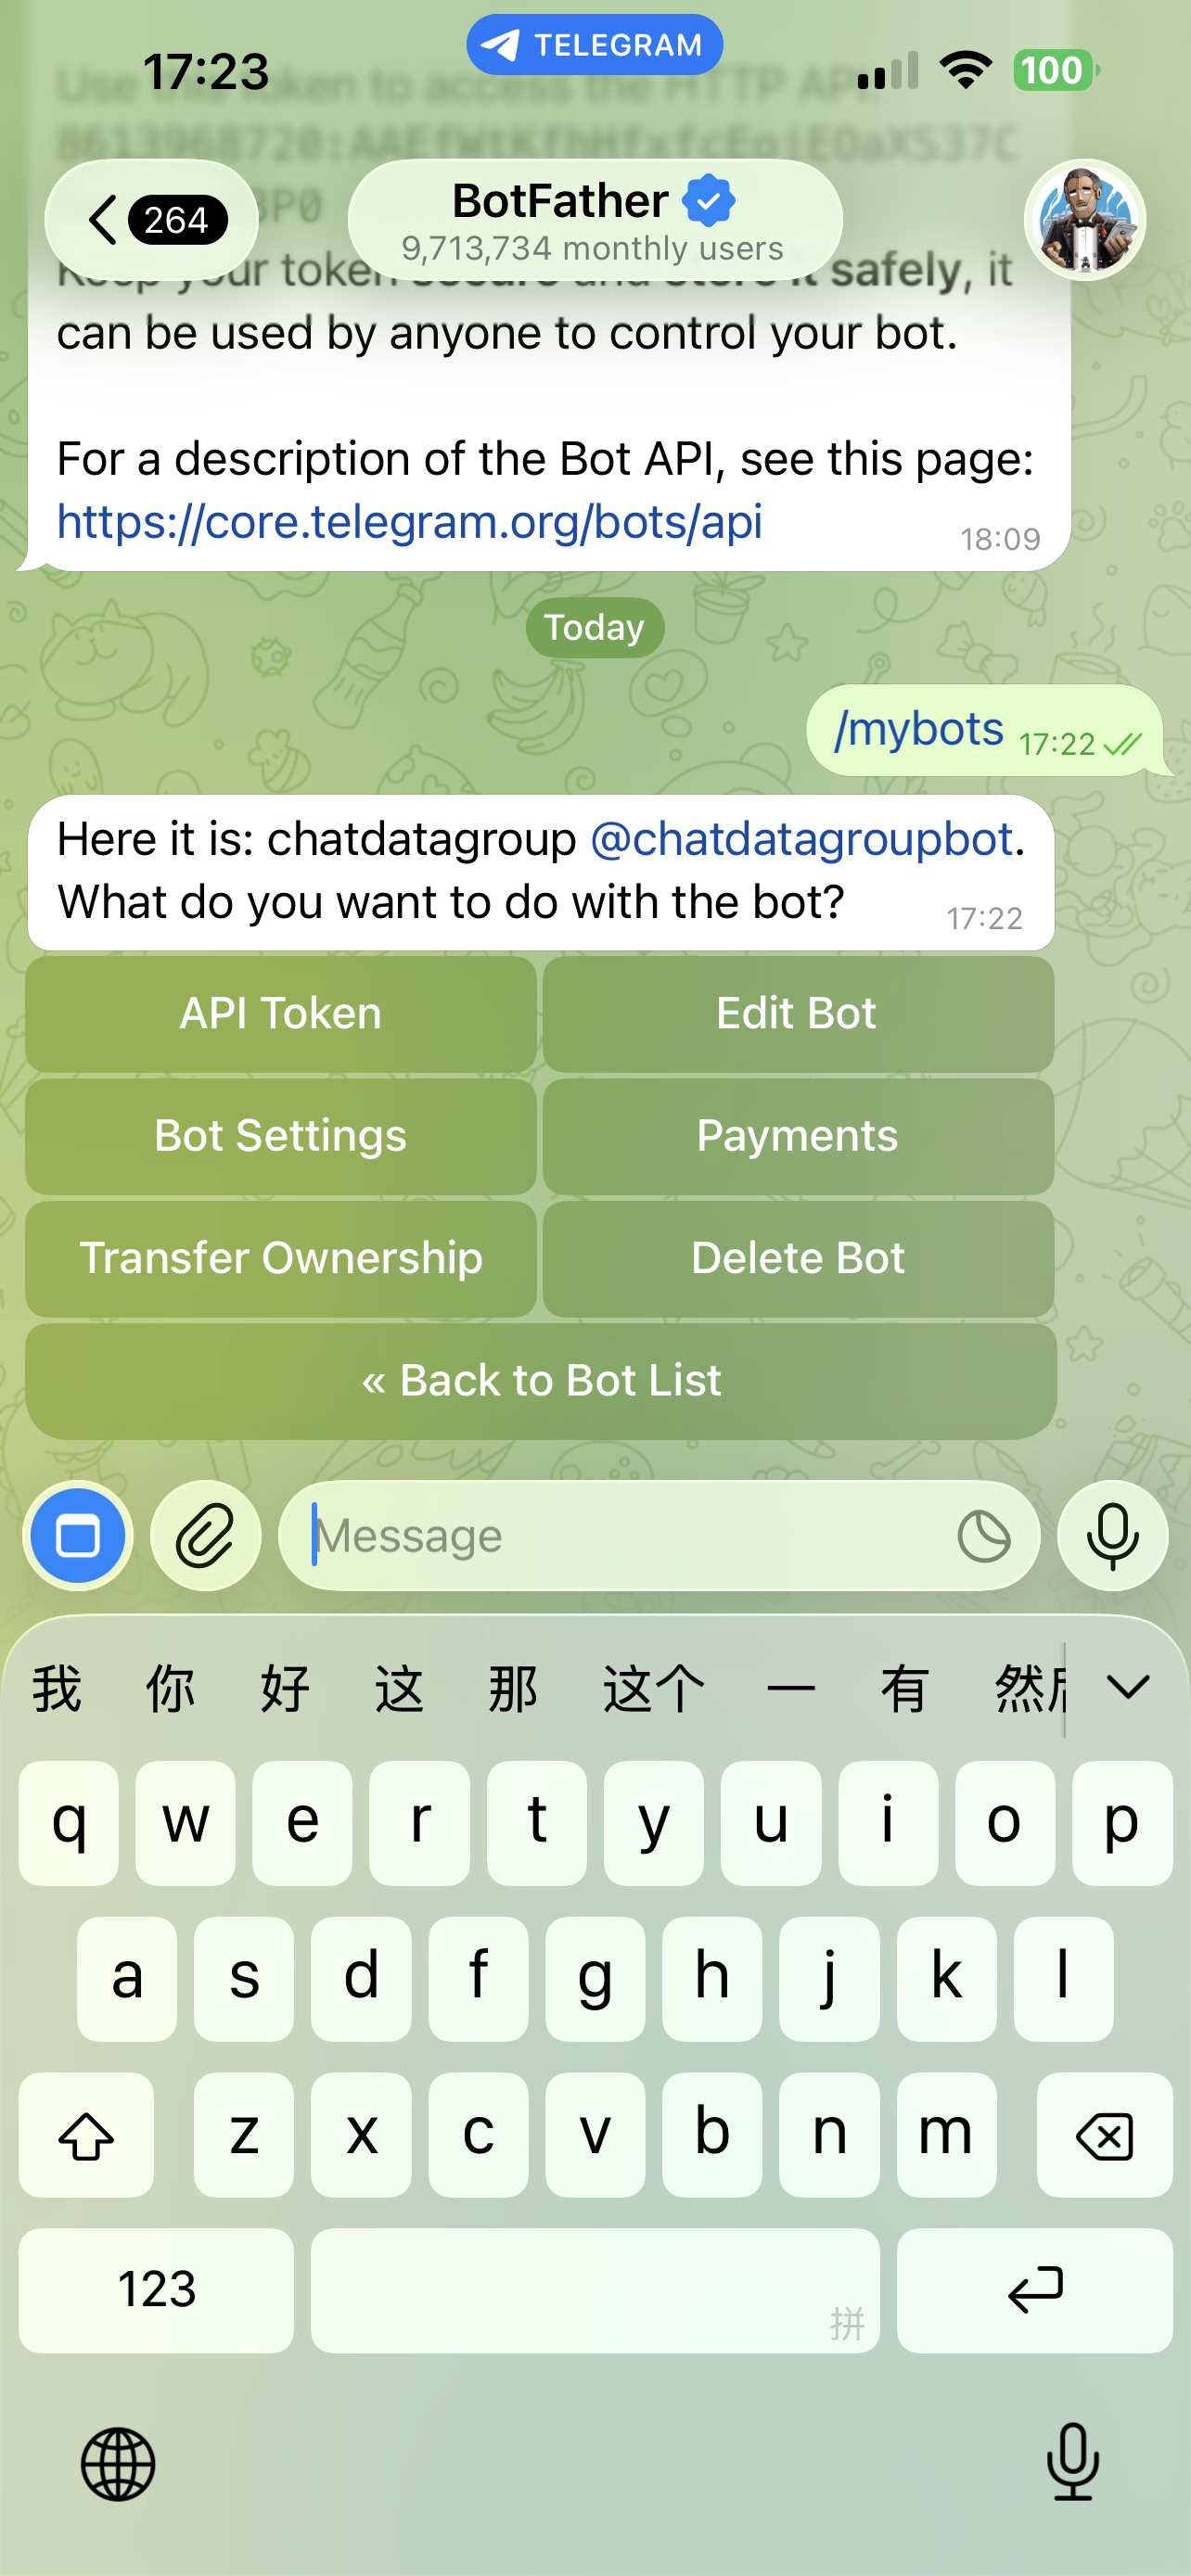
Step 3: Connect Your Bot to Chat Data
Now that you have your Telegram bot and token, let's connect it to Chat Data:
Navigate to Integrations
- Log into your Chat Data dashboard
- Select your chatbot
- Click on the "Integrations" tab
Select Telegram Integration
- Find the Telegram integration card
- Click "Configure" or "Add to Telegram"

Enter Your Bot Token
- Paste the bot token you received from BotFather
- Ensure there are no extra spaces or characters
- Click "Connect Bot"
Verify Connection
- Chat Data will verify your token with Telegram
- Upon successful connection, you'll see:
- Bot name and username
- Connection status (green indicator)
- Direct link to test your bot
- QR code for easy mobile access
Step 4: Test Your Integration
After successful connection, it's important to test your bot:
- Open your bot using the provided link or QR code
- Send
/startto initiate conversation - Send a test message to verify AI responses
- Check response quality and timing
Advanced Configuration Options
Chat Data provides several advanced features to customize your Telegram bot's behavior:
Group Chat Support
Your Telegram bot can respond in group chats and supergroups, not just direct messages. Each group member gets their own private conversation context with the bot — others can see the replies, but the bot never mixes one person's history with another's.
Enabling Group Chat Support
- Go to My Chatbots > [Your Chatbot] > Integrations > Telegram
- Expand the Group Chat Support section
- Toggle it ON
- Optionally customize the welcome message — this is sent when the bot first joins a group. You can use the
{{botName}}placeholder to insert the bot's display name.
How Members Interact in Groups
Once the bot is added to a group, members can interact with it in three ways:
- @mention the bot — Type
@yourbotnamefollowed by a question - Reply to a bot message — Reply directly to any message the bot sent. The bot sees the quoted text for context, so it can give a relevant answer even if the replier has no prior conversation history.
- Use a slash command — Type
/ask(or any custom command you've configured) followed by the question
Privacy Mode
The bot respects Telegram's Privacy Mode by default. This means it only sees messages that are directly addressed to it (@mentions, replies to its messages, and slash commands). It does not read every message in the group.
Group Chat Behavior Notes
- Suggested-question buttons are hidden in groups to prevent one member from accidentally triggering a response in another member's context. CTA link buttons still appear normally.
- Existing DMs are unchanged. Enabling group support has no effect on your bot's direct-message behavior.
- Billing works the same way. Group responses consume message credits from the bot owner's plan, just like DMs.
- Live chat escalation works in groups. Agents can take over a group member's conversation from the dashboard and reply as the bot.
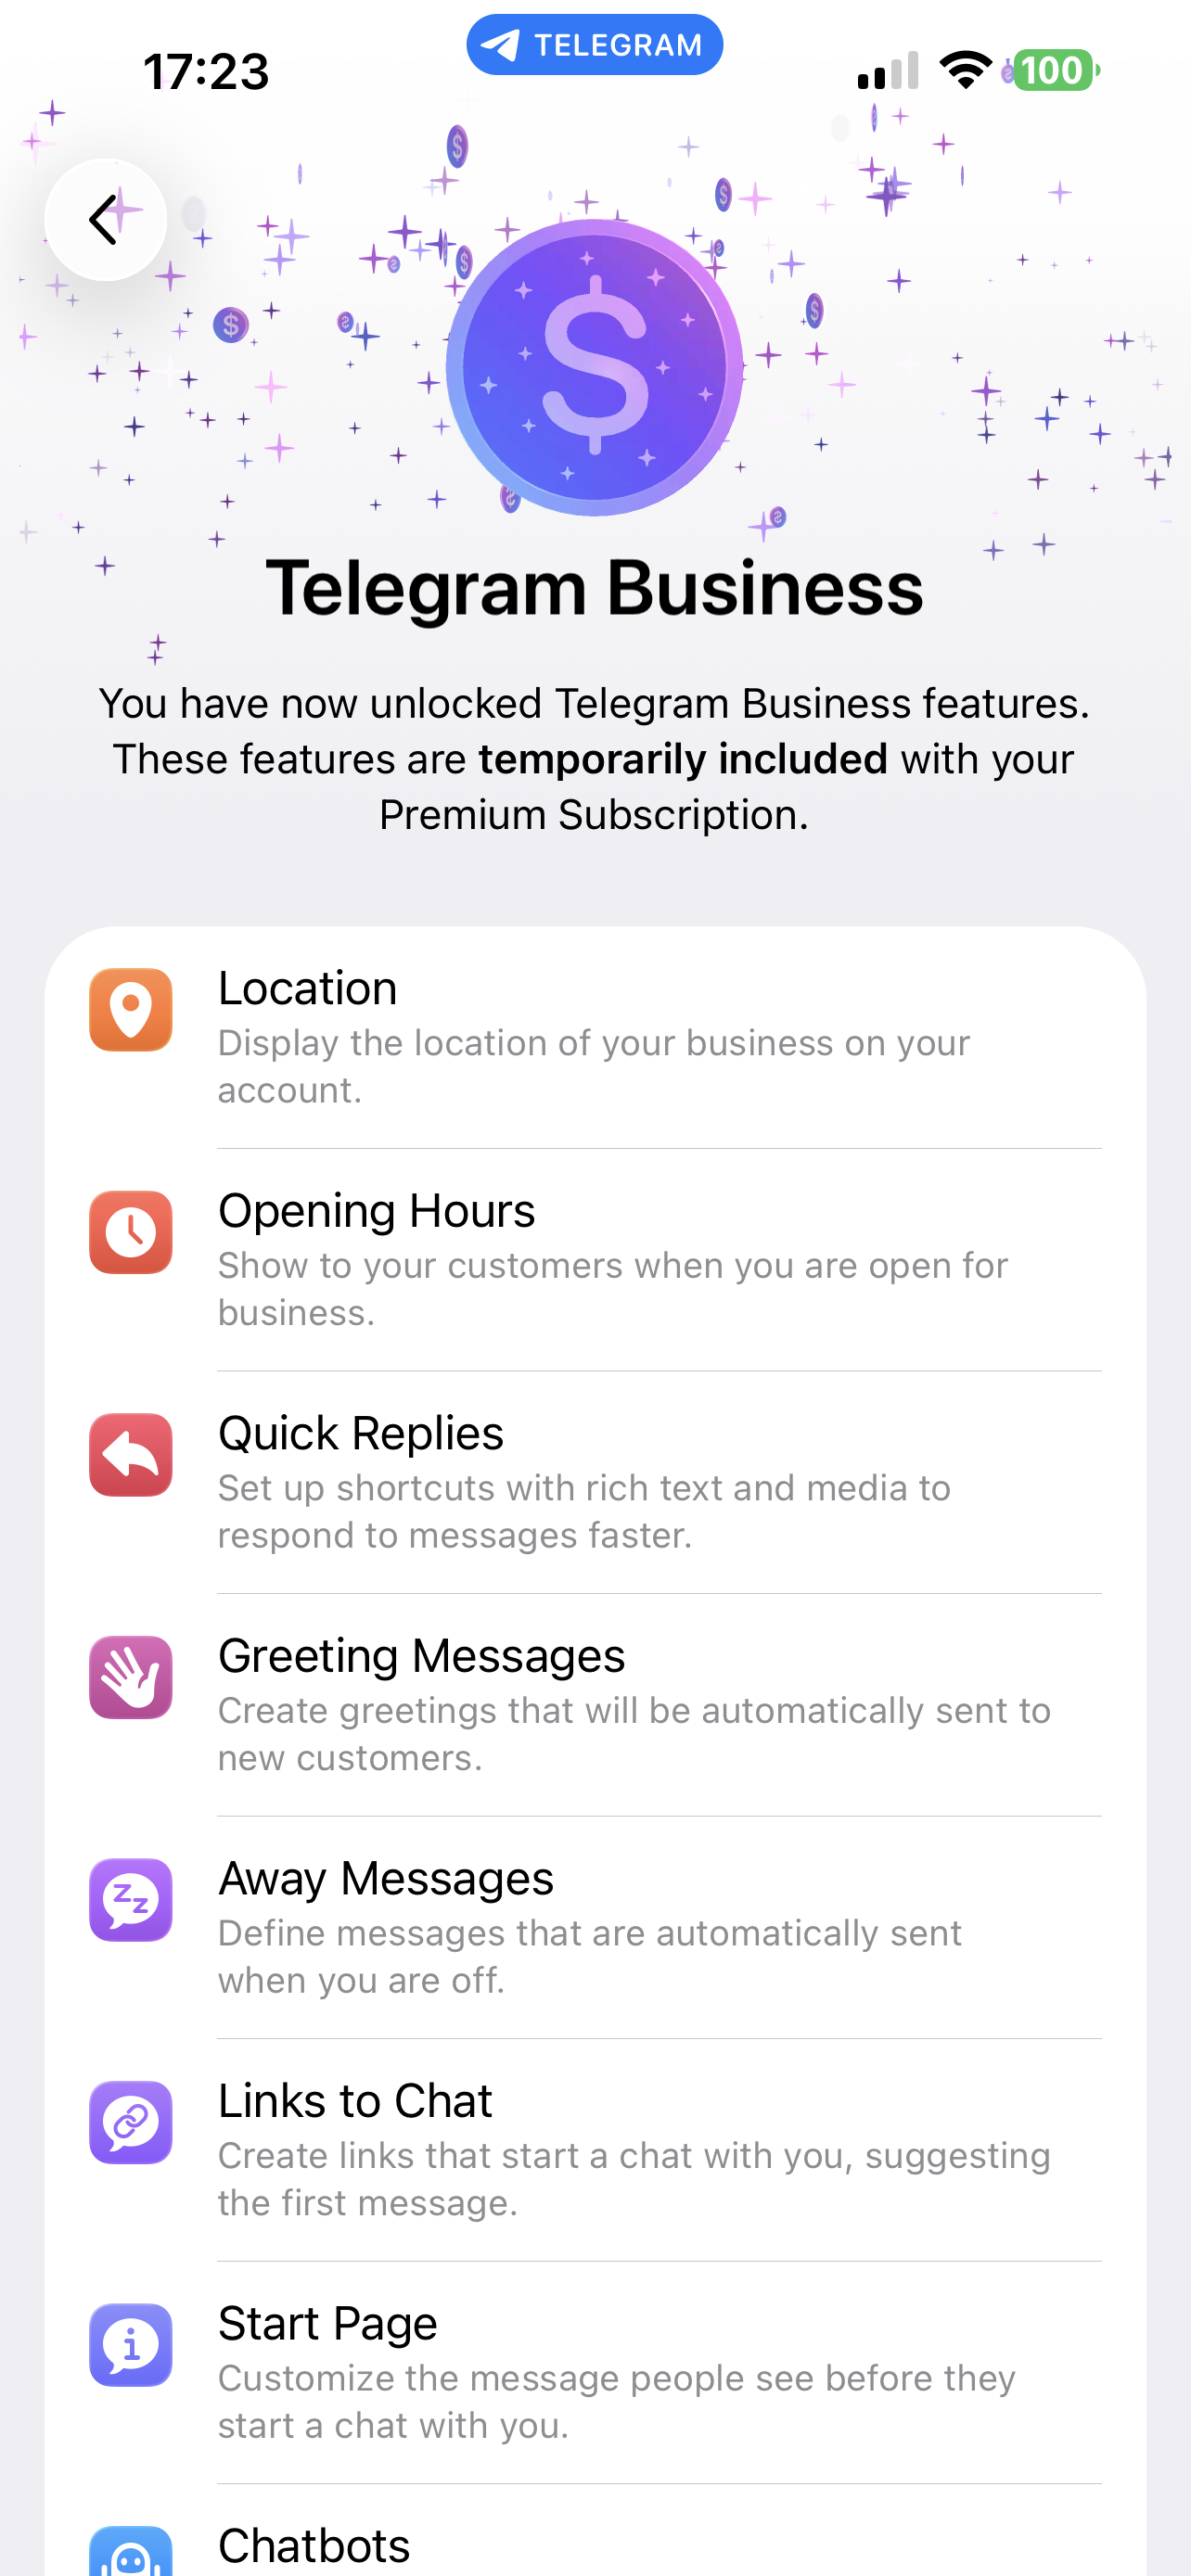
Telegram Business Account Integration
Telegram Business accounts can connect your Chat Data bot to reply on your behalf inside your personal 1:1 customer chats. Customers see your name and avatar — not the bot's. You can take over any conversation manually at any time, and the AI automatically pauses for 30 minutes (configurable) when you do.
This is a different mode from the public-bot direct-messaging covered above. Use it when you want the AI to act as you in your personal Telegram Business inbox, rather than as a separate @yourbot account.
For the full product overview, see the Telegram Business Chatbot page. The setup steps below walk through connecting your existing Chat Data Telegram bot to a Telegram Business account.
Requirements
- An active Telegram Premium subscription on the account you want to connect (Telegram Business is currently a Premium feature).
- Your bot already connected to Chat Data via the steps in Step 3 above. The webhook is registered with full Telegram Business update support on every connect.
- The bot's Business Mode enabled in BotFather (the steps below cover this).
Step 1: Enable Business Mode in BotFather
By default, Telegram bots cannot be added to Business accounts. You need to flip the Business Mode switch in BotFather first. Open Telegram and start a chat with @BotFather, then walk through the four taps below:
 Send /mybots and pick your bot
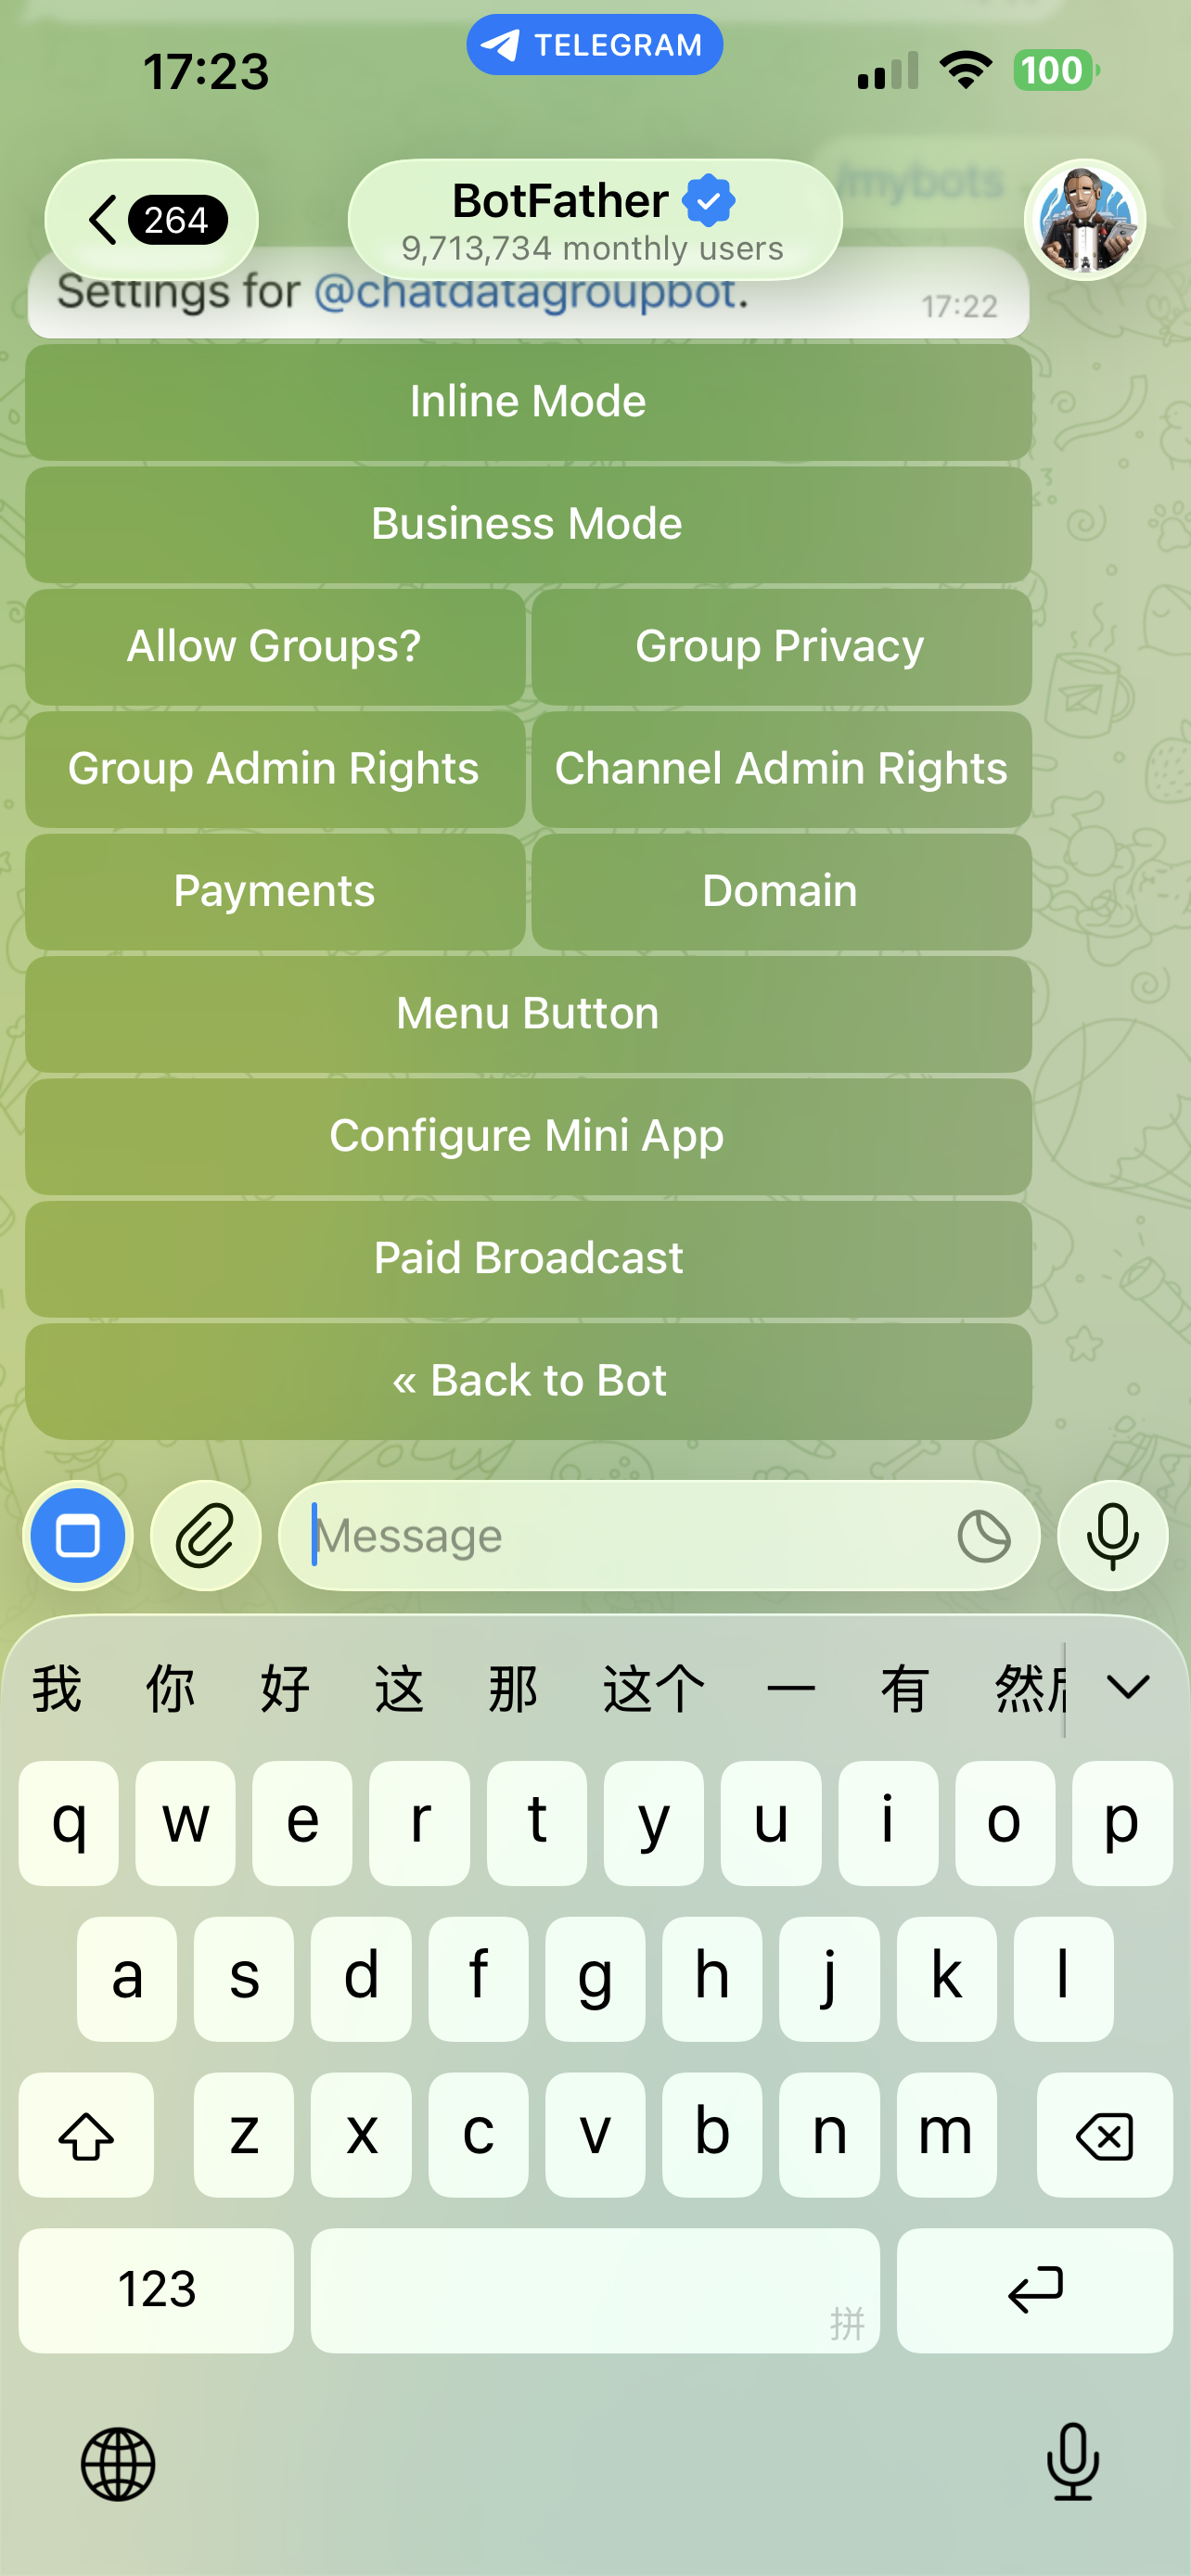 Tap Bot Settings
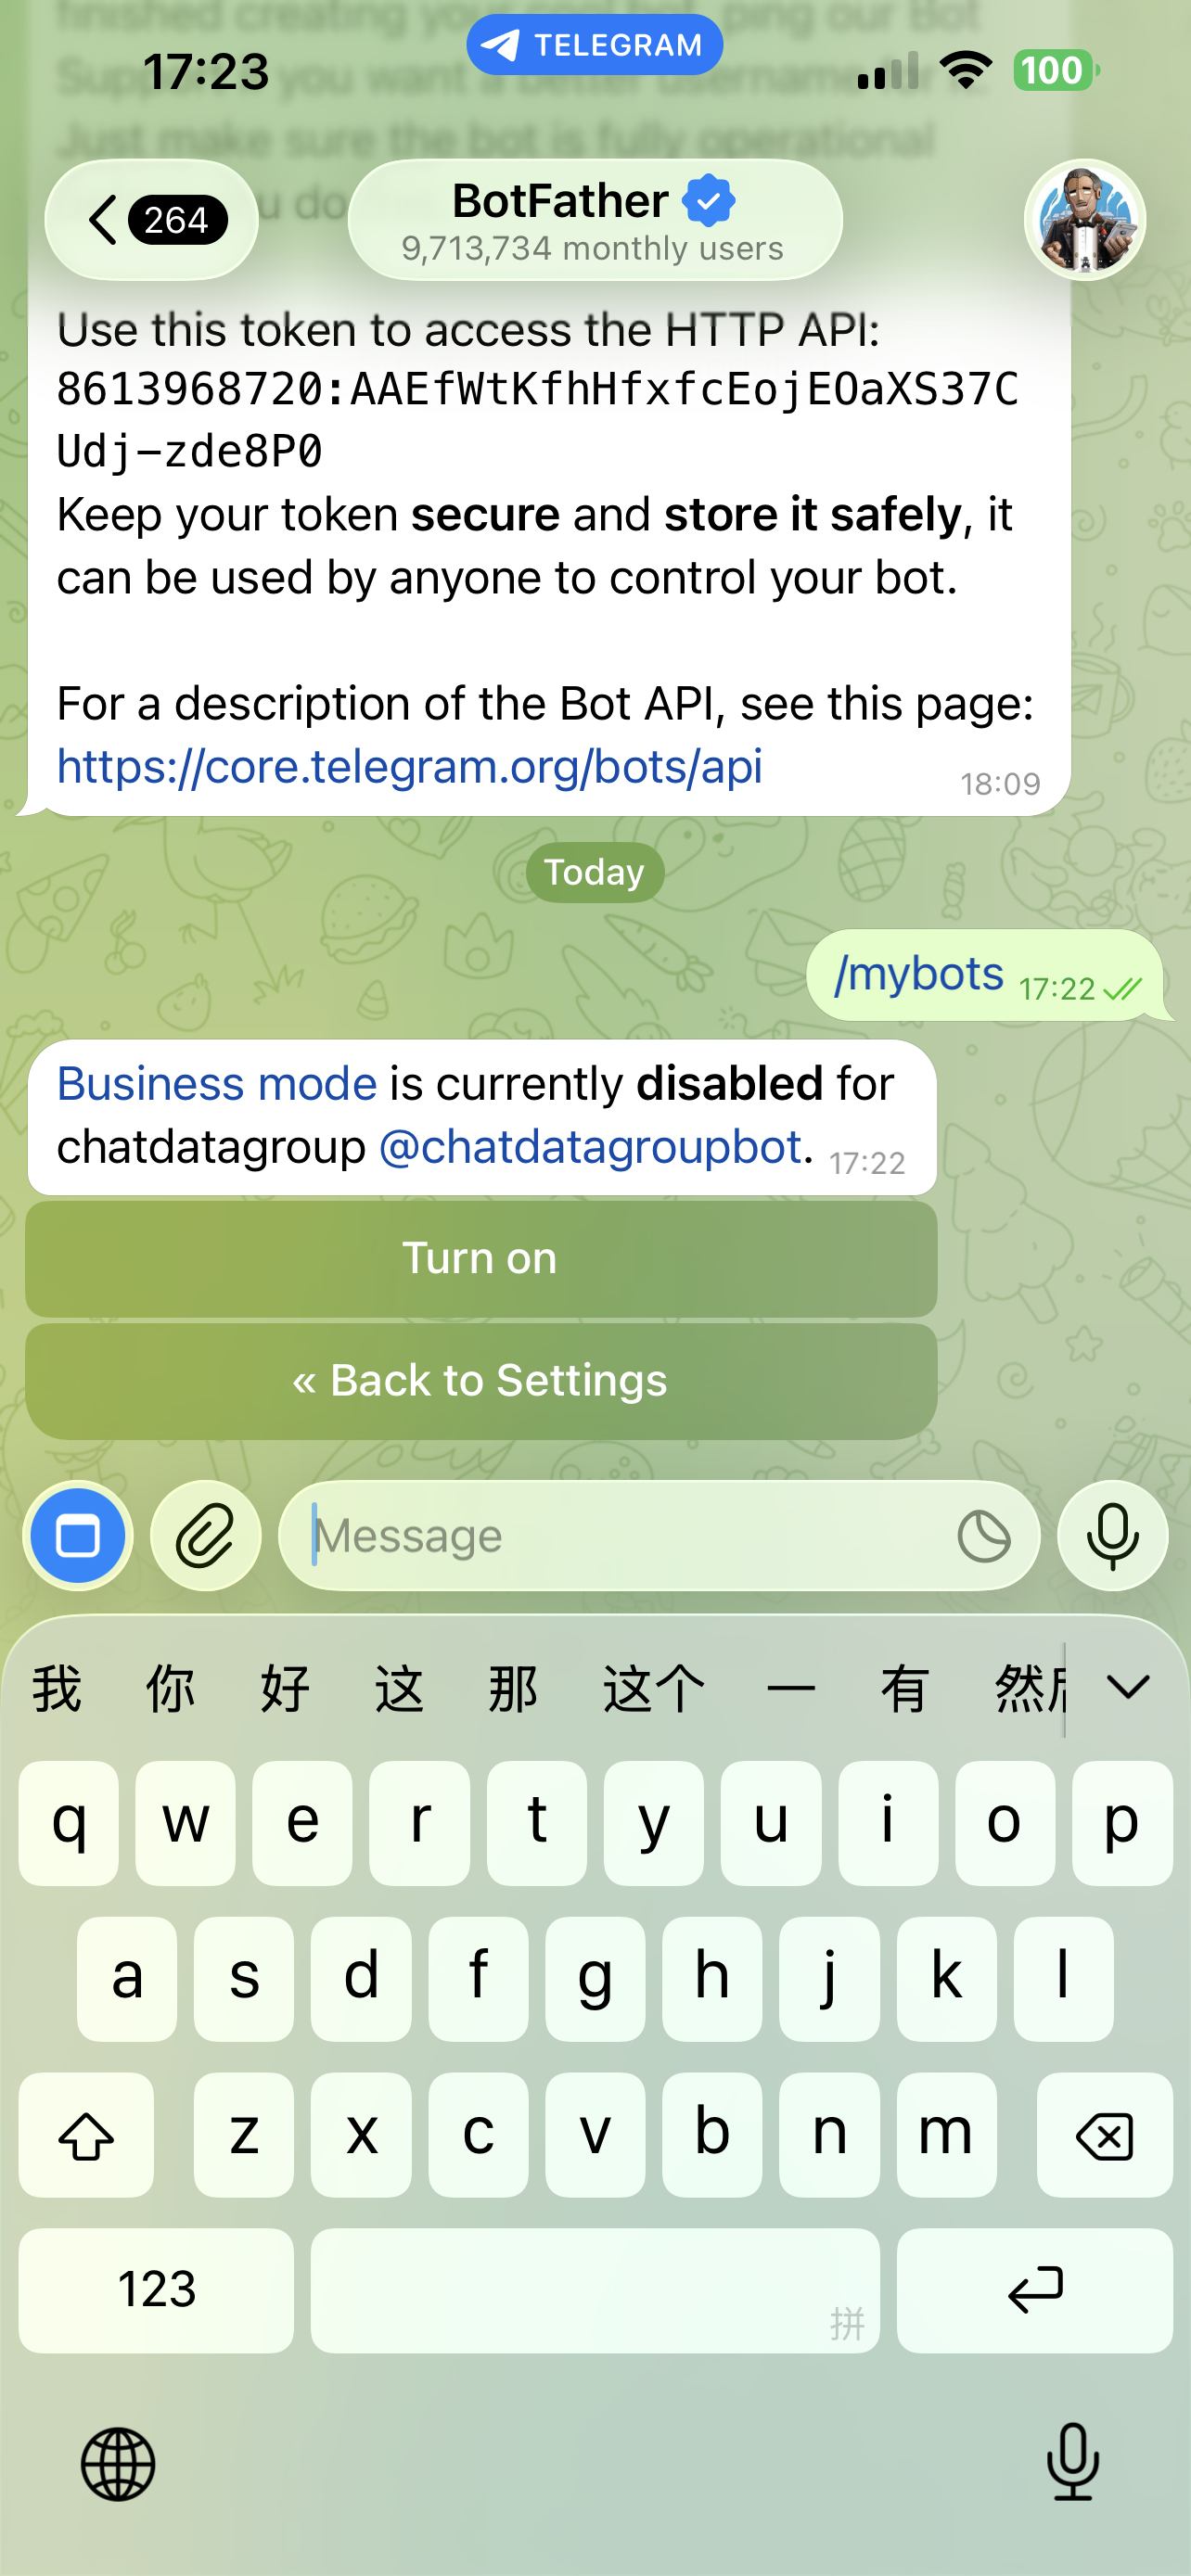 Tap Business Mode
 Tap Turn on — confirmed enabled
When BotFather replies with "Business mode is currently enabled for...", the bot is eligible to connect to a Telegram Business account.
Step 2: Add the Bot to Your Telegram Business Account
Switch from BotFather back to your main Telegram app and add the bot under your Business settings:
 Settings → Business → tap Chatbots
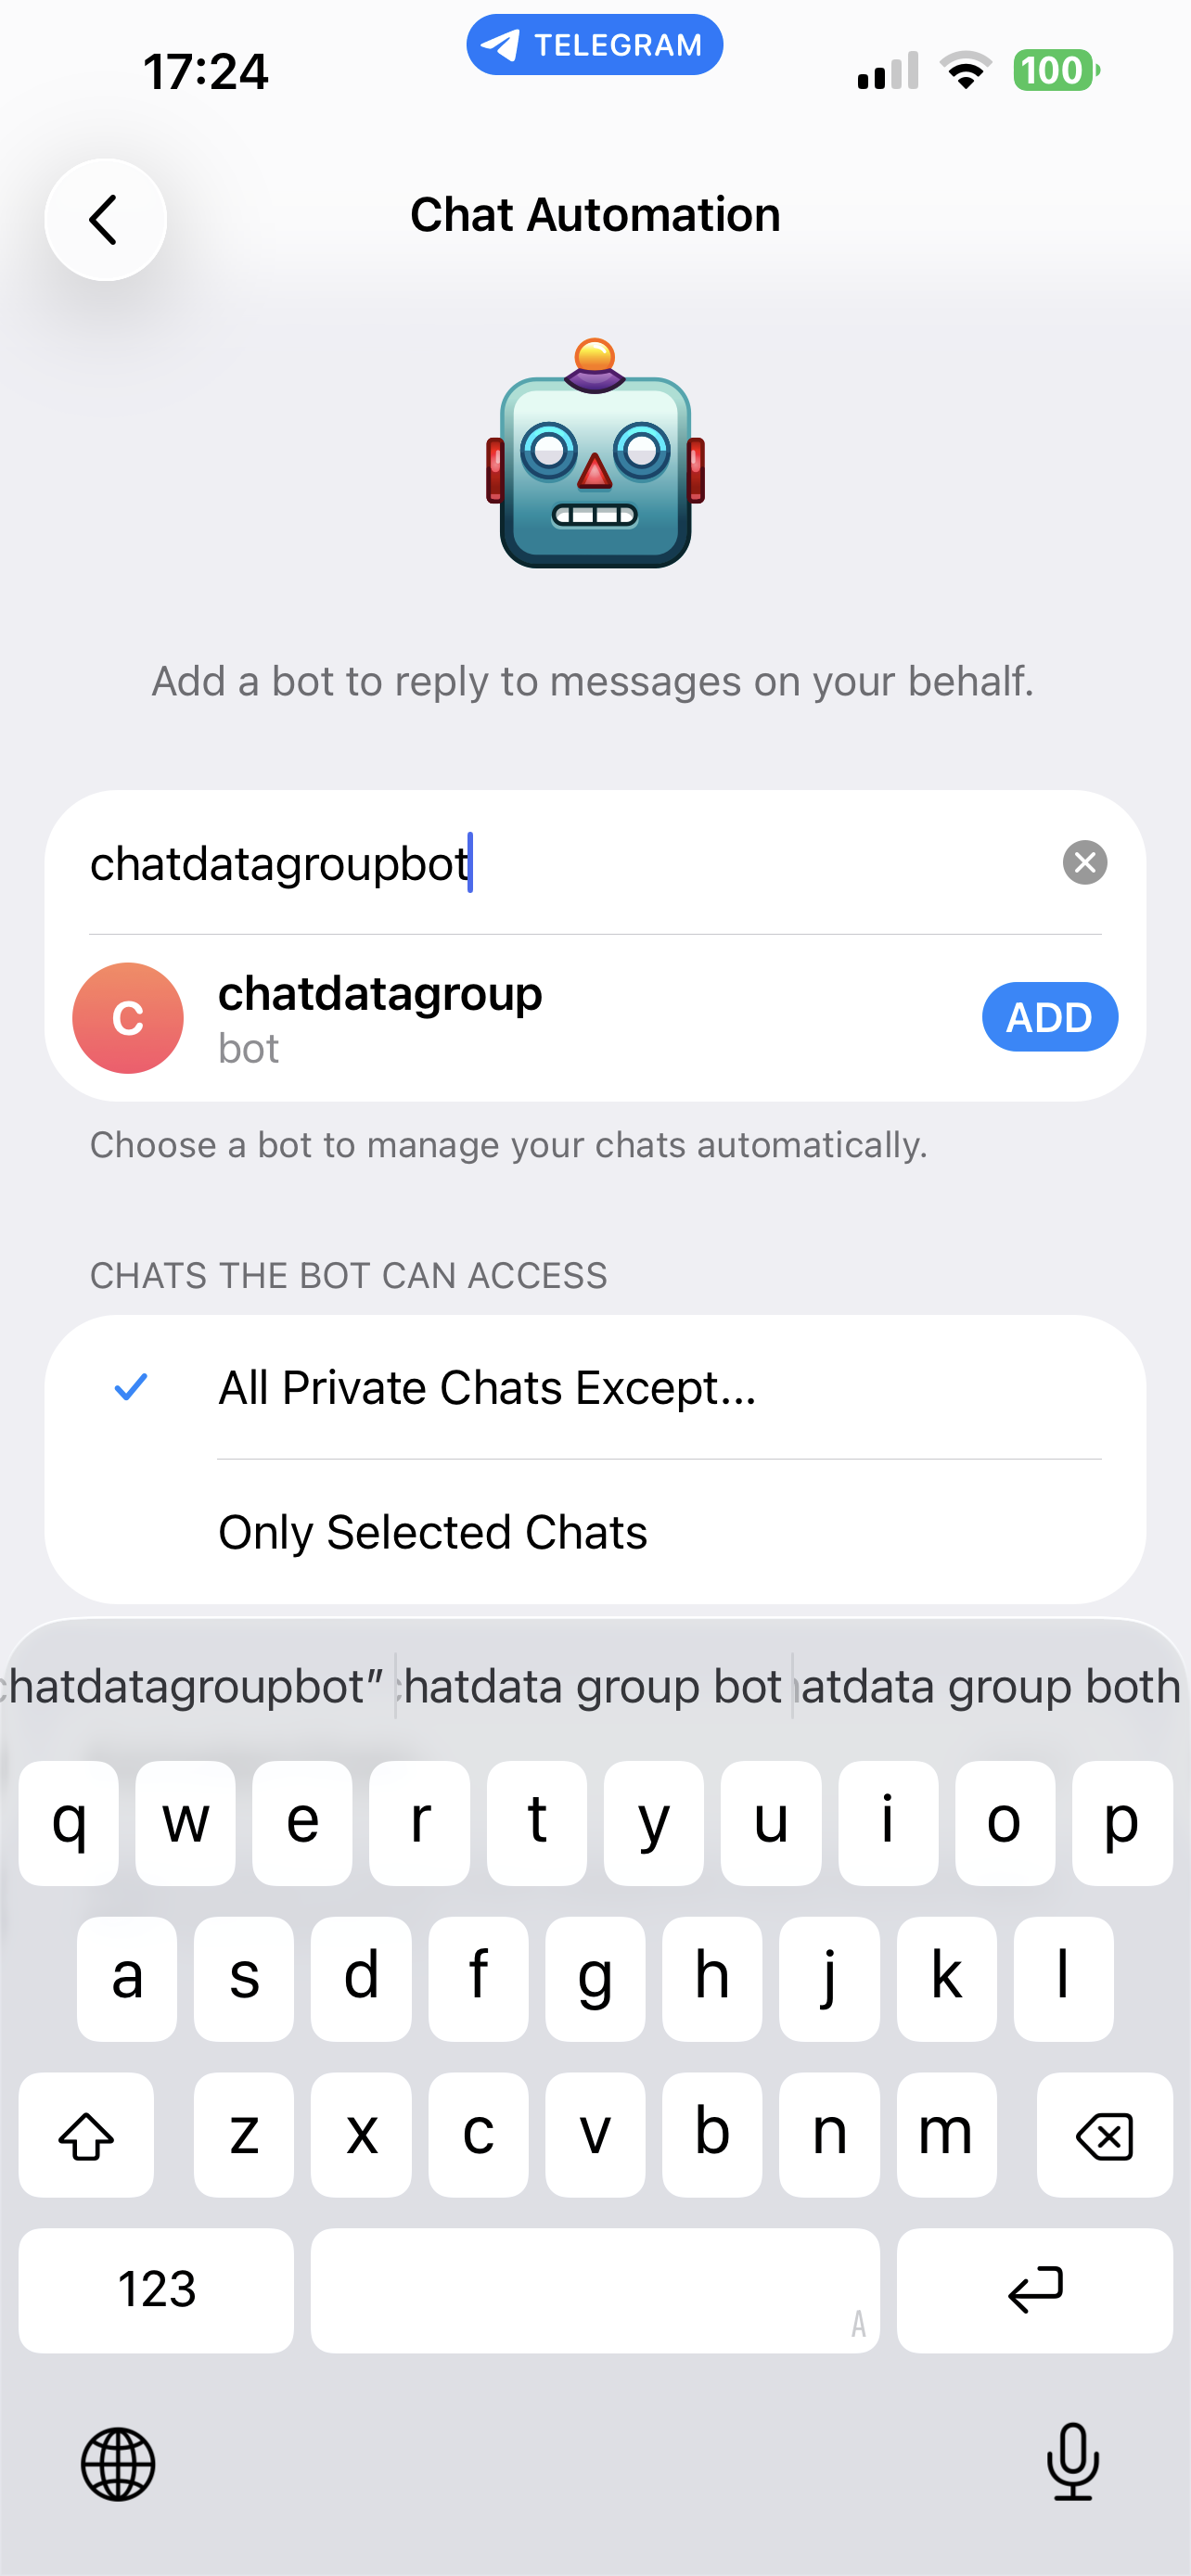 Type the bot's username → tap ADD
On the Chat Automation screen, the CHATS THE BOT CAN ACCESS section lets you choose between All Private Chats Except... (the default — bot replies in all your customer chats) or Only Selected Chats (restrict to specific people). No additional permission grants are required — the bot is ready to reply once added.
Hit "This bot doesn't support Telegram Business yet"?
If you try to add the bot and get this error, it means your Telegram client is still showing the cached pre-Business-Mode state of the bot. To resolve:
- Make sure Step 1 is done — Business Mode must be On in BotFather.
- Force-quit Telegram completely (swipe it out of the app switcher on mobile, fully quit on desktop — don't just background it).
- Re-launch Telegram and retry Step 2.
Telegram caches a bot's capability list per-device. The Business Mode toggle takes effect on the server immediately, but the Telegram client needs a cold relaunch to pick up the change.
What Happens After You Connect
Once added, the AI starts answering your customer DMs under your name and avatar — customers won't know they're interacting with AI unless your prompt discloses it. Every reply routes through Telegram's business connection.
You stay fully in control:
- Type a manual reply yourself in any chat — the AI detects it within milliseconds and pauses LLM responses for that conversation for 30 minutes (configurable via your bot's auto-off setting in Chat Data).
- Pause, revoke, or remove the bot at any time from the same Telegram → Settings → Business → Chatbots screen. No Chat Data dashboard click required.
- Existing public-bot behavior is unchanged. If your bot was already responding to direct messages, group chats, or channels via
@yourbot, all of that keeps working. Telegram Business is a parallel capability layered on the same bot.
Multi-Owner Support
One bot can be connected to multiple Telegram Business accounts simultaneously. If you build a bot for clients, each client connects it independently in their own Telegram Business settings. Every connection's conversations stay fully isolated — there's no cross-pollution of customer history, leads, or analytics between owners.
Business Mode Limitations
A few things behave differently from the public-bot mode:
- Interactive buttons are suppressed. Suggested-question buttons and workflow action buttons don't render in business chats — the callback round-trip from inline keyboards isn't wired through for business mode in this release. Text, files, voice messages, and photos all work normally.
- Follow-up jobs are disabled. The AI won't proactively message customers under your name. Auto-follow-ups only fire in regular public-bot conversations.
- AI disclosure may be required. If you operate in the EU (Article 50 of the EU AI Act, applicable from 2 August 2026) or California (SB 1001), you may need to disclose AI involvement in your customer chats. Chat Data does not add disclosures automatically — add a line to your system prompt instructing the AI to disclose on first contact, or when the conversation reaches transactional intent. Consult counsel for your jurisdiction.
Bot Commands
Bot commands are the slash commands (e.g. /ask, /hours, /pricing) that appear in Telegram's / autocomplete menu. They help users discover what your bot can do.
When you first connect a Telegram bot, Chat Data automatically registers a default /ask command. You can add, edit, or remove commands at any time from the integration panel.
Managing Commands
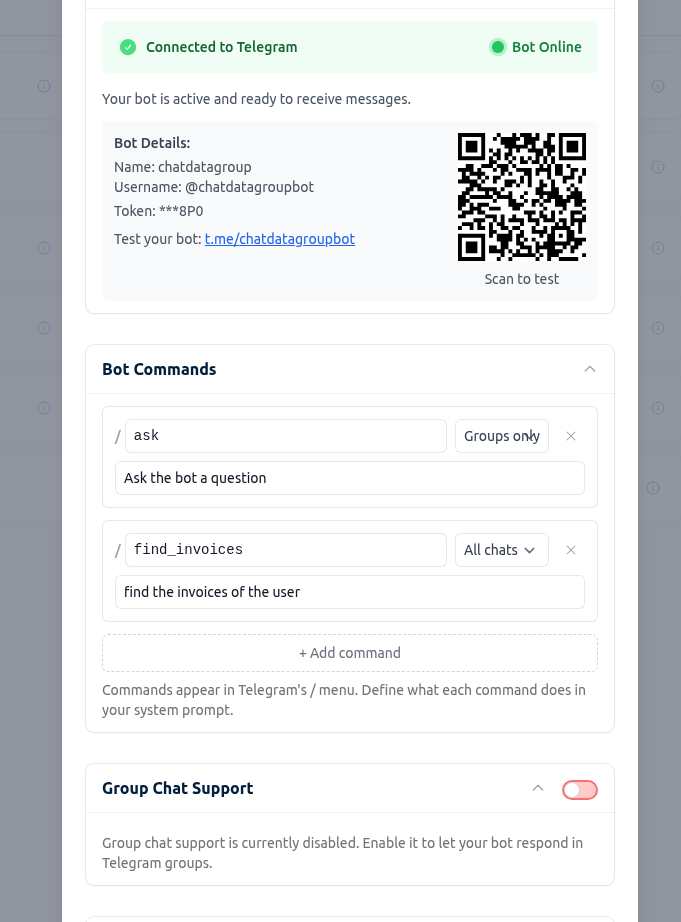
- Go to My Chatbots > [Your Chatbot] > Integrations > Telegram
- Expand the Bot Commands section
- Each command has three fields:
- Command name — Lowercase letters, numbers, and underscores only (1–32 characters). The
/prefix is added automatically. - Description — A short description (3–256 characters) that appears in Telegram's autocomplete menu.
- Scope — Controls where the command appears:
- All chats — Visible in both DMs and groups (default)
- Groups only — Only visible in group chats
- DMs only — Only visible in direct messages
- Command name — Lowercase letters, numbers, and underscores only (1–32 characters). The
- Click the checkmark button to save changes, or the X button to discard.
How Scopes Work
Telegram uses a hierarchical override system for command visibility. When you set a command to "All chats", it appears everywhere. When you set a command to "Groups only", it appears only in groups — it does not inherit commands from the "All chats" scope. Chat Data handles this automatically by expanding "All chats" commands into every scope's menu.
For example, if you have:
/askscoped to All chats/startscoped to Groups only
Then in group chats, users will see both /ask and /start. In DMs, they will only see /ask.
Command Behavior
Commands only register the name and description in Telegram's menu — they do not define the bot's behavior. To make the bot respond to a command, describe the desired behavior in your chatbot's system prompt. For example:
When the user sends /hours, respond with our business hours: Monday–Friday 9am–5pm EST.
Limits
- Maximum 100 commands per scope (Telegram API limit)
- Command names must be unique within each effective scope — you cannot have
/askscoped to "All chats" and another/askscoped to "Groups only", since both would appear in the groups menu.
Response Format Configuration
Control how your bot delivers responses to users:
- Text: Text input → Text output (traditional text-based messaging)
- Audio: Voice input → Voice output (audio-only conversations)
- Mix: Supports both modes - text input → text output AND voice input → voice output
Auto-Off Functionality
Configure automatic AI pause for human takeover:
- Time-based: Pause AI for a specified duration after human intervention
- Keyword-triggered: Pause when specific keywords are detected
- Manual control: Pause/resume through the dashboard
- Schedule-based: Set operating hours for AI responses
AI Re-engagement
Timely follow-ups are crucial for ensuring customer satisfaction. If you want the AI chatbot to follow up with customers after their last interaction, you can customize three key aspects of the AI follow-up:
- Time window for follow-up - Set when the bot should check back after the last message
- Trigger conditions - Define specific conditions that warrant a follow-up
- Re-engagement message style - Customize the tone and content of follow-up messages
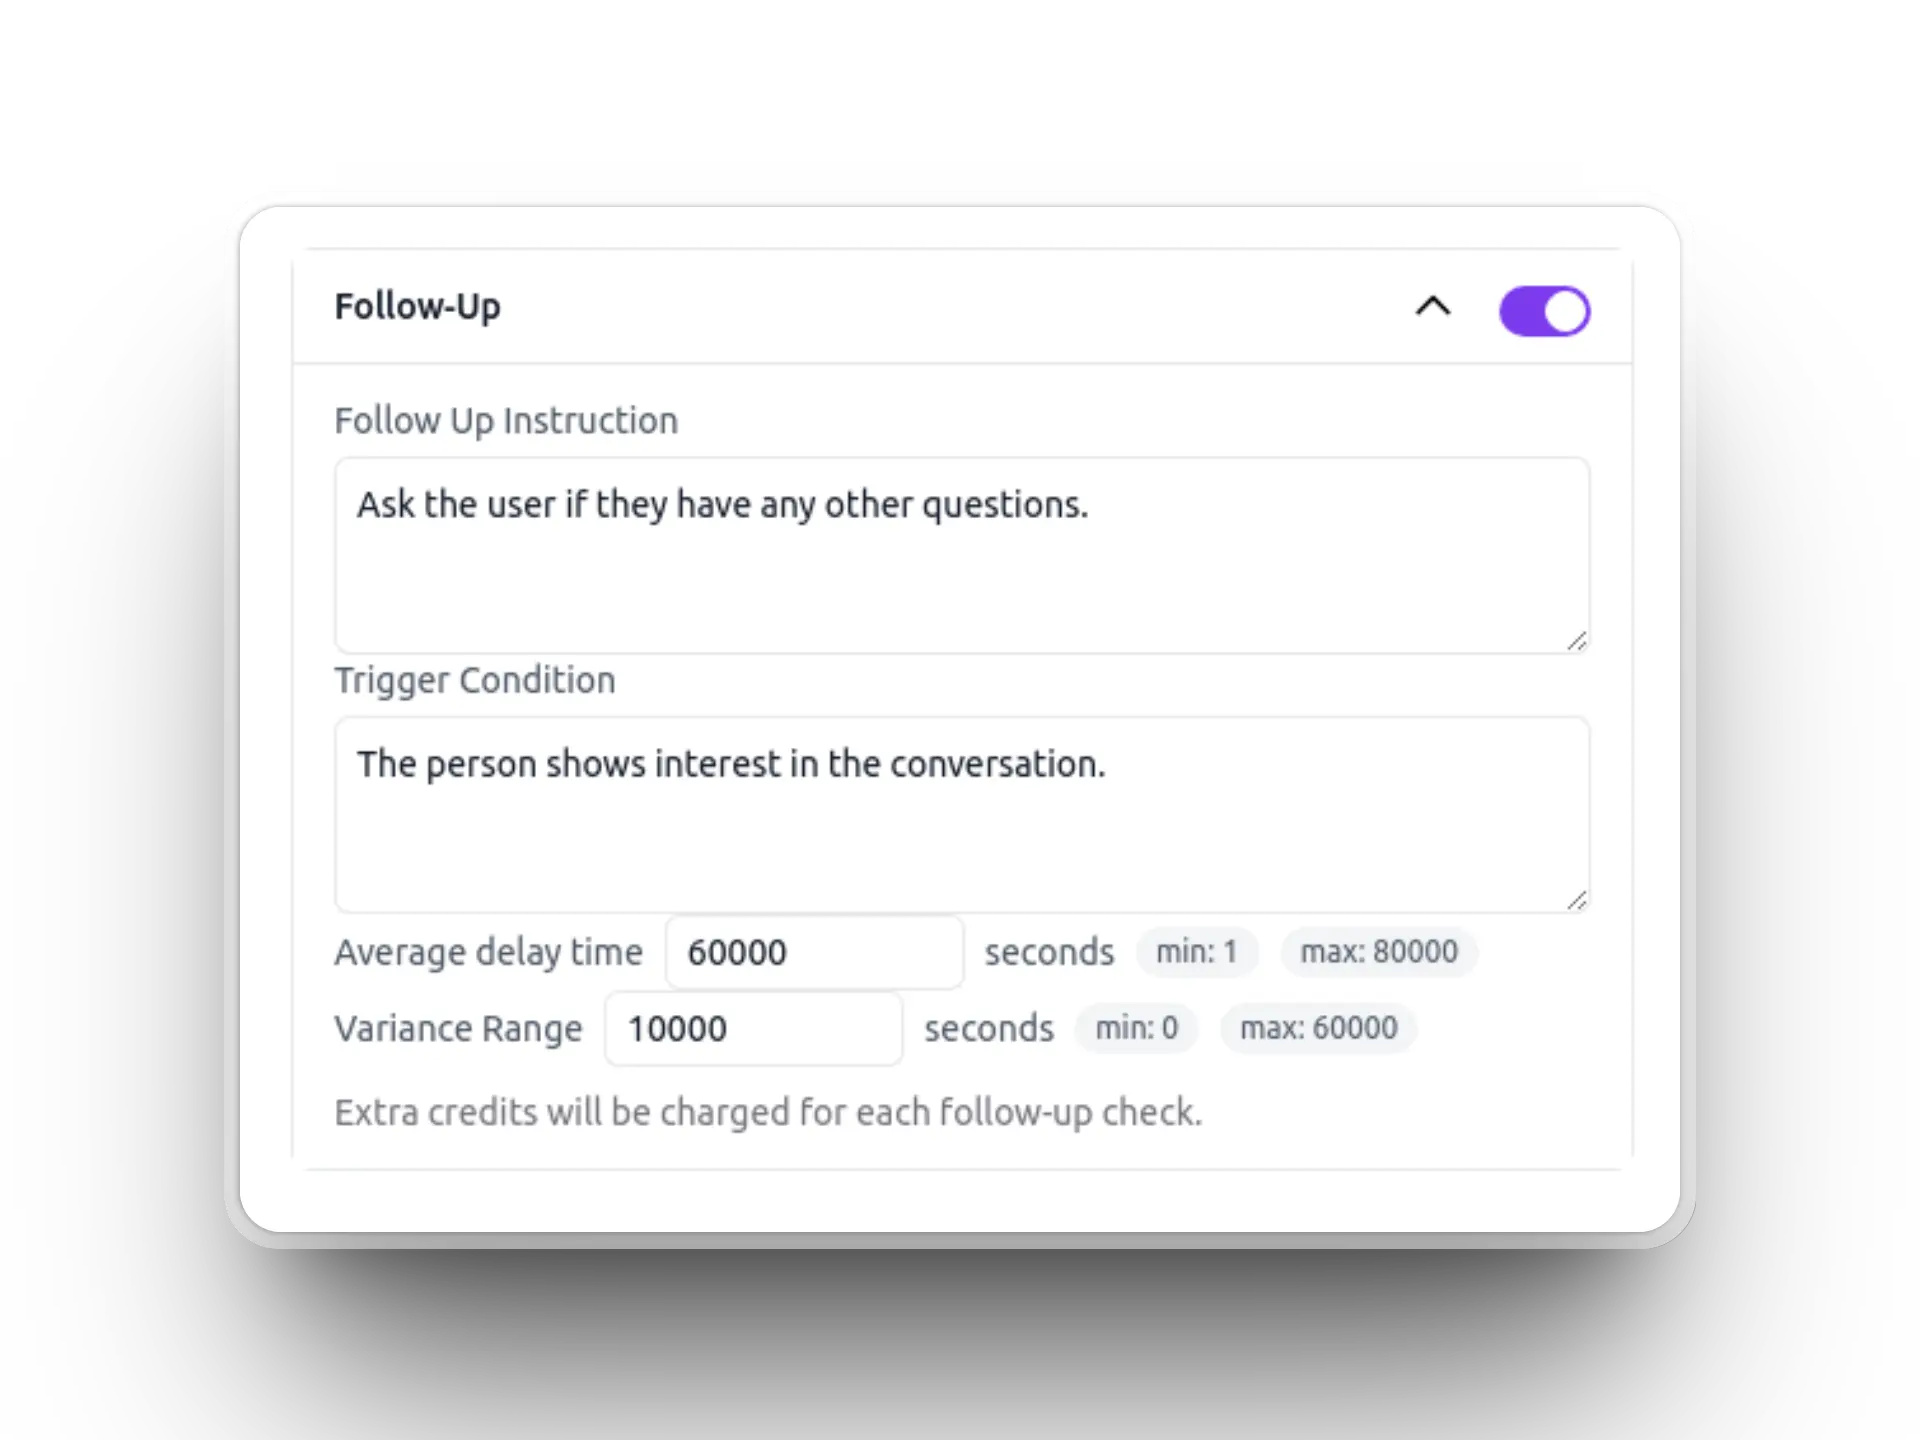
When the specified time arrives, the AI evaluates whether the conversation meets your defined re-engagement criteria. If the conditions are met, it sends a contextually appropriate follow-up message based on the previous conversation, helping to:
- Re-engage inactive users
- Complete unfinished conversations
- Provide additional assistance
- Gather feedback on previous interactions
Conclusion
You've successfully integrated your Chat Data chatbot with Telegram! Your bot is now ready to engage with users, provide intelligent responses, and handle conversations 24/7. Remember to:
- Regularly monitor performance and user feedback
- Keep your bot's knowledge base updated
- Test new features before deploying
- Maintain security best practices
- Engage with the Chat Data community for tips and support
For additional help or advanced configurations, consult the Chat Data documentation or contact our support team.
Frequently Asked Questions
What do I need before connecting a chatbot to Telegram?
You need a Telegram account, a Chat Data chatbot that has already been configured, and a Telegram bot token created through BotFather.
What are the main Telegram bot limitations mentioned in the guide?
Bots cannot start conversations on their own, each bot needs a unique BotFather token, one token can only be connected to one Chat Data chatbot at a time, and bot usernames must be unique and end with bot.
How do I create the Telegram bot token used for integration?
Use BotFather in Telegram, run the /newbot flow, choose a display name and unique username ending in bot, and then copy the token BotFather returns after the bot is created.
How do I connect the Telegram bot to Chat Data?
Open your chatbot's Integrations tab in Chat Data, choose Telegram, paste the bot token from BotFather, and let Chat Data verify the connection. After that you get the bot details, a direct link, and a QR code for testing.